






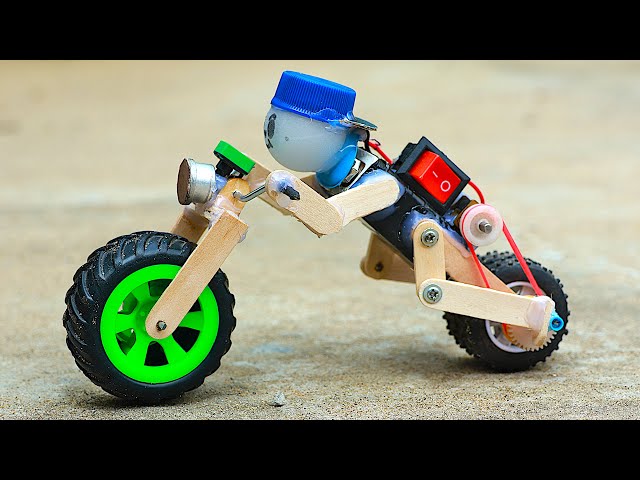
Have you ever wanted to create something fun and special with your own hands? Making a homemade toy bike is easier than you think, and it’s a great way to bring joy to your kids or even enjoy a creative project yourself.
Imagine the pride you’ll feel when your toy bike is ready to roll, crafted from simple materials right at home. In this guide, you’ll discover easy steps that anyone can follow, no matter your experience. Ready to turn ordinary items into a playful masterpiece?
Let’s get started!
Materials Needed
Gathering the right materials makes building a homemade toy bike easier and safer. Prepare all items before starting. This helps avoid interruptions and keeps the project smooth.
Basic Supplies
- Wooden planks or sturdy cardboard for the frame
- Plastic or wooden wheels, about 4 to 6 inches in diameter
- Strong glue or wood glue for assembly
- Screws or small nails for extra support
- Paint and brushes for decoration
- Sandpaper to smooth rough edges
- String or thin rope for handlebars
- Scissors or a small saw for cutting materials
- Ruler or measuring tape for accuracy
Safety Gear
- Protective gloves to avoid cuts and splinters
- Safety goggles to protect eyes from dust and debris
- Face mask to prevent inhaling dust
- Adult supervision for children during the project

Credit: www.youtube.com
Choosing The Right Design
Choosing the right design for your homemade toy bike sets the foundation for a successful and fun project. It influences how easy the bike will be to build, how safe it will feel, and how much your child will enjoy playing with it. Think about the skill level you have and the tools you can access before picking a design.
Simple Models
Simple models are perfect if you’re new to crafting or want a quick build. These designs often use basic shapes and materials like cardboard or lightweight wood. You can focus on creating a sturdy frame without worrying about complicated details.
For example, a basic two-wheeled bike with a flat base and paper wheels can be a great start. It teaches you how to balance and connect parts without needing advanced tools. Have you ever tried to make a toy with just a few materials and found out how satisfying it is when it works?
Creative Ideas
If you want to add a personal touch, consider creative designs that mix colors and unusual shapes. You might build a bike inspired by a favorite cartoon or design it with moving parts like pedals or a steering handle. These ideas make the bike more exciting but can take more time and effort.
Think about adding small details like stickers, painted patterns, or even soft grips made from fabric. These extras can turn a simple toy into something memorable. What unique features would make your homemade bike stand out to your child or friends?
Step-by-step Assembly
Assembling your homemade toy bike is where your creativity and patience truly pay off. Each part you put together brings the bike closer to life, turning simple materials into a fun, functional toy. Let’s break down this process into manageable parts that make building enjoyable and straightforward.
Frame Construction
Start by shaping the frame, which acts as the bike’s backbone. Use sturdy materials like wooden sticks or lightweight metal rods to create a strong base. Make sure the frame is balanced and symmetrical so the bike stands well and rides smoothly.
Secure the joints tightly using glue or small screws. If you try holding pieces together without proper fastening, the frame might wobble or break easily. Think about the shape you want—classic, compact, or something unique—and sketch it out before building.
Attaching Wheels
Choose wheels that fit the size of your frame, ensuring they spin freely. You can use old toy wheels, bottle caps, or even small round objects with smooth edges. Attach the wheels firmly using axles made from skewers or metal pins.
Check the alignment by spinning each wheel after attaching. Do they roll straight without wobbling? If not, adjust the axles or the frame until the movement feels smooth. Remember, your bike’s fun depends a lot on how well the wheels turn.
Adding Handlebars
Handlebars give your toy bike character and make it easy to hold or push. Use a sturdy stick or a bent wire to form the handlebars, then attach them to the front of the frame. Ensure they are fixed tightly so they don’t move around during play.
Consider wrapping the handles with tape or fabric for a comfortable grip. You might want to add small decorations or knobs on the ends for a more realistic look. How will you make your handlebars stand out?
Decorating The Bike
Now it’s time to give your bike personality with colors and designs. Use paint, stickers, or markers to add patterns and details. Bright colors can make the toy more appealing, while personalized touches reflect your style.
Think about adding small accessories like a miniature bell or a basket made from fabric scraps. These extras can transform your toy bike into a cherished keepsake. What unique feature will you add to make your bike one-of-a-kind?
Safety Tips
Safety is the top priority when making a homemade toy bike. Small mistakes can cause accidents or injuries. Follow these safety tips to keep children safe while enjoying their new toy. Proper checks and precautions can prevent many problems.
Secure Fastenings
Check all screws, bolts, and nuts carefully. Tighten them firmly to avoid loosening during play. Loose parts can cause the bike to break or fall apart. Use strong glue or tape for extra support if needed. Inspect the bike regularly to ensure all fastenings stay secure.
Child Supervision
Always watch children while they play with the homemade toy bike. Supervision helps prevent falls or unsafe use. Teach kids how to use the bike gently and safely. Set clear rules for riding areas, avoiding stairs or busy places. Stay close to help quickly if an accident happens.
Fun Activities With Your Toy Bike
Building a homemade toy bike sparks creativity and fun for kids and adults alike. Crafting it yourself offers joy and a sense of pride while playing. Enjoy endless adventures and imaginative rides with a bike made by your own hands.
Racing Games
Organize thrilling racing games with your toy bike. Set up a simple racetrack in your backyard or living room. Use items like books or shoes to mark the start and finish lines. Invite friends or family for a friendly competition. Racing is a great way to improve speed and control. It also encourages a sense of fair play and sportsmanship.Obstacle Courses
Create an obstacle course using household items. Use cushions, boxes, and chairs to form a challenging route. Encourage creativity in designing the course. Each obstacle can test different skills. For example, navigating around a box tests steering, while a cushion may require a gentle push to move. This activity sharpens problem-solving abilities and boosts confidence.
Credit: www.youtube.com

Credit: www.youtube.com
Frequently Asked Questions
What Materials Are Needed To Make A Homemade Toy Bike?
To make a homemade toy bike, you need cardboard, glue, scissors, paint, and markers. Optional items include wheels from old toys or bottle caps for realistic wheels. These materials are easy to find and safe for kids.
How Long Does It Take To Build A Toy Bike At Home?
Building a homemade toy bike usually takes about 1 to 2 hours. This time depends on the complexity of the design and drying time for glue or paint. Simple models can be finished faster, making it a quick DIY project.
Can Children Safely Make A Toy Bike At Home?
Yes, children can safely make a toy bike with adult supervision. Using child-friendly materials like cardboard and non-toxic glue ensures safety. Adults should handle sharp tools like scissors to prevent accidents.
How Can I Customize My Homemade Toy Bike?
You can customize your toy bike by painting it with favorite colors, adding stickers, or using markers for designs. Personal touches like names or patterns make the toy unique and more fun to play with.
Conclusion
Making a homemade toy bike can be fun and rewarding. You use simple materials and tools. It helps improve creativity and skills. Kids enjoy playing with a bike made by you. This project also teaches patience and care. Try it step by step, and you will succeed.
Keep safety in mind while building the bike. Enjoy the process and share the joy with others. A homemade toy bike is a great way to spend time together. Give it a try and see the smiles it brings!