



Are you ready to create something fun and magical for your little ones? Making Toy Story blocks is easier than you think, and it’s a great way to bring the beloved characters of Woody, Buzz, and friends right into your home.
Imagine your child’s eyes lighting up as they play with blocks that tell a story. In this guide, you’ll discover simple steps to craft your own Toy Story blocks that are not only colorful but also safe and perfect for endless playtime.
Keep reading, and let’s turn your creativity into a toy that sparks joy and imagination!

Credit: www.youtube.com
Materials Needed
Making Toy Story blocks is a fun project for all ages. You will need some basic materials before you start.
Choosing the right materials helps create safe and attractive blocks for play.
Wood Types
Wood is the main material for Toy Story blocks. Pick wood that is safe and easy to shape.
Common wood types include softwoods and hardwoods. Each type has its benefits.
- Pine: Soft, easy to cut, and affordable
- Maple: Hard, smooth finish, durable
- Birch: Strong, fine grain, good for painting
- Poplar: Light, smooth, and easy to paint
Paint And Finishes
Paint makes the blocks colorful and fun. Use non-toxic paints safe for children.
Finishes protect the wood and paint. Choose finishes that are safe and easy to apply.
- Water-based acrylic paint: Bright colors, easy to clean
- Non-toxic spray paint: Fast drying, smooth coverage
- Clear water-based varnish: Protects paint without yellowing
- Natural oil finish: Enhances wood grain, child-safe
Tools Required
Having the right tools makes building blocks easier and safer. Use simple tools for cutting and shaping wood.
Safety gear is important to protect yourself while working.
- Hand saw or jigsaw for cutting wood
- Sandpaper or sanding block for smooth edges
- Paintbrushes or foam brushes for painting
- Measuring tape or ruler for accuracy
- Pencil for marking wood
- Safety goggles and gloves for protection
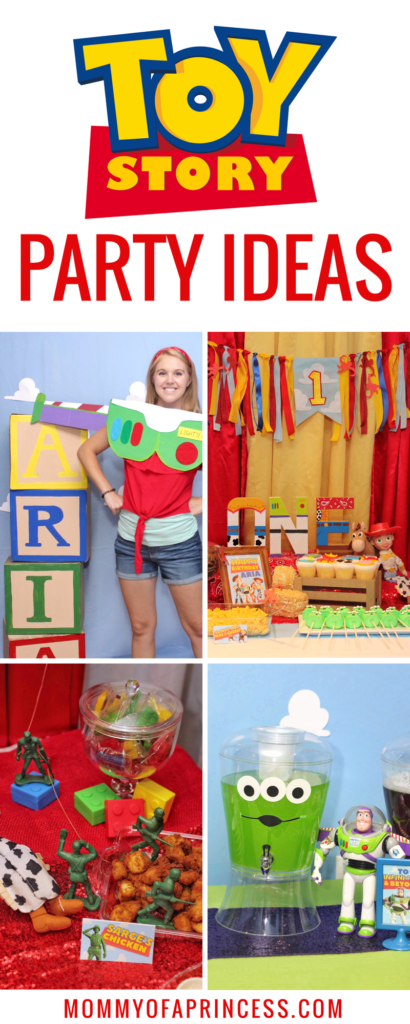
Credit: mommyofaprincess.com
Preparing The Wood
Preparing the wood is the first step to make Toy Story blocks. Good preparation helps the blocks look nice and last long.
This process includes measuring, cutting, and sanding the wood to create smooth and safe edges.
Measuring And Cutting
Measure the wood pieces carefully to get the right block size. Use a ruler or tape measure for accuracy.
Mark the cutting lines clearly with a pencil. Cut the wood along these lines using a saw.
- Use a straight edge for accurate marks
- Double-check measurements before cutting
- Cut slowly to avoid splintering the wood
Sanding For Smooth Edges
Sanding removes rough spots and makes the blocks safe for children. Use sandpaper with medium grit first.
After the first sanding, switch to fine grit sandpaper for a smooth finish. Sand all sides and edges evenly.
- Wear a mask to avoid dust inhalation
- Sand along the grain of the wood
- Check for splinters and rough spots after sanding
Painting The Blocks
Painting the blocks is a fun way to bring Toy Story characters to life. It lets you add color and details to plain wooden blocks.
Use safe paints and take your time. Good painting makes your blocks look special and colorful.
Choosing Colors
Pick colors that match your favorite Toy Story characters. Bright and bold colors work well for a playful look.
Use colors like red, yellow, green, blue, and white. These colors match the main characters and toys.
- Woody: brown, yellow, red, and blue
- Buzz Lightyear: white, green, and purple
- Jessie: red, white, and yellow
- Alien: green and blue
Applying Base Coats
Start by painting a base coat on each block. This helps the colors stick and look smooth.
Use a brush or sponge to cover all sides evenly. Let the base coat dry completely before adding details.
- Choose a color that matches the main color of the character
- Apply thin layers for even coverage
- Wait at least 30 minutes for drying
- Use light sanding if the surface feels rough
Adding Details
After the base coat dries, add small details like eyes, clothes, or logos. Use fine brushes for accuracy.
Take your time to paint clean lines and shapes. Details make the blocks look like real Toy Story toys.
- Use black for outlines and eyes
- Add spots or stripes for clothes
- Paint logos or symbols carefully
- Use a toothpick for very small dots
Adding Toy Story Characters
Adding Toy Story characters to your blocks makes them fun and special. You can use different ways to create the characters on your blocks.
This guide shows easy ways to add Toy Story characters using stencils, decals, and hand-painting techniques.
Stencil And Decal Options
Stencils and decals help you put Toy Story characters on blocks quickly. Stencils let you paint shapes neatly. Decals are stickers with character images.
Choose stencils or decals based on your skill and tools. Both give great results and make the blocks look fun.
- Use stencils to paint shapes like Woody’s hat or Buzz Lightyear’s wings.
- Buy or print decals with characters like Jessie or Bullseye.
- Apply decals on smooth block surfaces for best stickiness.
- Seal stencils or decals with clear paint to protect them.
Hand-painting Techniques
Hand-painting lets you add details and a personal touch to your Toy Story blocks. Use small brushes and bright colors for best results.
Start with simple shapes and add details like faces, clothes, and accessories. Let each layer dry before adding more paint.
- Sketch characters lightly with pencil before painting.
- Use fine brushes for eyes and small details.
- Mix colors to match character outfits accurately.
- Finish with a clear coat to protect your artwork.
Sealing And Finishing
Sealing and finishing your Toy Story blocks protect them from wear and damage. It also helps keep the colors bright and clear.
This step makes sure your blocks last longer and look good even after playtime.
Protective Coatings
Use a clear protective coating to cover the blocks. This stops scratches and water damage. You can choose from varnish, polyurethane, or lacquer.
Apply the coating with a soft brush or spray. Make sure to cover every side evenly for full protection.
- Varnish gives a shiny finish
- Polyurethane is very durable
- Lacquer dries quickly
- Choose water-based for easy cleanup
Drying And Curing
Let the blocks dry fully after sealing. Drying time depends on the coating type and room temperature.
Curing makes the coating hard and strong. Avoid touching the blocks until curing finishes to keep the surface smooth.
- Dry in a dust-free area
- Keep blocks flat and still
- Wait at least 24 hours for drying
- Curing can take several days
Safety Tips
Making Toy Story blocks is fun and creative. Safety is very important when making toys for children.
Use safe materials and finishes to keep children safe while playing with the blocks.
Non-toxic Materials
Choose non-toxic materials to make sure the blocks are safe. Children often put toys in their mouths.
Use wood or plastic that is labeled non-toxic. Avoid materials with harmful chemicals or paints.
- Use natural wood like maple or beech
- Choose water-based, non-toxic paint
- Avoid plastics with BPA or phthalates
- Check for certification like ASTM or EN71
Child-safe Finishes
Child-safe finishes protect the blocks and the child. These finishes prevent splinters and peeling paint.
Use finishes that dry clear and are safe if chewed or licked by children.
- Apply food-grade mineral oil or beeswax
- Use water-based varnishes that are non-toxic
- Let finishes dry fully before giving blocks to kids
- Avoid finishes with strong smells or solvents
Creative Play Ideas
Making Toy Story blocks lets kids enjoy hours of fun. These blocks spark creativity and help develop skills.
Kids can use blocks to build games or tell stories. Both ways boost imagination and problem-solving.
Building Games
Use Toy Story blocks to create fun building challenges. Kids can stack blocks to make towers or castles.
Try building different shapes or matching colors. This helps improve hand-eye coordination and thinking skills.
- Build the tallest tower without it falling
- Create shapes like squares, triangles, or circles
- Match blocks by color or size
- Make patterns with different block designs
Storytelling With Blocks
Blocks can help kids tell Toy Story adventures. They can build scenes from the movies or make new ones.
Encourage kids to describe what happens in their story. This improves language skills and creativity.
- Build a Toy Story character’s home or favorite place
- Use blocks as props for telling stories
- Create new adventures for Woody, Buzz, and friends
- Act out scenes using the block settings

Credit: www.lmentsofstyle.com
Frequently Asked Questions
What Materials Are Needed To Make Toy Story Blocks?
You need wooden blocks, non-toxic paint, paintbrushes, sandpaper, and stencils of Toy Story characters. These materials ensure safe and colorful blocks.
How Do I Paint Toy Story Characters On Blocks?
Use stencils or freehand paint the characters with acrylic paint. Let each layer dry before adding details for a neat finish.
Can I Make Toy Story Blocks Safe For Toddlers?
Yes, use non-toxic paint and smooth all edges with sandpaper. This prevents splinters and ensures the blocks are child-friendly.
How Long Does It Take To Complete Toy Story Blocks?
It usually takes 2-3 hours, including drying time. Complex designs may require more time for detailed painting.
Conclusion
Making Toy Story blocks is a fun and simple project. You only need a few materials and some creativity. Each step helps you build blocks that kids will love. These blocks can inspire play and learning at the same time.
Try different colors and shapes to make them unique. Enjoy the process and share your creation with friends. Crafting these blocks brings joy and lasting memories. Keep practicing and have fun with every block you make.