



Are you wondering how to make the most out of your child’s toy chest? Toys chests are more than just storage—they can shape your child’s playtime, keep your home tidy, and even teach valuable lessons.
But what should you really do to these chests to keep them safe, organized, and fun? Keep reading, because the simple steps you take now can transform your toy chest from a cluttered mess into a helpful, joyful part of your family’s daily life.
You’ll discover easy tips that save you time and stress, while making your child’s play space better than ever.
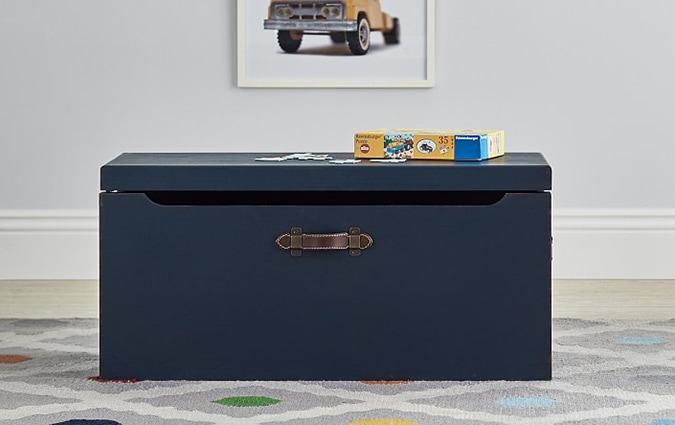
Credit: www.potterybarnkids.com
Choosing Safe Toy Chests
Choosing a safe toy chest is essential for every parent who wants to keep their children both happy and protected. Toy chests often become a favorite spot for kids to store their treasures, so it’s important to pick one that won’t pose hidden dangers. Think about how your child will interact with the chest daily—will it be easy to open, sturdy enough to avoid tipping, and free from harmful materials?
Materials To Avoid
Some toy chests contain materials that can harm your child. Avoid those made with low-quality particleboard or MDF that may release formaldehyde or other toxic chemicals. Also, steer clear of chests with lead-based paints or finishes, as these can be extremely hazardous if ingested.
Plastic chests might seem safe, but check for BPA-free labels and avoid those with sharp edges or brittle parts that can crack. Opting for natural, solid wood with non-toxic finishes is often a safer bet for your child’s health and safety.
Child-friendly Designs
Design matters just as much as materials. Look for toy chests with rounded corners and smooth edges to prevent cuts and bruises. A chest with a slow-close lid or safety hinges can stop little fingers from getting pinched.
Consider the chest’s height and size—can your child reach inside easily without climbing on it? Adding ventilation holes prevents suffocation risks if your child ever climbs inside. Would your child be more likely to use a chest that’s colorful and decorated with fun patterns? These small touches can encourage good organizational habits.
Safety Certifications To Look For
Certifications give you peace of mind that the toy chest meets safety standards. Look for labels like ASTM F963, which covers toy safety, or the JPMA certification, which ensures the product is free from harmful chemicals and meets structural safety requirements.
Additionally, check if the chest complies with CPSIA regulations on lead content and phthalates. These certifications show that the manufacturer has tested the product thoroughly—would you trust your child’s safety to anything less?
Preventing Common Hazards
Toys chests are common in many homes. They keep toys organized and out of sight. Yet, they can also cause injuries if not safe. Parents must watch for hazards. Small steps can protect children from harm. Focus on three main safety points to make toy chests safer.
Avoiding Sharp Edges
Sharp edges on toy chests can cut or scratch little hands. Smooth all corners and edges using sandpaper or edge guards. Choose chests made of soft materials or rounded shapes. Check for nails or screws sticking out. Cover or remove anything that can hurt a child.
Securing Heavy Lids
Heavy lids can slam shut quickly, trapping fingers or causing injuries. Use slow-closing hinges or lid supports to prevent slamming. Avoid lids that fall back easily. Teach children to open lids gently. Consider chests without lids for younger kids to reduce risks.
Ensuring Proper Ventilation
Closed toy chests can trap air, causing suffocation risks if a child climbs inside. Add ventilation holes or slats in the chest design. Make sure air can flow freely inside. Never leave children unattended near closed chests. Proper airflow keeps the chest safe and fresh.
Organizing Toys Effectively
Organizing toys effectively helps keep play areas neat and safe. It makes finding toys faster and cleanup easier. A well-organized toy chest teaches kids responsibility and care for their belongings. Simple methods can create a system that works for both parents and children.
Sorting By Size And Type
Sort toys by their size and type to save space. Group similar toys like cars, dolls, or blocks together. Keep large toys separate to avoid damage and clutter. This method helps kids know where each toy belongs.
Using Dividers And Bins
Use dividers or bins inside the toy chest to separate groups. Bins help keep small parts from mixing up. Dividers create clear sections for different toy categories. Choose sturdy containers that fit well inside the chest.
Labeling For Easy Access
Label bins and sections with words or pictures. Labels guide children to put toys back in the right place. Use large, clear fonts or simple images for easy reading. This step encourages independence and keeps the chest tidy.
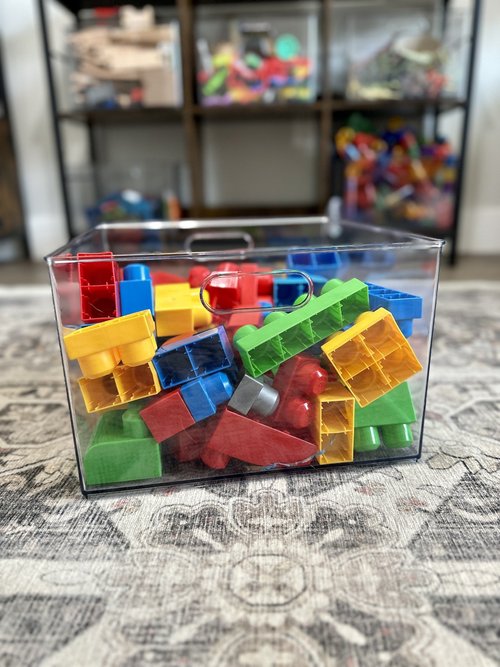
Credit: mrsashleyfrench.com
Maintaining Toy Chest Hygiene
Parents should regularly clean toy chests to remove dust and germs. Wiping surfaces with mild soap and water keeps the chest safe for kids. Keeping toys organized inside also helps maintain hygiene and prevents clutter.
Maintaining toy chest hygiene is crucial for a healthy play environment. Parents must ensure toys are clean and safe for children. Regular maintenance prevents bacteria and odors. It also extends the lifespan of toys and the chest. Let’s explore some effective practices to keep toy chests hygienic.Regular Cleaning Tips
Clean toy chests weekly for better hygiene. Use a damp cloth to wipe surfaces. Avoid harsh chemicals that may harm children. Opt for child-safe cleaning products. Vacuum inside the chest to remove dust and debris. Regular cleaning prevents germ buildup.Dealing With Spills And Stains
Spills happen often during play. Act quickly to avoid stains. Blot spills with a dry cloth immediately. Use mild soap and water for stain removal. Test any cleaning solution on a small area first. Avoid soaking wooden chests to prevent warping. Ensure the chest is dry before replacing toys.Preventing Mold And Odors
Mold thrives in damp environments. Keep toy chests in dry areas. Ensure toys are dry before storage. Use silica gel packets to absorb moisture. Regularly air out the toy chest. Baking soda can help neutralize odors. Place an open box inside the chest for freshness.Encouraging Kids To Use Toy Chests
Encouraging kids to use toy chests helps keep play areas tidy. It teaches responsibility and creates good habits early. Parents can make this task simple and enjoyable. The right approach turns cleanup into a positive routine for children.
Making Cleanup Fun
Turn putting toys away into a playful activity. Use a timer and challenge kids to beat the clock. Sing cleanup songs together or make up stories about the toys going to sleep. Fun moments make kids want to help more often.
Setting A Routine
Choose specific times for cleanup, like before dinner or bedtime. Consistent routines build habits quickly. Use clear and simple instructions. Remind children gently and praise their efforts. Routine helps children know what to expect and feel secure.
Rewarding Organization
Offer small rewards for keeping toys in the chest. Stickers, extra playtime, or choosing a story can motivate kids. Celebrate their progress with kind words. Rewards show children that their efforts matter and encourage them to keep organizing.
Upgrading And Repurposing
Upgrading and repurposing toy chests can breathe new life into your child’s playroom. Instead of tossing out an old chest, think about how you can improve its look or function. This approach saves money, reduces waste, and adds a personal touch to your home.
When To Replace A Toy Chest
Check the toy chest for safety issues first. If the wood is splintering or the hinges are rusty, it might be time for a replacement. Also, consider if the size still fits your child’s needs or if the style feels outdated in your space.
Does the chest meet current safety standards? If not, upgrading is better than risking injury. Sometimes, a simple repaint or new hardware can extend its life, but major damage means replacement is safer.
Creative Diy Ideas
Painting the toy chest with bright colors or fun patterns can turn it into a focal point. Adding chalkboard paint on the lid lets kids draw and erase endlessly. You could also stencil their names or favorite characters for a custom look.
Try swapping out old knobs for unique handles like animal shapes or vintage pulls. Lining the inside with patterned fabric or wallpaper adds a surprising pop when opened. These small changes make the chest feel brand new.
Repurposing Old Toy Chests
Old toy chests don’t have to stay in the playroom. You can transform them into a bench by adding cushions on top. This creates extra seating and storage in one piece.
Turn a chest into a planter box for your garden by sealing it properly. Or, convert it into a coffee table with a glass top for a playful living room touch. Think beyond storage—your toy chest can serve many functions.
What creative use can you find for your child’s toy chest once it’s outgrown? Sometimes, repurposing sparks the most fun projects and keeps memories alive.

Credit: www.todaysparent.com
Frequently Asked Questions
How Can Parents Organize Toy Chests Effectively?
Parents should sort toys by type and size before storing. Use bins or dividers to keep items separate. Label sections for easy toy retrieval. Regularly declutter to remove broken or unused toys. This keeps the toy chest neat and accessible for children.
What Safety Tips Should Parents Follow For Toy Chests?
Ensure the toy chest has a soft-close lid to prevent finger injuries. Avoid heavy lids that can slam shut. Anchor tall chests to the wall to prevent tipping. Check for sharp edges or loose parts. These measures keep children safe during playtime.
How Often Should Parents Clean Toy Chests?
Clean toy chests at least once a month. Wipe surfaces with mild soap and water. Dry thoroughly to prevent mold or mildew. Regular cleaning reduces germs and keeps toys hygienic. It also helps maintain the chest’s condition.
Should Parents Involve Children In Managing Toy Chests?
Yes, involving children teaches responsibility and organization skills. Encourage kids to put toys back after use. Make cleanup a fun routine or game. This habit promotes a tidy play area and respect for belongings.
Conclusion
Parents should keep toy chests clean and safe for children. Regularly check for broken parts or sharp edges. Organize toys to make cleanup easy and fun. Teach kids to put toys away after playtime. Choose chests with proper ventilation to avoid mold.
Use labels or pictures to help kids find toys. A well-maintained toy chest supports good habits and safe play. Simple steps can keep toy chests neat and child-friendly. Small efforts make a big difference in your child’s play area.