



Do you have old cast iron toys that hold a special place in your heart but show signs of wear and tear? You don’t need to toss them out or spend a fortune on replacements.
Repairing cast iron toys might seem tricky, but with the right steps, you can bring them back to life. Imagine turning those chipped, rusty pieces into treasures that look almost new again. In this guide, you’ll discover simple, effective ways to fix your cast iron toys yourself.
Ready to restore your cherished keepsakes? Let’s dive in and get started!
Assessing The Damage
Before you dive into fixing your cast iron toys, it’s crucial to assess the damage carefully. This step helps you understand what you’re dealing with and plan your repair approach effectively. Taking the time here can save you from surprises and ensure the toy is restored safely and beautifully.
Identifying Common Issues
Start by looking closely at the toy’s surface and structure. Common problems include chips in the paint, small cracks, broken parts, and worn edges. You might also find loose components or missing screws that affect the toy’s stability.
Ask yourself: Is the damage mostly cosmetic, or does it affect how the toy functions? Knowing this helps decide if you need simple touch-ups or more serious repairs.
Checking For Rust And Corrosion
Rust is the enemy of cast iron. Examine the toy for any reddish or brown patches, which usually indicate rust. Run your fingers over the surface; rough or flaky areas are warning signs.
If rust is present, think about how deep it goes. Surface rust can be cleaned, but severe corrosion might mean the metal is weakened. You want to avoid restoring a toy that won’t hold up after repair.
Evaluating Structural Integrity
Test the toy’s strength by gently applying pressure to different parts. Does it feel sturdy or wobble? Check joints, hinges, and moving parts carefully.
Look for hairline cracks or bends that might not be obvious at first glance. Even small weaknesses can worsen over time, so identifying them early is key to a safe and lasting repair.

Credit: www.ebay.com
Gathering Repair Materials
Gathering the right materials is the first step to repairing cast iron toys. Using proper tools and supplies helps ensure a smooth and lasting restoration. Preparing everything beforehand saves time and prevents frustration during the process.
Essential Tools And Supplies
Collecting the correct tools makes the repair easier and more precise. Basic supplies include:
- Fine-grit sandpaper for smoothing surfaces
- Metal epoxy or cast iron adhesive for fixing cracks
- Small brushes for detailed painting
- Clamps or rubber bands to hold pieces in place while drying
- Cleaning cloths and mild detergent for removing dirt
Choosing The Right Paints And Primers
Using suitable paints and primers protects the toy and restores its look. Choose paints designed for metal surfaces to avoid peeling. Primers help paint stick better and last longer. Look for non-toxic, lead-free options to keep the toy safe for handling. Match colors closely to the original for a natural finish.
Safety Gear For Restoration
Protection during repair is vital. Wear gloves to avoid skin irritation from chemicals. Use a mask to prevent inhaling dust or fumes. Safety glasses protect your eyes from debris. Work in a well-ventilated area to reduce exposure to paint fumes. These simple steps keep you safe and comfortable.
Cleaning The Toy
Cleaning cast iron toys is the first important step before any repair. Dirt, grime, and rust can hide damage and affect how well repairs hold. Proper cleaning reveals the toy’s true condition. It also creates a smooth surface for paint or glue to stick.
Use gentle tools and cleaners to protect the toy’s details. Take your time and work carefully to avoid causing more damage. A clean toy looks better and lasts longer after repair.
Removing Dirt And Grime
Start by wiping the toy with a soft cloth to remove loose dust. Use warm water mixed with mild soap for stubborn dirt. A soft brush helps reach small crevices. Avoid soaking the toy in water to stop rust from spreading. Dry the toy completely with a clean towel.
Dealing With Rust Spots
Rust weakens cast iron and must be removed. Use fine steel wool or a wire brush to gently scrub rust spots. Sandpaper with fine grit also works well. Clean the area with a damp cloth to remove rust dust. Dry the toy quickly to prevent new rust from forming.
Preparing The Surface For Repair
After cleaning, inspect the toy for cracks or chips. Lightly sand rough areas to smooth the surface. Remove any leftover dust with a soft cloth. Make sure the toy is completely dry. This preparation helps paint and adhesives stick better. The toy is now ready for the next repair steps.
Fixing Structural Damage
Structural damage to cast iron toys can be disheartening, especially when these pieces hold sentimental value or rare craftsmanship. Fixing these issues requires patience, the right materials, and some basic skills. Let’s dive into how you can restore your toy’s strength and appearance effectively.
Repairing Cracks And Chips
Cracks and chips weaken the toy’s structure and can worsen if ignored. Start by cleaning the damaged area thoroughly to remove dust and grease. Use a fine file or sandpaper to smooth out rough edges around the crack or chip.
After preparation, apply a strong adhesive designed for metal repair, pressing the crack gently to close it. Hold the parts together until the adhesive sets, usually 10-15 minutes. For chips, filling the gap with metal filler after adhesive drying helps restore the shape.
Reattaching Broken Parts
Broken parts like wheels or handles can often be reattached securely at home. Check if the broken surfaces fit tightly together; this fit is crucial for a lasting repair. Use a high-quality epoxy glue that bonds metal firmly.
Apply the epoxy evenly on both surfaces, then press the parts together and clamp them if possible. Let the glue cure fully, which might take several hours to a day depending on the product. Have you ever noticed how a steady hand and patience make all the difference in these repairs?
Using Epoxy And Fillers
Epoxy and fillers are your best friends for restoring both strength and appearance. Epoxy provides a durable bond, while fillers help rebuild missing chunks or smooth uneven surfaces. Choose a filler that can be sanded and painted once dried.
Mix the epoxy and filler according to the instructions, then apply it carefully to the damaged areas. Shape it as close to the original form as possible before it hardens. After curing, sand the area gently and consider repainting to match the toy’s original color.
Sanding And Smoothing
Sanding and smoothing can restore the charm of old cast iron toys. Begin by using fine-grit sandpaper to gently remove rust and imperfections. Follow up with a smooth finish to bring back the toy’s original luster.
Sanding and smoothing are essential steps in repairing cast iron toys. Removing rust and imperfections helps restore their original beauty. Proper sanding ensures the paint adheres well, offering a lasting finish.Choosing The Right Sandpaper
Select sandpaper based on the toy’s condition. Use coarse grit for heavy rust or paint. Finer grit is better for smoothing surfaces. Common grades are 80, 120, and 220. Start with a coarser grit, then move to finer ones. This method removes imperfections and prepares the surface for painting.Sanding Techniques For Cast Iron
Always sand gently to avoid damage. Use circular motions for even sanding. Focus on rusty or rough areas first. Employ a sanding block for flat surfaces. For intricate details, consider a sanding sponge. These tools reach small crevices without harm. Regularly check your progress to ensure even sanding.Preparing For Painting
After sanding, clean the toy thoroughly. Remove dust with a damp cloth. Ensure the toy is completely dry before painting. Inspect the surface for any missed spots. Repeat sanding if necessary. A smooth, clean surface ensures paint adheres properly. This step is crucial for a professional finish.Painting And Finishing
Painting and finishing cast iron toys brings them back to life. It protects the metal from rust and wear. A good finish also makes the toy look bright and new again. Use the right products and techniques for the best results. Patience and care during painting can create a smooth, lasting finish.
Applying Primer Correctly
Start with a clean, dry surface. Remove any old paint or rust. Use a wire brush or sandpaper to smooth rough spots. Choose a primer made for metal surfaces. Apply a thin, even coat with a brush or spray. Let the primer dry fully before painting. This step helps paint stick and prevents rust.
Painting Tips For Vintage Toys
Pick paint designed for metal or outdoor use. Use thin coats to avoid drips and runs. Allow each layer to dry before adding another. Work in a well-ventilated space to speed drying. Use small brushes for detailed areas. Bright, classic colors keep the toy’s vintage charm. Avoid thick paint that hides fine details.
Sealing And Protecting The Finish
Seal the paint with a clear topcoat for extra protection. Use a matte or glossy finish based on your preference. Apply the sealer in thin, even layers. Let each coat dry completely before adding another. The sealer shields paint from scratches and moisture. It also gives the toy a polished, finished look.
Maintaining Restored Toys
Maintaining restored cast iron toys keeps them beautiful and functional for years. Proper care prevents rust and damage. It also preserves the paint and metal. Small efforts make a big difference in their lifespan.
Storage Tips To Prevent Damage
Store toys in a dry place to avoid rust. Avoid damp basements or attics. Use soft cloth or bubble wrap to protect surfaces. Keep toys separated to prevent scratches. Avoid stacking heavy items on top. Consider a display case with good ventilation.
Regular Cleaning Practices
Dust toys gently with a soft brush or cloth. Use mild soap and water for deeper cleaning. Dry toys completely with a soft towel. Avoid harsh chemicals that can damage paint. Check for signs of rust or wear regularly. Treat rust spots early with light sanding and oil.
Handling And Display Advice
Handle toys with clean, dry hands. Hold toys by sturdy parts to avoid breaks. Rotate displayed toys to reduce wear in one spot. Use padded stands or mounts for support. Keep toys away from direct sunlight to prevent fading. Avoid placing toys near heat sources.
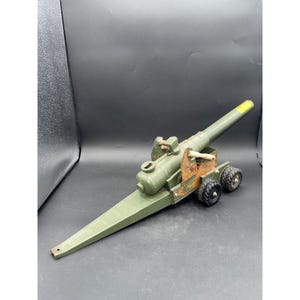
Credit: www.etsy.com

Credit: www.ebay.com
Frequently Asked Questions
How Do I Clean Rust Off Cast Iron Toys?
Use fine steel wool or a wire brush to gently remove rust. Apply a rust remover if needed. Rinse and dry thoroughly to prevent further rusting.
What Glue Works Best For Repairing Broken Cast Iron Toys?
Use a strong epoxy adhesive designed for metal. It bonds well and dries durable. Ensure surfaces are clean before applying glue.
Can I Repaint My Cast Iron Toy After Repair?
Yes, use high-quality enamel or oil-based paint. Clean and prime the surface first. This restores appearance and protects against future damage.
How To Fix Loose Or Missing Parts On Cast Iron Toys?
Reattach loose parts with metal epoxy or solder if skilled. Replace missing parts with replicas or fabricate replacements carefully.
Conclusion
Repairing cast iron toys takes patience and simple tools. Clean the toy well before starting any fix. Use gentle methods to avoid causing more damage. Small cracks and rust spots can often be removed easily. Paint carefully to keep the toy looking good.
Take your time and work step-by-step. You can bring old toys back to life with care. Enjoy the process and the memories these toys hold. Keep them safe for the next generation to enjoy.