



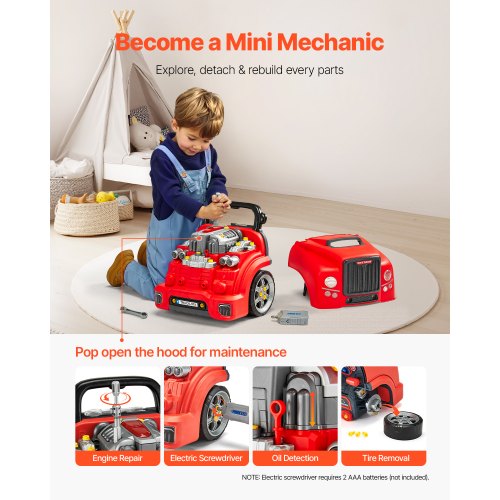
Is your favorite toy engine not working like it used to? Don’t worry—you can fix it yourself, even if you’ve never done this before.
Imagine bringing your toy engine back to life and enjoying hours of fun again. In this guide, you’ll find simple, step-by-step tips that anyone can follow. By the end, you’ll know exactly how to repair your toy engine and save money on replacements.
Ready to get started? Let’s dive in!
Common Toy Engine Issues
Toy engines can stop working or perform poorly due to several common issues. Knowing these problems helps you fix the engine faster. Many problems are easy to spot and repair with basic tools. Understanding common issues makes toy engine repair less frustrating.
Engine Won’t Start
An engine that won’t start is a common problem. Check if the battery is dead or loose. Look for dirt or dust blocking the ignition switch. Wiring may be broken or disconnected. Sometimes, the motor brushes are worn out and need replacement.
Unusual Noises
Strange sounds from the engine often mean parts are worn or damaged. Grinding or squealing noises may come from gears or bearings. Loose screws or bolts cause rattling sounds. Lack of lubrication can make the engine noisy. Check for foreign objects stuck inside the motor.
Poor Performance
If the toy engine runs slow or weak, it needs attention. Dirty or clogged filters reduce airflow and power. Worn brushes or contacts cause weak electrical flow. Gears may slip or have broken teeth. Check for corrosion on battery terminals. Clean and lubricate moving parts regularly.
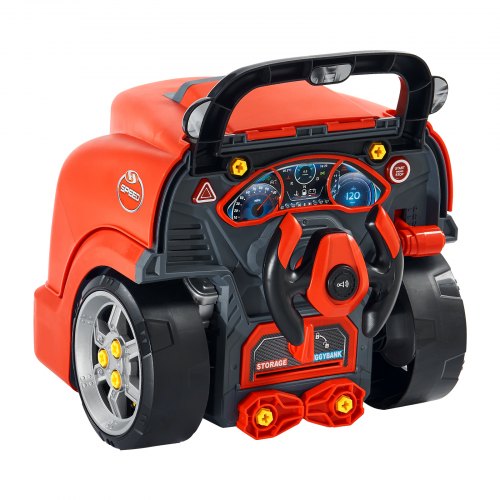
Credit: www.vevor.ca
Tools You’ll Need
Repairing a toy engine can be a rewarding experience, but having the right tools is essential to avoid frustration and mistakes. The tools you gather will depend on the complexity of the engine and the type of repairs you plan to tackle. Are you prepared to handle delicate parts and tiny screws? Let’s look at the tools that will make your repair work smoother and more efficient.
Basic Repair Kit
A basic repair kit is your foundation. It usually includes screwdrivers with various heads, tweezers, and small pliers. These tools help you open the toy engine casing and handle small components without causing damage.
Don’t underestimate the importance of a good set of screwdrivers. Magnetic tips can save you from losing tiny screws that tend to slip away. A magnifying glass or a small LED flashlight can also be handy to spot issues inside tight spaces.
- Phillips and flathead screwdrivers (miniature sizes)
- Needle-nose pliers
- Tweezers
- Magnifying glass or LED flashlight
- Small cleaning brush
Specialized Tools
Sometimes, basic tools aren’t enough, especially if the toy engine has complex electrical parts or requires precise calibration. Specialized tools like a multimeter help you check electrical connections and identify faults.
If you encounter gears or moving parts that need adjustment or replacement, a small gear puller or a set of precision files will come in handy. Having these tools ready can save hours of trial and error.
- Multimeter for electrical testing
- Small gear puller
- Precision files for smoothing parts
- Lubricant applicator (small oil syringe or brush)
- Heat shrink tubing for wire repair
Have you ever tried fixing something only to realize you’re missing the right tool halfway through? Gathering these tools before you start can make all the difference. What’s the one tool you think you can’t do without when repairing a toy engine?
Safety Precautions
Repairing a toy engine requires care and attention to safety. Small parts and batteries pose risks during the process. Taking safety precautions protects you and the toy from damage. Follow simple rules to keep the repair work safe and effective.
Handling Small Parts
Small parts can easily get lost or swallowed. Keep these parts in a container to avoid losing them. Work in a clean, well-lit space to see parts clearly. Avoid putting small parts near your mouth or face. Use tweezers or small tools to handle tiny pieces carefully. Keep children and pets away while repairing to prevent accidents.
Working With Batteries
Batteries can leak or cause shocks if handled wrong. Remove batteries before starting any repair work. Check for leaks or corrosion on the battery and compartment. Use gloves when handling damaged batteries. Insert batteries correctly, following the toy’s polarity marks. Dispose of old batteries safely according to local rules. Avoid mixing old and new batteries to prevent damage.
Step-by-step Repair Process
Repairing a toy engine requires patience and careful attention. Follow the step-by-step process to fix common issues. This guide helps you bring the toy back to life safely and effectively.
Diagnose The Problem
Start by checking the toy engine carefully. Look for visible damage or loose parts. Test if the engine powers on or makes unusual sounds. Identify whether the problem is electrical or mechanical. Note down any signs of wear or broken pieces.
Clean The Engine
Remove dust and dirt from the toy engine gently. Use a soft brush or cloth to clean small parts. Avoid water unless the toy is waterproof. Clean contacts and moving parts to improve performance. Dirt often causes the engine to stop working properly.
Replace Faulty Components
Find the parts that do not work or are broken. Order new components that fit the toy engine model. Carefully remove the faulty parts using the right tools. Install the new parts firmly but without forcing them. Check all connections and moving pieces for smooth operation.
Reassemble The Toy
Put all parts back together in the correct order. Tighten screws and clips securely but gently. Make sure no parts are left loose inside. Test the toy engine after assembly to confirm it works well. This step ensures the toy is safe and ready for use.
Testing After Repair
Testing the toy engine after repair ensures it functions smoothly. Listen for consistent sounds and check movement. Proper testing confirms the engine is ready for play.
Testing the toy engine after repair is crucial. It ensures everything works properly. This step confirms the engine runs smoothly. Testing helps identify any missed problems.Functionality Check
First, ensure the engine turns on. Listen for any unusual sounds. Check if all parts move as they should. Observe the wheels and any moving parts. They should run smoothly without stopping. Check the battery compartment. Make sure the batteries are inserted correctly. Look for any loose wires or connections. This can prevent the engine from starting. Ensure the switches function properly. Switches should respond immediately when toggled.Performance Evaluation
Observe the engine’s speed. It should maintain a consistent pace. Fast or slow changes can signal issues. Test the engine on different surfaces. See if it performs well on both carpet and hardwood. Check for overheating. Feel the engine after a few minutes. It should be warm, not hot. Overheating can indicate internal problems. Look for any smoke or burning smell. This can be a sign of a serious issue. Finally, test the engine with a load. Attach a small toy trailer or car. Ensure the engine can pull it without struggling. This checks the engine’s power and efficiency.Tips For Maintaining Toy Engines
Maintaining toy engines extends their life and keeps them working smoothly. Simple care routines prevent common problems and save repair time. Focus on cleaning, storage, and battery care to protect your toy engine.
Regular Cleaning
Dust and dirt can block small parts inside the toy engine. Clean the surface with a soft cloth often. Use a small brush to remove dirt from tight areas. Avoid water unless the toy is waterproof. Keep contacts and gears free from grime for better performance.
Proper Storage
Store toy engines in a dry, cool place away from sunlight. Heat and moisture can damage plastic and metal parts. Use a box or container to protect from dust and accidental drops. Avoid stacking heavy items on top of toys to prevent cracks or breaks.
Battery Care
Remove batteries if the toy will not be used for a long time. Old or leaking batteries can harm the toy’s electronics. Use the correct battery type recommended by the manufacturer. Replace batteries regularly to maintain strong power and avoid corrosion.
When To Seek Professional Help
Knowing when to seek professional help is important for toy engine repairs. Some problems need expert tools and skills. Trying to fix complex issues alone might cause more damage.
Recognizing signs that require professional attention saves time and money. It also ensures your toy engine works safely and correctly.
Signs Of Internal Damage
Unusual noises inside the engine can indicate serious problems. Broken gears or damaged wires are hard to fix without special tools. If you notice smoke or burning smells, stop using the toy immediately.
Electrical Issues Beyond Basic Troubleshooting
When the toy engine does not respond after battery replacement, there might be wiring problems. Faulty circuits need a professional to diagnose and repair. Avoid opening delicate parts if unsure about electrical systems.
Missing Or Broken Parts
Lost or damaged small parts like screws, springs, or connectors require exact replacements. Professionals have access to spare parts made for specific toy engines. Using wrong parts can worsen the damage or cause safety risks.
Repeated Failures After Repairs
If the engine breaks down again soon after repair, it may need expert evaluation. Professionals can find hidden issues missed during basic fixes. Persistent problems often require deeper inspection and professional tools.
Safety Concerns
Damage that affects the toy’s safety, such as sharp edges or exposed wires, should be handled by experts. Professionals ensure the toy meets safety standards before giving it back. Playing with unsafe toys can lead to injuries.
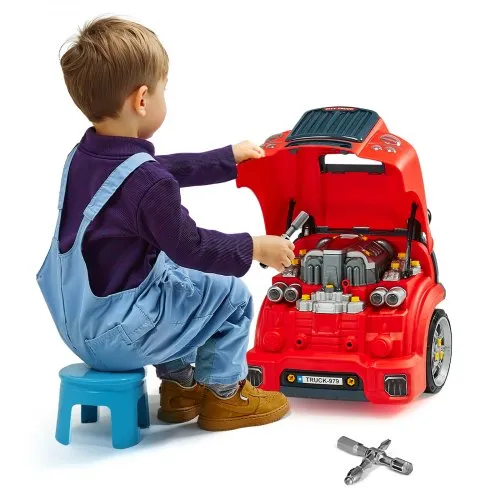
Credit: www.vevor.ca
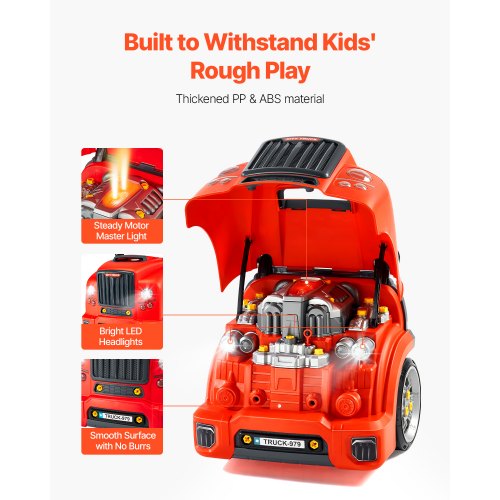
Credit: www.vevor.ca
Frequently Asked Questions
How Do I Diagnose A Toy Engine Problem?
Check for visible damage, loose parts, or dirt buildup. Test the engine by powering it on. Note any unusual sounds or failure to start.
What Tools Are Needed To Repair A Toy Engine?
Common tools include small screwdrivers, tweezers, cleaning brushes, and lubricants. A multimeter helps diagnose electrical issues in motorized toy engines.
Can I Fix A Toy Engine Motor Myself?
Yes, simple repairs like cleaning, tightening parts, or replacing batteries are doable. Complex electrical issues may need professional help.
How Do I Clean A Toy Engine Safely?
Use a soft brush or compressed air to remove dust. Avoid water near electrical components. Use a dry cloth for stubborn dirt.
Conclusion
Repairing a toy engine can be simple with the right steps. Take your time and check each part carefully. Small fixes often bring big improvements. Keep tools and instructions close by for help. Practice makes the process easier and faster.
Enjoy bringing a toy engine back to life. It feels good to fix something yourself. Try these tips and see how well it works.