



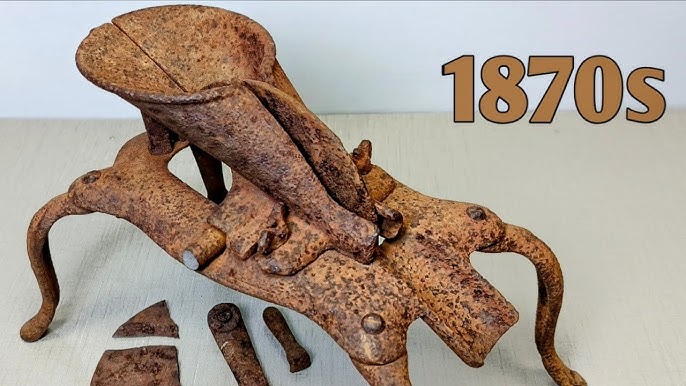
Have a beloved cast iron toy that’s cracked, chipped, or broken? You don’t have to throw it away or spend a fortune replacing it.
Imagine bringing your treasured toy back to life with a few simple steps you can do yourself. In this guide, you’ll discover easy, effective ways to repair your cast iron toy and keep its charm intact. Ready to save your favorite piece and enjoy it for years to come?
Let’s get started.
Assessing Damage
Before you jump into repairing your cast iron toy, you need to carefully assess the damage. Understanding the exact condition of the toy helps you choose the right repair methods and avoid causing more harm. This step also saves time and money by focusing on what truly needs fixing.
Identifying Common Issues
Cast iron toys often face similar problems. These include cracks, chips, broken parts, and worn paint. Look closely at every angle and use a bright light to spot hairline fractures or small missing pieces.
Have you ever missed a tiny crack only to see it grow bigger after repair? Taking your time here prevents surprises later. Write down what you find to stay organized.
Checking For Rust And Corrosion
Rust is the most common enemy of cast iron toys. It appears as reddish-brown patches that can flake off when touched. Use a wire brush or fine sandpaper to gently remove surface rust and reveal the extent underneath.
Ask yourself: Is the rust just on the surface, or has it eaten deep into the metal? Deep corrosion weakens the toy and might require professional help. For light rust, treating with rust remover and sealing afterward can restore the toy’s appearance and strength.
Evaluating Structural Integrity
Does the toy still feel solid or does it wobble and creak? Test its strength by gently pressing or moving parts. Loose joints or bent sections indicate structural issues that need careful repair.
Think about whether the toy can safely hold its own weight or if it risks breaking again. Reinforcing weak spots with epoxy or welding small cracks may be necessary. Your goal is to restore both the look and the durability of the toy.

Credit: www.ebay.com
Gathering Materials
Before you dive into fixing your cherished cast iron toy, gathering the right materials sets the foundation for a smooth repair process. Having everything on hand prevents interruptions and helps you focus on restoring the toy’s charm. Let’s break down what you need to prepare.
Essential Tools
- Small screwdrivers:Ideal for removing tiny screws or parts without damaging them.
- Fine grit sandpaper (220-400 grit):Perfect for smoothing rough edges and preparing surfaces for paint.
- Epoxy adhesive:A strong glue that works well on metal and can hold broken pieces together firmly.
- Needle-nose pliers:Great for bending or holding small components during repair.
- Paintbrushes:For touch-ups or applying protective coatings after repair.
Have you ever tried fixing a toy only to find you were missing a tiny tool? Having these essentials ready makes the difference between a quick fix and a frustrating pause.
Recommended Cleaning Supplies
- Mild dish soap:Cleans dirt and grease without harming the metal surface.
- Soft cloths or microfiber towels:Use these to gently wipe down the toy after cleaning.
- White vinegar:Helps remove rust spots safely when soaked or applied with a cloth.
- Toothbrush:Reaches into crevices and detailed areas for thorough cleaning.
Cleaning your cast iron toy well before repair isn’t just about looks—it ensures adhesives and paint stick properly. Have you noticed how a clean surface always results in a better finish?
Safety Gear
- Protective gloves:Keeps your hands safe from sharp edges and chemical exposure.
- Safety goggles:Shields your eyes from dust, debris, or splashes during cleaning and sanding.
- Face mask:Prevents inhaling fine dust particles or fumes from adhesives and paint.
Taking a moment to protect yourself might feel like extra effort, but it’s essential. Would you rather risk a small cut or irritation, or enjoy the repair process safely and comfortably?
Cleaning The Toy
Cleaning your cast iron toy thoroughly is essential before any repair work. Dirt, grime, and rust can hide damage or interfere with adhesives and paint. Taking the time to clean properly ensures your repair lasts and looks great.
Removing Dirt And Grime
Start by wiping the toy with a soft cloth to remove loose dust. Use warm water mixed with a few drops of mild dish soap to scrub away stubborn dirt. A soft brush, like an old toothbrush, works well for getting into small crevices without scratching the surface.
If the toy has sticky residue or grease, try a little white vinegar on a cloth—it’s gentle but effective. Avoid soaking the toy completely in water to prevent further rusting.
Dealing With Rust Spots
Rust can be tricky but don’t ignore it. Use fine steel wool or a rust eraser to gently rub rust spots until they fade. Be careful not to scrub too hard; you want to remove rust without damaging the cast iron underneath.
After removing rust, wipe the area with a damp cloth and dry immediately. Applying a thin layer of mineral oil can help prevent rust from returning while you work on repairs.
Prepping For Repair
Once clean, inspect the toy closely for cracks or missing pieces. Use a cloth to remove any leftover dust from sanding or rust removal. Ensuring the surface is dry and free of oils will help adhesives or paints stick better.
Have you noticed small imperfections hiding under dirt before? Taking the cleaning step seriously reveals problems early, so your repair isn’t just a quick fix but a lasting solution.

Credit: www.ebay.ca
Fixing Cracks And Breaks
Fixing cracks and breaks in cast iron toys can restore their beauty. Many collectors cherish these toys for their historical value. Repairing them requires patience and the right materials. Proper techniques ensure the toy’s longevity and maintain its charm. Let’s explore some effective repair methods.
Using Epoxy Adhesives
Epoxy adhesives are strong and perfect for cast iron. Choose a high-quality epoxy for metal repairs. Mix the epoxy according to the package instructions. Apply it carefully along the crack or break. Use a small brush for precise application. Ensure the adhesive covers the entire damaged area.
Clamping And Setting
After applying epoxy, clamping is essential. Use small clamps to hold pieces together. Ensure the parts align correctly. Do not overtighten the clamps. Let the epoxy cure as per the manufacturer’s instructions. This step ensures a strong bond between the pieces.
Sanding Repair Areas
Once the epoxy cures, remove excess adhesive. Use fine-grit sandpaper for a smooth finish. Sand gently to avoid damaging the toy. Focus on the repaired area until it’s flush with the surface. This process enhances the toy’s appearance and prepares it for any finishing touches.
Restoring Paint
Restoring the paint on a cast iron toy brings it back to life. Old paint may peel or fade over time. Fresh paint protects and enhances the toy’s look. Careful preparation and the right materials are key. Follow each step for a smooth, lasting finish.
Selecting Suitable Paints
Choose paints designed for metal surfaces. Oil-based or enamel paints work best. They stick well and resist chipping. Select colors close to the toy’s original shades. Avoid water-based paints as they may peel quickly.
- Use non-toxic paints if the toy is for children.
- Check for rust-resistant formulas.
- Pick paints with a satin or gloss finish for shine.
Applying Primer And Paint
Start with a clean, dry surface. Sand gently to smooth rough spots. Apply a thin coat of metal primer. Primer helps paint stick and prevents rust. Let primer dry completely before painting.
Use a small brush for detailed areas. Paint in thin, even layers. Allow each layer to dry fully. Multiple layers create a stronger, brighter finish. Avoid thick paint to prevent drips and clumps.
Finishing With Sealant
Seal the paint to protect it from damage. Use a clear, protective sealant made for metal. Apply in thin coats, covering the entire painted area. Sealants add shine and guard against moisture and wear.
Let the sealant dry in a dust-free place. This step extends the life of the paint job. Your cast iron toy will look beautiful and stay protected for years.
Credit: www.etsy.com
Preventing Future Damage
Preventing future damage to your cast iron toy helps keep it safe and looking good. Small care habits extend its life and avoid costly repairs. Follow simple steps to protect your toy from rust, cracks, and wear.
Proper Storage Tips
Store your cast iron toy in a dry, cool place. Avoid damp areas to stop rust from forming. Use soft cloth or foam padding to prevent scratches and dents. Keep it away from direct sunlight to protect the paint and metal.
Routine Maintenance
Clean the toy regularly with a dry or slightly damp cloth. Never soak it in water. Apply a thin layer of oil to metal parts to stop rust. Check for loose screws or cracks and fix them early. This keeps the toy strong and safe.
Handling Guidelines
Handle the toy with care to avoid drops or knocks. Use both hands when lifting heavy parts. Teach children to play gently and avoid throwing or banging the toy. Proper handling reduces the chance of breaks and chips.
Frequently Asked Questions
How Do I Clean Cast Iron Toys Before Repair?
Clean cast iron toys with warm, soapy water and a soft brush. Remove dirt, rust, and grease completely. Dry thoroughly to prevent further rusting. This prepares the toy for effective repair and ensures better adhesion of paint or sealants.
What Materials Are Needed To Repair Cast Iron Toys?
You need rust remover, sandpaper, epoxy putty, primer, and paint. Use fine-grit sandpaper to smooth surfaces. Epoxy putty fills cracks or chips. Primer and paint protect and restore the toy’s appearance.
Can I Repair Cracks In Cast Iron Toys At Home?
Yes, small cracks can be fixed with epoxy putty. Clean the area, apply putty, and shape it smoothly. Allow it to cure fully before sanding or painting. Larger cracks may need professional welding for durability.
How To Prevent Rust On Repaired Cast Iron Toys?
Apply a rust-inhibiting primer and high-quality paint after repair. Store toys in a dry environment to avoid moisture. Regularly inspect and touch up paint to maintain protection against rust.
Conclusion
Repairing cast iron toys takes patience and care. Clean the toy gently before starting any fix. Use the right tools to avoid damage. Small cracks or chips can be filled and smoothed easily. After repairs, paint carefully to protect the surface.
Regular maintenance keeps your cast iron toys lasting longer. These steps help you restore old toys safely. Enjoy bringing new life to cherished playthings. Simple fixes can make a big difference. Keep your toys looking good for years.