



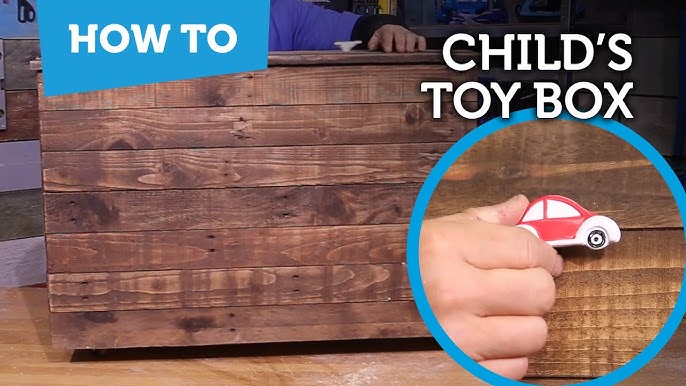
Are you looking for a simple project that adds charm and function to your home? Building a wood toy box bench is a perfect way to organize your child’s toys while creating a cozy spot to sit.
Imagine having a sturdy, beautiful piece that keeps clutter out of sight and brings warmth to any room. In this guide, you’ll discover easy steps and tips that make the process clear and enjoyable—even if you’re new to woodworking. Stick with me, and by the end, you’ll have the confidence and know-how to build your own toy box bench that your family will love.

Credit: www.ana-white.com
Materials And Tools Needed
Gathering the right materials and tools is key to building a sturdy wood toy box bench. Choosing quality wood ensures durability and a smooth finish. Tools help shape and assemble the parts precisely. Prepare everything before starting to save time and avoid frustration.
Wood Materials
- Pine or cedar boards (for the box structure)
- 1×4 or 1×6 planks (for bench seating)
- Wood screws or nails
- Wood glue (for extra strength)
- Sandpaper (medium and fine grit)
- Wood stain or paint (optional for finishing)
Tools Required
- Measuring tape
- Pencil for marking
- Hand saw or circular saw
- Drill with drill bits
- Screwdriver or drill driver
- Clamps (to hold pieces while gluing)
- Sanding block or electric sander
- Paintbrush or cloth (for applying finish)
Safety Equipment
- Safety glasses
- Dust mask
- Work gloves
Choosing The Right Wood
Choosing the right wood is a key step in building a sturdy and attractive wood toy box bench. The type of wood you select affects the strength, appearance, and even the ease of working on your project. It’s not just about picking any wood; it’s about understanding what suits your needs and your workspace.
Understanding Wood Types: Hardwood Vs Softwood
Hardwoods like oak, maple, and cherry are dense and durable. They offer a beautiful grain and can handle heavy use without denting easily. However, they can be tougher to cut and shape, which might slow down your project if you’re new to woodworking.
Softwoods such as pine, cedar, and fir are easier to work with and generally more affordable. They’re lighter and can be just as strong for a toy box bench if properly constructed. Think about where your bench will be used—softwood might be perfect for indoor use and easy handling.
Considering Wood Safety For Kids
Your toy box bench will likely be around children, so safety matters. Choose wood that doesn’t splinter easily and avoid species known to cause allergic reactions. Sanding well and applying non-toxic finishes are crucial steps to make the wood safe and smooth to touch.
Have you checked if the wood is free from knots or rough spots? These can cause splinters and weaken your box. Picking clear, straight-grained wood can save you trouble later.
Balancing Budget And Quality
It’s tempting to go for the cheapest wood, but this can backfire if it warps or breaks quickly. Setting a budget helps narrow your choices, but prioritize quality over cost when possible. For example, pine offers a good balance between price and durability and is widely available.
Could investing a bit more upfront save you time and repairs later? Think about how long you want your bench to last and how much effort you want to put into maintenance.
Matching Wood With Your Tools And Skills
Your toolset and experience level should influence your wood choice. If you only have basic tools, softer woods will be easier to cut and join. If you’re comfortable with power tools and precision, harder woods can give a premium finish.
Ask yourself: Do you want a quick project or a detailed one? This decision will guide your wood selection and affect the overall satisfaction with your build.
Measuring And Cutting Wood Pieces
Measuring and cutting wood pieces accurately is key to building a sturdy wood toy box bench. Precise measurements ensure all parts fit together well. Careful cutting prevents gaps and keeps the project strong. Take your time with this step for the best results.
Gathering Your Tools And Materials
Prepare a tape measure, pencil, carpenter’s square, and saw. Use a sharp saw blade for clean cuts. Have clamps ready to hold wood steady. Safety glasses protect your eyes during cutting.
Measuring The Wood Pieces
Measure twice before marking the wood. Mark each piece clearly with a pencil. Use a carpenter’s square to draw straight lines. Double-check measurements for all parts like sides, bottom, and seat.
Cutting The Wood Safely And Accurately
Secure the wood with clamps on a stable surface. Follow the marked lines slowly with the saw. Keep your hand steady for a straight cut. Use a fine-toothed saw for smooth edges.
Organizing Cut Pieces For Assembly
Sort the cut pieces by size and shape. Label each piece with its position in the bench. Store them flat to avoid warping. This step helps speed up assembly later.

Credit: www.ana-white.com
Assembling The Frame
Begin by joining the wooden pieces to form a sturdy frame. Make sure all corners are square and secure the joints tightly with screws. This frame will support the entire toy box bench, so accuracy is key.
Assembling the frame is a crucial part of building a wood toy box bench. This step sets the foundation for the entire structure. Proper assembly ensures stability and durability. Follow the steps below to create a robust frame for your toy box bench.Gather Your Tools And Materials
Ensure you have all necessary tools and materials ready. This includes wood pieces cut to size, screws, a screwdriver, and a measuring tape. Having everything at hand keeps the process smooth.Lay Out The Frame Pieces
Position the wood pieces on a flat surface. Arrange them according to the design plan. Make sure each piece is correctly placed. This will help you visualize the frame structure.Attach The Sides To The Base
Begin by securing the side panels to the base. Use screws to fasten them tightly. Ensure the corners align perfectly. This step is important for maintaining the frame’s shape.Secure The Back Panel
Attach the back panel to the frame. Use screws along the edges to keep it firm. Ensure it lines up with the side panels. A well-secured back panel adds stability.Check For Level And Alignment
Use a measuring tape to check the alignment. Ensure all sides are even and straight. Adjust as needed to achieve a balanced frame. This prevents future wobbling or instability.Reinforce The Frame Joints
Add extra screws to reinforce the joints. Focus on corners and connections. Strengthening these areas increases the frame’s durability. A strong frame supports the bench’s long-term use.Building The Storage Box
Building the storage box is the heart of your wood toy box bench project. This is where you create the main container that will hold all the toys securely while also providing a sturdy base for the bench seat. Pay close attention to measurements and joinery to ensure the box is both functional and durable.
Choosing The Right Wood And Materials
Select wood that is strong enough to hold weight but smooth enough to keep little hands safe. Pine and poplar are great options because they are affordable and easy to work with. Don’t forget to pick up wood screws, wood glue, and sandpaper for finishing.
Cutting And Preparing The Wood Panels
Start by cutting your wood panels to the exact dimensions needed for the box’s sides, bottom, and back. Make sure to double-check measurements before cutting to avoid mistakes. Sand each piece thoroughly to remove splinters and rough edges—this step saves you from future headaches.
Assembling The Box Frame
Lay out the cut panels on a flat surface. Apply wood glue along the edges before joining them to ensure a strong hold. Use clamps to hold the pieces together while you drive screws in, reinforcing the corners with brackets if necessary.
Adding The Bottom Panel
Attach the bottom panel last to keep the box square during assembly. Position it carefully and secure with screws spaced evenly around the edges. This panel supports all the weight inside, so make sure it’s firmly attached and flush with the sides.
Finishing Touches For Durability And Safety
Once assembled, sand any rough spots and fill screw holes with wood filler for a smooth finish. Consider applying non-toxic paint or sealant to protect the wood and make cleaning easier. How could you make sure the finish you choose is safe for children?
Constructing The Bench Seat
Constructing the bench seat is a crucial part of your wood toy box bench project. This seat not only provides a comfortable place to sit but also serves as the lid to the storage compartment. Ensuring it fits well and operates smoothly will make your bench both functional and enjoyable.
Choosing The Right Wood For The Seat
Pick a wood that balances strength and comfort. Hardwood like oak or maple offers durability but can be heavy. Pine is lighter and easier to work with, though less durable. Think about how often the bench will be used and by whom to decide what fits your needs best.
Cutting And Sanding The Seat Panels
Measure the bench frame carefully before cutting your seat panels. Accurate cuts ensure a snug fit and smooth operation. After cutting, sand all edges and surfaces thoroughly to prevent splinters and create a comfortable seating area.
Attaching The Seat To The Toy Box
Use sturdy hinges to connect the seat to the box, allowing it to open and close easily. Position the hinges evenly to avoid warping or uneven gaps. Test the seat’s movement frequently during installation to fix any misalignment early.
Adding Support For Comfort And Stability
Consider adding a cross support or braces underneath the seat to prevent sagging. This extra support can handle the weight of sitting and the pressure of opening the lid. Think about how your bench will be used and add reinforcements where needed.
Finishing Touches For Safety And Style
Round off corners and edges to make the seat safe for children. Apply a finish that protects the wood and complements your room’s style. A non-toxic paint or varnish keeps your toy box bench safe and attractive for years to come.
Sanding And Finishing
Sanding and finishing are key steps in building a wood toy box bench. They protect the wood and give it a smooth, safe surface. Sanding removes rough edges and splinters. Finishing adds color and shields the wood from damage.
Careful sanding and a good finish make the bench last longer. The process also makes the bench look neat and inviting.
Sanding The Wood Smooth
Start with coarse sandpaper to remove big rough spots. Use a sanding block or an electric sander for even pressure.
Move to finer sandpaper for a smooth surface. Sand with the grain to avoid scratches. Check all corners and edges carefully.
Choosing The Right Finish
Pick a finish that is safe for children. Non-toxic, water-based finishes work well.
Options include paint, stain, or clear sealant. Each gives a different look and protection level.
Applying Finish Evenly
Use a clean brush or cloth to apply finish. Spread it thin and even to avoid drips.
Let the first coat dry fully. Lightly sand between coats for a smooth feel. Apply at least two coats for durability.
Adding Decorative Touches
Adding decorative touches brings your wood toy box bench to life. It makes the bench unique and fits your room’s style. Small details can turn a simple bench into a special piece.
Decorative touches also protect the wood and improve its look. Choose ideas that match your skills and the bench’s use. Fun and simple options work well for a kid’s space.
Painting And Staining For Style
Use paint to add color and personality. Bright colors make the bench cheerful and fun. Soft tones create a calm, cozy feel. Stains highlight the wood’s natural grain. They give a warm, classic look.
Choose non-toxic paints and stains for safety. Apply several thin layers for smooth coverage. Let each layer dry before adding the next.
Adding Stencils And Patterns
Stencils create neat shapes and designs. Use simple patterns like stars, hearts, or animals. Position them on the bench’s sides or top. Patterns add charm without much effort.
Try painting stripes or polka dots for a playful look. Use painter’s tape to keep lines clean. Let the paint dry fully before use.
Using Decorative Hardware
Decorative knobs and handles make the bench easier to open. Choose fun shapes like animals or stars. Metal accents can add a vintage touch. Secure hardware firmly for safety.
Check that all screws are smooth to avoid scratches. Hardware also makes the bench feel more finished.
Adding Cushions And Fabrics
A cushion on top adds comfort and color. Choose soft, durable fabric that is easy to clean. Tie the cushion with ribbons or use Velcro for easy removal.
Fabric-covered storage baskets inside the bench keep toys organized. Pick patterns that match the room’s decor. This softens the look and adds texture.
Personalizing With Names Or Initials
Paint or carve names or initials on the bench. It adds a personal touch and makes the bench special. Use stencils for neat letters or try freehand for a casual look.
Seal the letters with clear varnish to protect them. This step helps the decoration last longer.
Safety Tips For Woodworking
Always wear safety glasses and keep your work area clean to avoid accidents. Use sharp tools carefully and secure wood pieces firmly before cutting or drilling.
Creating a wood toy box bench is a rewarding project. Yet, safety must be your top priority. Woodworking involves tools that can be dangerous without proper care. Understanding safety tips ensures a smooth and enjoyable building experience.Wear Protective Gear
Always wear safety goggles to protect your eyes from wood chips. Use ear protection when working with loud machinery. Gloves can prevent splinters and cuts, but choose ones that allow control.Ensure A Clean Workspace
Keep your workspace tidy. Remove clutter to prevent accidents. Ensure good lighting to see your work clearly. A clean space reduces the risk of injury.Check Tools Before Use
Inspect tools for damage or wear before starting. Sharp tools work better and are safer. Replace or repair any faulty equipment to prevent accidents.Understand Tool Operation
Read manuals and watch instructional videos for each tool. Knowing how to use tools properly avoids mistakes. Practice with scrap wood to gain confidence.Keep A First Aid Kit Handy
Have a first aid kit nearby. Quick access to bandages and antiseptics is crucial. Knowing basic first aid helps in emergencies.Work At A Comfortable Height
Adjust your bench to a suitable height. A comfortable position reduces strain on your back. Good posture prevents long-term health issues.Use Clamps Securely
Always secure your wood pieces with clamps. This prevents slipping during cutting or drilling. Proper clamping enhances precision and safety.Stay Focused And Take Breaks
Avoid distractions while working with tools. Stay alert and focused on the task. Take regular breaks to avoid fatigue and maintain safety.Maintaining Your Wood Toy Box Bench
Maintaining your wood toy box bench is key to keeping it functional and beautiful for years. A little care goes a long way in protecting the wood from wear and tear, stains, and damage. You’ll enjoy using your bench more when it looks fresh and sturdy every day.
Cleaning And Dusting Regularly
Dust can settle in corners and on surfaces, dulling the finish and inviting scratches. Use a soft, dry cloth or a microfiber duster to remove dust gently. Avoid harsh chemicals; a damp cloth with mild soap works well for sticky spots.
Have you noticed how quick regular dusting saves you from deeper cleaning chores later? It’s a small habit that keeps your bench looking great without much effort.
Protecting The Wood Surface
Apply a quality wood polish or wax every few months to nourish the wood and add a protective layer. This helps prevent moisture damage and keeps the color vibrant. Make sure the product suits the finish you chose for your bench.
Think about areas where your kids might place drinks or snacks. Using coasters or a washable cloth cover can shield the surface from stains and spills, extending the life of your finish.
Checking And Tightening Hardware
Loose screws or hinges can make the bench unstable and noisy. Inspect these parts regularly and tighten them with a screwdriver as needed. This simple step keeps the toy box safe and easy to open and close.
Have you ever struggled with a squeaky or wobbly bench? A quick check and adjustment can prevent accidents and frustration.
Repairing Minor Damages
Scratches, dents, or small cracks happen even with careful use. Fill minor scratches with a wood filler that matches your bench’s color. Sand lightly and touch up with paint or stain to blend repairs seamlessly.
Ignoring small issues can lead to bigger problems later. Fixing damage early saves time and keeps your bench looking as good as new.
Storing Your Toy Box Bench Properly
If you need to store the bench, keep it in a dry, temperature-controlled place to avoid warping or mold. Cover it with a breathable cloth to prevent dust buildup while allowing air circulation.
Have you ever stored wooden furniture only to find it damaged afterward? Proper storage can make all the difference in preserving your handiwork.

Credit: www.ana-white.com
Frequently Asked Questions
What Materials Are Needed To Build A Wood Toy Box Bench?
You need wood planks, screws, wood glue, hinges, sandpaper, and paint or stain. Choose durable wood like pine or oak for strength and longevity.
How Long Does It Take To Build A Wood Toy Box Bench?
Building typically takes 4 to 6 hours, depending on skill level. Allow extra time for drying paint or stain after assembly.
What Tools Are Required For Making A Wood Toy Box Bench?
Essential tools include a saw, drill, screwdriver, measuring tape, square, and clamps. These tools help ensure precise cuts and secure assembly.
Can I Customize The Size Of The Toy Box Bench?
Yes, you can adjust dimensions to fit your space and storage needs. Just maintain proportions for structural stability and comfort when sitting.
Conclusion
Building a wood toy box bench is a fun and useful project. You can create storage and seating in one piece. Using simple tools and steps makes the process easy. Personalize your bench with paint or cushions for comfort. This project saves space and keeps toys organized.
Enjoy your new bench every day. Try building one yourself and see the results. Simple, practical, and rewarding.