



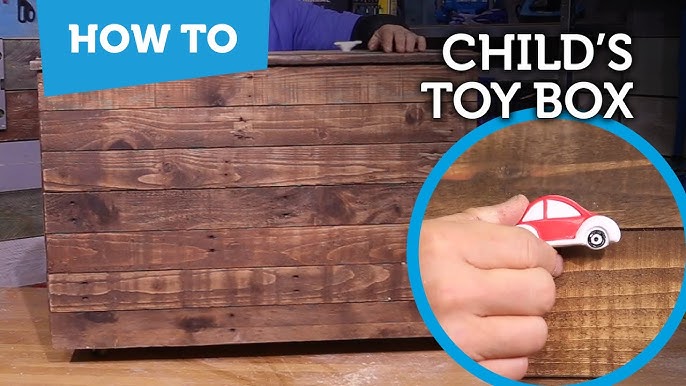
Are you tired of stepping on scattered toys every time you enter your child’s room? Imagine having a special place where all those toys can be neatly stored and easily found.
Building your own kids toy chest is easier than you think, and it can bring order and joy to your home. In this guide, you’ll discover simple steps to create a sturdy, safe, and fun toy chest that your child will love.
Keep reading, and you’ll be surprised how quickly your space can transform!
Choosing The Right Materials
Choosing the right materials is key to building a durable and safe toy chest your kids will love. The materials affect the chest’s strength, appearance, and how safe it is for children. Picking the right wood, finishes, and tools sets the foundation for a successful project.
Wood Types And Finishes
Hardwoods like oak, maple, and cherry offer excellent durability and a beautiful finish. They resist dents and scratches better, which is perfect for a toy chest that will see lots of use. Softwoods such as pine are easier to work with and more budget-friendly but can show wear faster.
Consider the finish carefully. Use non-toxic, water-based paints or natural oils like linseed or tung oil. These finishes keep the wood safe for kids while protecting it from spills and scratches.
Safety Considerations
Safety should never be an afterthought. Avoid wood with splinters or rough edges that can hurt little hands. Sand the wood thoroughly to create smooth surfaces.
Make sure any paint or finish is free from harmful chemicals. Look for products labeled as child-safe or non-toxic. Also, think about adding soft-close hinges to prevent pinched fingers.
Tools You’ll Need
Having the right tools makes the job easier and more precise. Essential tools include a saw (circular or hand saw), drill, sander, measuring tape, and clamps. A screwdriver set and wood glue will help with assembly and adding strength.
Invest in safety gear too, such as goggles and a dust mask. Protecting yourself during the build ensures you stay focused and injury-free.

Credit: www.ana-white.com
Planning Your Toy Chest Design
Planning your toy chest design sets the foundation for a useful and attractive storage solution. Thoughtful planning saves time and ensures the chest fits your child’s needs and room space. Consider size, style, and personal touches to create a perfect piece.
Measuring Space And Size
Measure the area where the toy chest will sit. Note the length, width, and height limits carefully. Choose a size that holds enough toys but doesn’t crowd the room. Keep in mind your child’s age and toy collection growth. A chest that’s too small will fill up quickly. Too big may waste space.
Selecting A Style
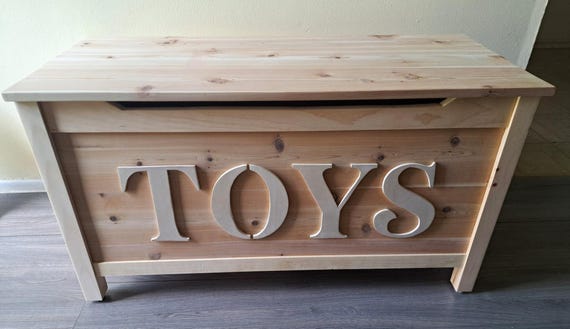
Choose a style that matches the room’s decor and your child’s taste. Options include classic wooden chests, colorful painted boxes, or modern minimalist designs. Decide if you want a chest with a lid or open compartments. Pick materials that are safe and durable. Smooth edges and non-toxic finishes keep kids safe.
Adding Personal Touches
Make the toy chest unique with simple decorations. Paint the child’s name or favorite characters on the chest. Use stickers, stencils, or hand-painted designs for fun. Add soft cushions on top for seating comfort. Personal touches encourage kids to use and enjoy their chest more.
Cutting And Preparing The Wood
Cutting and preparing the wood is a crucial phase in building a kids toy chest. It sets the foundation for a sturdy and safe final product. Taking your time to measure, cut, and smooth the wood properly ensures the chest will last and be safe for children to use.
Marking And Measuring Pieces
Start by clearly marking all your pieces on the wood. Use a pencil and a ruler or measuring tape to outline each part precisely. Double-check your measurements before cutting—accuracy here saves you from wasted wood and frustration later.
Think about the size of the toy chest and the thickness of the wood. Will the chest fit in the intended space? How much storage do you want? Planning these details helps avoid surprises as you progress.
Safe Cutting Techniques
Safety is key when working with saws or power tools. Always wear safety goggles and gloves to protect your eyes and hands. Secure the wood firmly with clamps to prevent slipping during cutting.
Cut slowly and steadily along your marked lines. If you’re new to using power tools, practice on scrap wood first to gain confidence. Remember, a smooth, controlled cut reduces the risk of splinters and errors.
Sanding For Smooth Edges
After cutting, sand every edge and surface until smooth. Use medium-grit sandpaper first, then finish with fine-grit for a polished feel. This step removes splinters that could hurt little hands and gives the chest a professional look.
Pay extra attention to corners and joints where kids are likely to touch. Have you noticed how a rough edge can turn a fun project into a painful mishap? Taking time to sand well shows you care about safety and quality.
Credit: www.etsy.com
Assembling The Toy Chest
Building a kids toy chest involves choosing simple materials and following clear instructions. Assemble the pieces carefully to create a safe and sturdy storage space. This project helps keep toys organized and the room tidy.
Assembling the Toy Chest is an exciting part of your DIY project. This stage brings all the pieces together. You’ll see your creation take shape. It requires patience and attention to detail. Follow these steps to ensure a sturdy and safe toy chest.Constructing The Frame
Begin with the frame. It’s the foundation of the toy chest. Use sturdy wood pieces. Align them carefully. Secure them with screws or nails. Ensure the corners are square. This keeps the chest stable. Check for any wobble. Adjust if necessary. A solid frame is crucial.Attaching The Panels
Next, attach the panels. These form the sides of the chest. Measure each panel. Make sure they fit perfectly. Use wood glue for added strength. Secure each panel with nails. Start with the sides. Then move to the front and back. Check alignment. Gaps can weaken the structure. Sand any rough edges. This ensures a smooth finish.Securing The Lid
The lid is the final piece. It should fit snugly. Use hinges for attachment. Position the hinges evenly. This allows smooth opening and closing. Consider a soft-close feature. It prevents loud slams. Test the lid several times. Ensure it operates smoothly. Secure any loose parts. Safety is essential for kids.Finishing Touches
Adding the finishing touches to your kids’ toy chest is where your project truly comes to life. This stage lets you customize the chest’s look and functionality to perfectly fit your child’s needs. Small details can make a big difference in safety, usability, and style.
Painting And Decorating
Choose non-toxic, child-safe paints to ensure the toy chest is safe for your little ones. Bright colors or fun patterns can turn the chest into a playful centerpiece in the room. You might even involve your kids in this step—letting them pick colors or add their own designs makes the chest feel truly theirs.
Adding decals, stickers, or stencils can bring extra personality without much effort. Think about themes your kids love, like animals, space, or favorite characters. These decorations also help the chest stand out and encourage tidying up.
Adding Safety Hinges
Safety hinges prevent the lid from slamming shut and protect little fingers from getting pinched. These hinges hold the lid open at any angle, giving you and your child peace of mind. Installing them is simple but crucial, especially if your child tends to be curious or clumsy.
Make sure to select hinges that fit the size and weight of your toy chest lid. Test the lid’s movement a few times after installation to ensure it operates smoothly and safely. Would you want to risk a tiny finger getting hurt? Safety hinges are worth the extra effort.
Installing Handles And Wheels
Handles make it easier for kids to open and move the chest, giving them independence. Choose handles that are comfortable to grip and securely fastened. Rounded or recessed handles reduce the chance of snagging on clothes or causing bumps.
Wheels add mobility, which is especially helpful if you want to clean or rearrange the room often. Opt for locking wheels to keep the chest stable when parked. Think about your space—do you need the chest to move around easily, or stay put? This decision affects which wheels work best.

Credit: www.wayfair.ca
Maintaining Your Toy Chest
Maintaining your kids’ toy chest keeps it safe and useful for years. Regular care prevents damage and keeps it looking nice. A well-kept toy chest also encourages kids to put toys away.
Cleaning Tips
Dust the toy chest weekly to avoid buildup. Use a soft cloth or microfiber duster for gentle cleaning. For sticky spots, wipe with a damp cloth and mild soap. Avoid harsh chemicals that can damage the finish. Dry the surface fully after cleaning to stop moisture damage.
Repairing Wear And Tear
Check hinges and handles often for loose screws or breaks. Tighten screws with a screwdriver to keep parts secure. Sand down rough edges or splinters to prevent injuries. Use wood filler to fix small dents or cracks. Repaint or seal areas where paint peels to protect wood from water.
Updating Decorations
Refresh the toy chest’s look with new paint or decals. Choose bright colors or fun themes that kids enjoy. Use stencils or stickers for easy decoration changes. Replace old knobs or handles with new, colorful ones. Personalize the chest with your child’s name or favorite characters.
Frequently Asked Questions
What Materials Are Best For Building A Kids Toy Chest?
Wood like pine or plywood is ideal for durability and safety. Choose non-toxic paint or finish to keep it child-friendly and long-lasting.
How Do I Ensure The Toy Chest Is Safe For Kids?
Use smooth edges, secure hinges, and non-toxic finishes. Avoid heavy lids or add safety hinges to prevent accidents.
What Size Should A Kids Toy Chest Be?
A chest around 24-30 inches wide and 18-20 inches tall works well. It fits most rooms and is easy for kids to access.
How Can I Customize A Toy Chest For My Child?
Paint it with bright colors, add decals, or stencil their name. Personal touches make it fun and encourage kids to organize toys.
Conclusion
Building a kids toy chest can be simple and fun. Choose safe materials and keep the design sturdy. Make sure it fits the space and holds plenty of toys. Personalize it with colors or stickers to make it special. This project helps keep the room tidy and teaches kids to organize.
Start small, and enjoy creating a useful piece for your child. A homemade toy chest lasts longer and brings joy every day. Give it a try and see the difference it makes!