






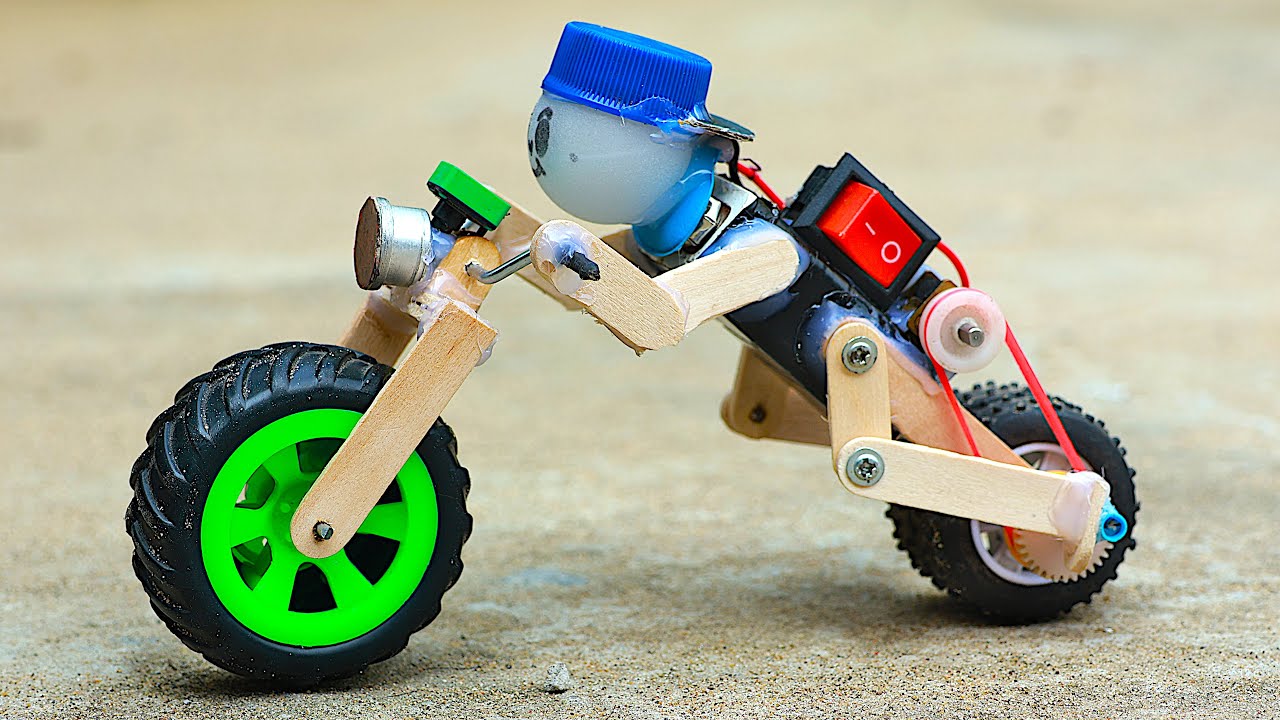
Have you ever wanted to create something fun with your own hands? Making a toy bike is easier than you think, and it’s a great way to spark your creativity.
Imagine building a mini bike that you can proudly show off or gift to someone special. In this guide, you’ll discover simple steps and tips that make the process enjoyable and stress-free. Ready to turn everyday materials into a cool toy bike?
Let’s get started!

Credit: m.youtube.com
Materials Needed
Gathering the right materials sets the foundation for building a sturdy and charming toy bike. Choosing quality supplies not only makes the process smoother but also ensures your finished product lasts longer and looks great. Let’s break down what you’ll need to get started.
Choosing The Right Wood
Wood is the heart of your toy bike. Opt for hardwoods like maple, oak, or birch—they provide strength without being too heavy. Softwoods like pine are easier to work with but might not hold up as well over time.
Think about the size and weight of your bike. Thicker wood pieces give more durability but can be tricky to shape. Have you considered visiting a local lumber yard to find unique wood cuts that fit your design?
Essential Tools
Having the right tools makes a big difference. You’ll need a saw for cutting the wood, sandpaper or a sander to smooth the edges, and a drill for making holes where parts will connect. A hammer or screwdriver will help with assembly.
Don’t forget measuring tools like a ruler or tape measure to keep your pieces precise. If you’ve never used these tools before, practicing on scrap wood can boost your confidence and improve accuracy.
Additional Supplies
- Wood glue:For strong joints without visible screws.
- Paint or wood stain:To add color and protect the wood.
- Small nails or screws:To secure parts firmly.
- Wheels:You can buy toy wheels or repurpose old ones.
- Sandpaper:Different grits for smoothing surfaces and edges.
What extra touches could make your toy bike unique? Maybe adding decals or using eco-friendly paints could be the twist that reflects your style.

Credit: cults3d.com
Designing Your Toy Bike
Designing your toy bike is the first creative step. It shapes the look and function of your project. A clear design helps make building easier and more fun. Focus on the bike’s shape, size, and parts that move.
Sketching The Bike Shape
Start by drawing the bike on paper. Use simple lines to outline the frame, wheels, and seat. Keep your sketch clear and basic. It guides the cutting and assembly of parts later.
Try different shapes to find what looks best. Round or square frames change the bike’s style. Sketching helps spot problems before you build.
Selecting Dimensions
Choose the size of your toy bike carefully. Decide the wheel diameter and frame length. Make sure parts fit well together.
Use a ruler to measure and mark dimensions on your materials. Standard sizes help make the bike stable and balanced. Keep dimensions consistent for smooth assembly.
Planning Moving Parts
Think about which parts will move, like wheels or pedals. Plan how to connect them using axles or small rods. Moving parts add fun and realism.
Draw details showing how parts fit and turn. Check if parts have enough space to move freely. Proper planning prevents parts from sticking or breaking.
Cutting And Shaping Parts
Cutting and shaping parts is a key step in making a toy bike. It turns raw wood into pieces that fit together perfectly. This stage requires care and precision. The right shapes make the toy bike look great and work well. Follow simple techniques to prepare the wood safely and smoothly.
Marking The Wood
Start by marking the wood clearly. Use a pencil and ruler for straight lines. Draw all parts before cutting. Mark edges and curves carefully. Check measurements twice to avoid mistakes. Clear marks guide your cuts and save time.
Safe Cutting Techniques
Use sharp tools for clean cuts. Choose a small saw or craft knife. Cut slowly and steadily along the lines. Keep fingers away from the blade. Work on a stable surface to prevent slips. Wear safety glasses to protect your eyes.
Sanding And Smoothing
Sand each piece after cutting. Use fine-grit sandpaper for smooth edges. Round sharp corners to avoid splinters. Sand in the direction of the wood grain. This step improves the look and feel. Smooth parts fit better and last longer.
Assembling The Bike
Assembling the toy bike brings all parts to life. It requires care and focus to fit pieces correctly. Each component must align well for smooth riding. Follow clear steps to build a sturdy toy bike.
Connecting The Frame
Start by joining the main frame parts. Match the holes on each piece carefully. Use screws or bolts to secure the frame tightly. Check that the frame is straight and stable. A strong frame supports the whole bike.
Attaching Wheels
Place the wheels on the frame’s axle points. Slide each wheel onto its axle smoothly. Use nuts or clips to lock wheels in place. Ensure wheels spin freely without wobbling. Proper wheel attachment improves balance and movement.
Adding The Seat And Handlebars
Fix the seat onto the seat post firmly. Adjust the seat height to fit the bike size. Attach the handlebars to the front fork securely. Tighten all bolts to avoid loose parts. Comfortable seat and handlebars make riding fun.
Painting And Decorating
Painting and decorating your toy bike brings it to life. It allows you to express creativity and add a personal touch. With the right approach, the bike becomes a unique masterpiece.
Choosing Paint Colors
Selecting the right colors is crucial. Choose vibrant hues that capture attention. Consider using colors that complement each other. Decide if you want a glossy or matte finish. Test your chosen colors on a small surface first. This ensures satisfaction with your choice.
Applying Paint Safely
Safety is important during painting. Work in a well-ventilated area to avoid fumes. Wear protective gear like masks and gloves. Use spray paint for smooth and even coverage. Keep the spray nozzle 6 inches away from the surface. Apply light coats to prevent drips and runs. Allow each coat to dry before applying the next.
Adding Decorative Details
Decorative details add character to your bike. Use stickers or decals for quick enhancements. Try hand-painting patterns or designs for a personal touch. Use stencils for precise shapes and logos. Consider adding reflective tape for safety and style. Let your imagination guide your decorative choices.
Safety Tips For Kids
Safety is the top priority when making a toy bike for kids. A safe toy helps avoid injuries and keeps playtime fun. Careful attention to materials, design, and supervision makes a big difference. Here are key safety tips to follow.
Using Non-toxic Materials
Choose materials that are safe for children. Non-toxic paints and glues prevent harmful chemicals. Avoid small parts that can break off and cause choking. Use wood, plastic, or metal that are child-friendly and durable.
Ensuring Smooth Edges
Check all edges and corners of the toy bike. Sand or file down sharp or rough spots. Smooth edges prevent cuts and scrapes during play. Test the bike by running your hand over every surface.
Supervision During Play
Always watch kids while they play with the toy bike. Supervision helps prevent accidents and unsafe use. Teach children how to use the bike properly. Be nearby to assist if needed and keep play safe.

Credit: www.msn.com
Frequently Asked Questions
What Materials Are Needed To Make A Toy Bike?
You need cardboard, glue, scissors, paint, and small wheels. These materials are affordable and easy to find. Using lightweight cardboard helps shape the bike better. Small plastic or wooden wheels work best for smooth movement.
How Long Does It Take To Build A Toy Bike?
Building a toy bike typically takes 1 to 2 hours. This depends on your crafting skills and the design complexity. Allow drying time for glue and paint. Planning and cutting parts carefully speeds up the process.
Can Kids Safely Make A Toy Bike At Home?
Yes, kids can safely make a toy bike with adult supervision. Use child-friendly tools like blunt scissors and non-toxic glue. Avoid small parts for younger children to prevent choking hazards. This activity boosts creativity and motor skills.
How To Customize A Toy Bike For Kids?
Customize by painting with favorite colors and adding stickers or decals. You can also use markers for unique designs. Personalizing the toy bike makes it more appealing and special. Use safe, non-toxic paints suitable for children.
Conclusion
Making a toy bike can be a fun and simple project. It helps you learn new skills step by step. You can use easy materials found at home or a store. Building it yourself gives a sense of pride and joy.
Plus, it can be a great gift or decoration. Remember to follow safety tips while creating your bike. Try different colors or designs to make it unique. Enjoy the process and share your creation with friends. Keep practicing, and you will improve every time.