






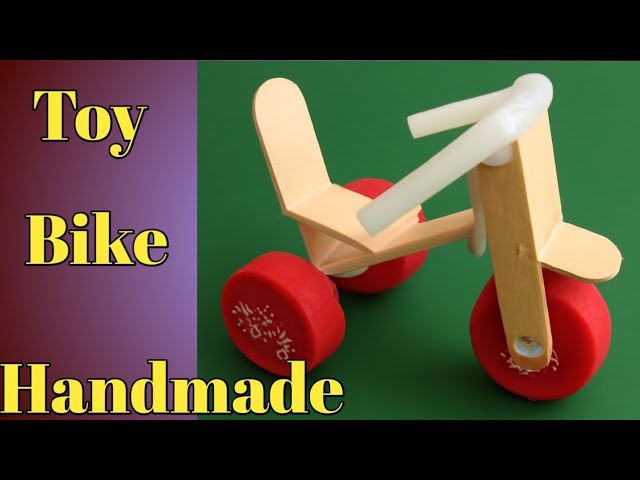
Have you ever wanted to create something special with your own hands? Imagine making a wooden toy bike that not only looks charming but also lasts for years.
This isn’t just any craft project—it’s a chance to bring joy to a child or add a unique piece to your home. In this guide, you’ll discover simple steps and insider tips that make building your wooden toy bike easy and fun.
By the end, you’ll feel proud knowing you made something truly one of a kind. Ready to start? Let’s dive in!

Credit: m.youtube.com
Materials And Tools Needed
Gathering the right materials and tools is the foundation of making a wooden toy bike that lasts and looks great. Choosing quality wood and having the right equipment on hand can save you time and frustration during the build. Let’s break down what you’ll need to get started confidently.
Choosing The Right Wood
Not all wood is equal when crafting a toy bike. You want wood that is sturdy but easy to work with. Pine and birch are popular choices because they are soft enough to cut smoothly yet durable for play.
Hardwoods like maple or oak are stronger but might need sharper tools and more effort. Think about the finish too; some woods take paint or varnish better, which affects the final look. Have you considered how the wood grain might influence the toy’s appearance?
Essential Tools List
Your project will be much smoother with the right tools ready. Basic woodworking tools include a handsaw or jigsaw for cutting shapes, a drill for making holes, and sandpaper or a sanding block to smooth edges.
Adding clamps helps keep pieces steady while you work, and a screwdriver is necessary for assembling parts. If you want more precision, a small chisel or carving knife can help shape details. What tools do you already have that could work for this project?
Safety Gear
Safety should never be an afterthought. Protect your eyes with safety goggles, especially when cutting or sanding. A dust mask is essential to avoid breathing in wood particles.
Gloves can protect your hands from splinters and sharp tools. Make sure your workspace is well-lit and ventilated to reduce hazards. How often do you check that your safety gear is in good condition?

Credit: www.youtube.com
Preparing The Wood Pieces
Preparing the wood pieces is the first crucial step in making a wooden toy bike. It sets the foundation for the entire project. Proper preparation ensures all parts fit well and the bike looks neat.
Each wood piece must be measured, cut, and smoothed carefully. This process helps avoid mistakes later. Take your time and work with focus for best results.
Measuring And Marking
Use a ruler or measuring tape to get exact lengths. Mark the wood with a pencil for clear cutting lines. Double-check measurements before marking to prevent errors.
Mark all parts: frame, wheels, seat, and handlebars. Use straight lines and clear marks for easy cutting. Consistent measurements keep the bike balanced and sturdy.
Cutting Techniques
Choose the right saw for clean cuts, like a jigsaw or handsaw. Follow marked lines closely for precision. Cut slowly to avoid splintering or mistakes.
Keep the wood steady using clamps or a workbench. Safety first: wear goggles and work gloves while cutting. Smooth cuts mean easier assembly later.
Sanding For Smooth Edges
Sand all cut edges with fine-grit sandpaper. This removes splinters and sharp spots. Smooth edges are safer for children to handle.
Sand in the direction of the wood grain for best results. Check every piece for rough areas and sand again if needed. Soft, smooth wood feels nice and looks professional.
Assembling The Frame
Assembling the frame is a key part of making a wooden toy bike. It shapes the bike’s structure and holds everything together. Careful assembly ensures the bike is strong and safe for play. Follow clear steps to join the parts firmly and check for stability throughout the process.
Joining The Main Parts
Start by arranging the main wooden pieces: the frame sides, top bar, and bottom bar. Align edges carefully so the frame forms a solid rectangle or triangle shape. Use clamps to hold parts in place while fitting them together. Check the angles with a carpenter’s square for accuracy. Good alignment prevents wobbling later.
Ensuring Stability
Test the frame’s stability by gently pressing on each joint. The frame should not move or creak. Add small wooden blocks inside corners if extra support is needed. Sand down rough edges to avoid splinters. A strong frame supports the weight and rough play without breaking.
Using Wood Glue And Screws
Apply wood glue along all joining surfaces for a tight bond. Spread glue evenly to cover the entire contact area. Clamp the parts firmly and let the glue dry for several hours. After drying, insert screws at key joints for extra strength. Pre-drill holes to prevent the wood from splitting. Tighten screws just enough to hold parts securely without cracking the wood.

Credit: www.youtube.com
Crafting The Wheels
Crafting the wheels is a key part of making a wooden toy bike. The wheels must be strong and smooth. This helps the bike roll well and look great. Focus on precise cuts and proper assembly for best results.
Cutting Wheel Shapes
Start by choosing a sturdy wood piece for the wheels. Use a compass or round object to trace circles. Cut the circles carefully with a saw or jigsaw. Sand the edges smooth to avoid splinters. Make sure each wheel is the same size for balance.
Drilling Axle Holes
Mark the center of each wooden wheel with a pencil. Use a drill with a bit that fits the axle size. Drill a hole straight through the center of each wheel. Keep the holes clean and smooth inside. This step ensures the wheels spin easily on the axle.
Attaching Wheels To Frame
Slide the wheels onto the bike’s wooden axle. Use washers or spacers to keep wheels from rubbing. Secure the wheels with nuts or wood glue, depending on design. Check that wheels turn freely without wobbling. Test the wheel attachment before final finishing touches.
Adding Finishing Touches
Smooth the bike’s edges using sandpaper for a safe, polished look. Apply paint or varnish to protect the wood and add color. Attach any extra parts securely to complete the toy bike.
Adding finishing touches to your wooden toy bike makes it unique. This is the stage where creativity meets craftsmanship. A well-finished bike not only looks good but lasts longer. Let’s explore how to enhance your toy bike.Painting And Decorating
Start with a base coat of paint. Use non-toxic, child-safe paints for safety. Bright colors make the bike attractive. Use small brushes for detailed designs. Stripes, stars, or polka dots add charm. Allow each coat to dry fully. Layering different colors adds depth.Applying Protective Coating
A protective coat keeps the paint from chipping. Use a clear, non-toxic sealant. Apply with a brush for even coverage. Let it dry in a dust-free area. This makes the bike durable and shiny. It also protects against moisture.Personalizing The Toy Bike
Add personal touches for a special feel. Engrave the child’s name on the frame. Stickers can add fun elements. Use themed stickers like animals or cars. Attach a bell or basket for extra play value. Let the child choose some decorations. This makes the toy bike truly theirs.Tips For Safe Play
Ensuring safe play with a wooden toy bike is important for every child’s enjoyment. Safety checks help prevent accidents and injuries. Taking time to inspect the toy before use makes playtime worry-free.
Checking For Sharp Edges
Run your hand along every surface of the wooden bike. Look closely for any splinters, rough spots, or sharp corners. Sand down all edges until they are smooth. Use fine-grit sandpaper for a gentle finish. A smooth surface keeps little hands safe from cuts and scratches.
Testing Durability
Press, twist, and shake the toy bike gently. Make sure all parts stay firmly attached. Check wheels, pedals, and handlebars for strength. A sturdy toy holds up to rough play. Replace or repair any loose or weak pieces immediately. This prevents choking hazards and breakage during use.
Supervision Recommendations
Always watch young children while they play with the toy bike. Stay close to help if they lose balance or need assistance. Teach children to use the toy bike carefully and on safe surfaces. Avoid steep or slippery areas to reduce falls. Supervision keeps playtime safe and fun.
Frequently Asked Questions
What Materials Are Needed To Make A Wooden Toy Bike?
You need quality wood, sandpaper, wood glue, non-toxic paint, and small screws. These materials ensure a durable, safe, and smooth-finished toy bike for children.
How Long Does It Take To Build A Wooden Toy Bike?
Building a wooden toy bike typically takes 4 to 6 hours. This includes cutting, assembling, sanding, and painting, depending on your skill level and tools available.
Can Beginners Make A Wooden Toy Bike Easily?
Yes, beginners can make a wooden toy bike with clear instructions. Start with simple designs and basic tools for a smooth and enjoyable experience.
Is It Safe To Use Non-toxic Paint On Wooden Toys?
Absolutely. Non-toxic paint is safe for children and prevents harmful chemical exposure. It also provides vibrant colors and protects the wood from damage.
Conclusion
Making a wooden toy bike is fun and rewarding. You only need a few tools and simple steps. Each part you build adds to the final bike. Crafting it helps improve your skills and patience. Kids will love a toy made with care.
Try different designs to make it unique. Keep practicing, and your work will get better. Enjoy the process and share your creation with others. This project brings creativity and joy together.