






Have you ever struggled to put a bike tire on your child’s ride-on toy? It can be tricky, but you don’t have to feel frustrated or stuck.
Imagine being able to fix it quickly and easily, so your little one can get back to having fun. In this guide, you’ll discover simple, step-by-step tips that make the whole process smooth and stress-free. Keep reading, and you’ll learn exactly how to get that tire on right the first time.
Your ride-on toy will be ready to roll in no time!
Tools Needed
Before you start putting a bike tire on your ride-on toy, having the right tools makes the job easier and safer. Using proper tools helps you avoid damage to the tire and the toy itself. Let’s look at what you’ll need to have on hand before you begin.
Essential Tools
- Tire Levers:These small, sturdy tools help you pry the tire off and back onto the rim without damaging the rubber or metal.
- Wrench or Socket Set:You’ll need this to remove and tighten the nuts or bolts holding the wheel in place. Make sure the sizes match your toy’s hardware.
- Air Pump:A reliable pump is necessary to inflate the tire once it’s on the rim. Check if your tire valve matches the pump head.
- Screwdriver:Sometimes, small screws secure parts around the wheel area. Having a flathead and Phillips screwdriver covers most needs.
Think about the last time you tried fixing something without the right tools—did it slow you down or cause frustration? Having these essentials ready can save you time and prevent mistakes.
Optional Accessories
- Soapy Water or Lubricant:Applying a bit of soapy water on the tire bead can make sliding it onto the rim easier.
- Gloves:Protect your hands from scrapes and dirt, especially if the tire or wheel is dusty or greasy.
- Tire Pressure Gauge:This helps you ensure the tire is inflated to the correct pressure, which improves ride quality and safety.
- Replacement Tube:Just in case your tube is damaged or old, having a spare can keep you ready for any surprises.
Have you ever struggled to fit a tire and wished you had a little extra help? These optional tools might seem small but can make the process smoother and more enjoyable.
Preparing The Toy
Preparing the toy is the first step to successfully fitting a new bike tire. This step ensures the wheel is ready for the new tire without any issues. Proper preparation helps the tire fit smoothly and last longer. It also makes the whole process safer for the child who will use the toy.
Start by removing the old tire carefully. This gives you clear access to the wheel and lets you check for any damage. Next, clean the wheel thoroughly. Dirt and debris can prevent the new tire from fitting properly. A clean wheel also helps the tire grip better and stay in place.
Remove Old Tire
Begin by turning the toy on its side. Look for the tire’s edge and pull it away from the wheel rim. Use your hands or a flat tool to ease the tire off. Avoid sharp tools that can damage the wheel. Work around the tire slowly until it is fully removed.
Clean The Wheel
Use a soft cloth or brush to remove dirt and dust from the wheel. Check for rust, broken parts, or sharp edges. Clean the rim and spokes carefully. Use mild soap and water if needed. Dry the wheel completely before fitting the new tire. A clean wheel ensures better tire performance and safety.
Selecting The Right Tire
Selecting the right tire is crucial for a smooth and safe ride on your child’s ride-on toy. A tire that fits well and matches the toy’s design not only improves performance but also extends the toy’s life. Before you buy, consider the size and type carefully to avoid common mistakes that can lead to frustration or damage.
Check Tire Size
Start by looking at the current tire or the toy’s manual to find the exact size needed. Tires come with measurements like diameter and width printed on the side, such as “8 x 2.5”.
If you can’t find the size, use a tape measure to get the diameter from one edge to the other across the center. Don’t guess—using the wrong size tire can make the toy unstable or cause it not to fit at all.
Choose Compatible Types
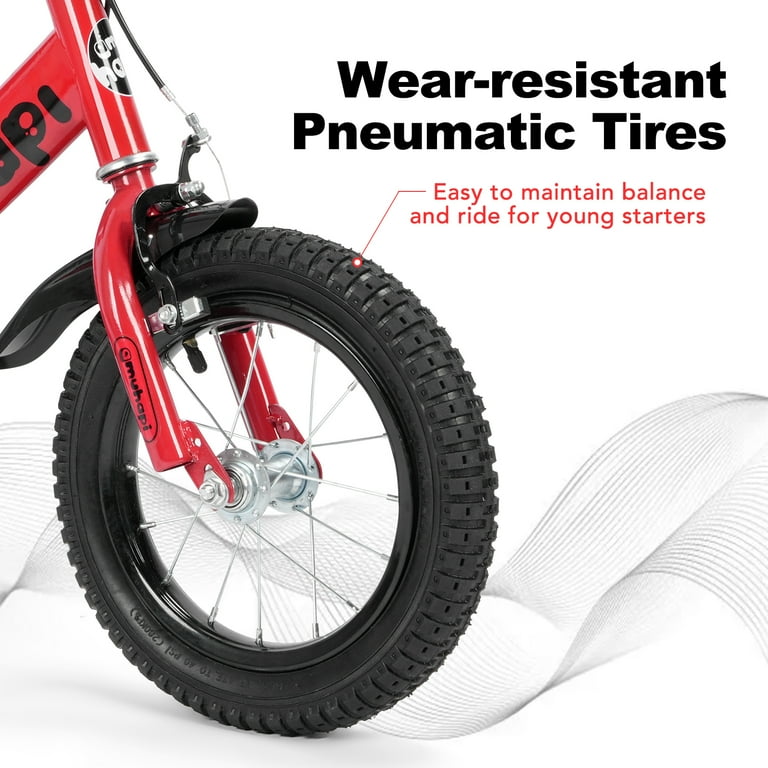
Not all tires are built the same. Some ride-on toys use solid rubber tires, while others require air-filled (pneumatic) tires for better shock absorption.
Think about where the toy will be used most. Solid tires handle rough surfaces well and need less maintenance, but pneumatic tires offer a smoother ride on uneven terrain.
Ask yourself: does your child need a tire that’s easy to maintain or one that provides extra comfort? Selecting a compatible type helps you avoid frequent replacements and keeps your child happy during playtime.
Credit: www.walmart.com
Mounting The Tire
Place the tire carefully onto the wheel rim, aligning it evenly all around. Use gentle pressure to fit the tire bead into the rim groove. Check the tire for proper seating before inflating to ensure a secure fit.
Mounting the Tire Mounting a bike tire on a ride-on toy might seem daunting at first, but with a little patience and guidance, it can be a straightforward task. Whether you’re fixing a flat or upgrading the tire for better performance, ensuring a proper fit is crucial for safety and smooth operation. Let’s dive into the steps to make this process seamless.Aligning The Tire
Begin by ensuring the tire is correctly aligned with the wheel rim. A misaligned tire can lead to uneven wear and an uncomfortable ride for your child. Before placing the tire on the rim, check for any directional arrows on the tire that indicate the correct rotation. Align these arrows with the direction of travel to ensure optimal performance.Securing The Tire
Once aligned, it’s time to secure the tire onto the rim. Start by gently pushing one side of the tire into the rim, using your thumbs to work the tire around the circumference. Take care not to pinch the inner tube if you’re using one. Consider using tire levers if the fit is too tight, but avoid using sharp objects that could damage the tire. After seating the tire on one side, check that the inner tube is entirely within the tire and not pinched. Then, work the other side of the tire onto the rim. A snug fit is key, so check all around the rim to ensure the tire is seated evenly. Inflate the tire to the recommended pressure while periodically checking for any bulges or uneven sections. Proper inflation not only ensures a smooth ride but also extends the lifespan of the tire. Is there a specific trick you use to make mounting easier? Share your tips in the comments below!Inflating The Tire
Inflating the tire on your ride-on toy is a crucial step that ensures smooth rides and prevents unexpected flats. Proper inflation keeps the tire firm enough to support weight but soft enough to absorb bumps. Let’s talk about how to get the right pressure and the best way to use a pump for the job.
Recommended Pressure
Check the sidewall of the tire for the recommended pressure range, usually measured in PSI (pounds per square inch). Most ride-on toy tires require a pressure between 20 to 30 PSI, but this can vary based on tire size and toy weight.
Underinflated tires make the ride sluggish and can damage the tire quickly. Overinflated tires, on the other hand, can cause a rough ride and increase the risk of popping. What pressure will give your child the smoothest, safest ride today?
Using A Pump
Start with a simple hand pump or a bike pump with a pressure gauge to avoid overinflating. Attach the pump nozzle firmly to the valve stem to prevent air leaks during inflation.
Pump steadily and check the pressure gauge frequently. If your pump doesn’t have a gauge, use a separate tire pressure gauge to measure often. Stopping to check pressure helps you get it just right without guesswork.
When you’ve reached the recommended pressure, carefully remove the pump and quickly replace the valve cap. This small step keeps dirt out and helps maintain tire pressure longer. Have you noticed how much easier it is to ride when the tires are properly inflated?

Credit: www.amazon.com
Final Checks
After successfully mounting the bike tire on the ride-on toy, it’s crucial to perform final checks. These ensure safety and smooth performance before your child takes it for a spin. Skipping these steps can lead to unexpected issues or even accidents.
Inspecting For Proper Fit
Look closely at how the tire sits on the rim. It should be snug without any gaps or bulges. If the tire feels loose or uneven, it might slip off during use, which is dangerous.
Check the alignment of the tire with the toy’s frame. It should rotate freely without rubbing against the body or any components. Sometimes a slight adjustment in the axle or tightening the nuts fixes this immediately.
Don’t forget to verify the tire pressure if it’s an inflatable type. Under or over-inflated tires affect the ride quality and can wear out faster. A quick squeeze test or using a pressure gauge can save you trouble later.
Test Ride Tips
Before letting your child ride, take the toy for a slow test ride yourself. This helps you feel any wobbling, resistance, or unusual noises. These signs often point to an issue that’s easy to fix if caught early.
Try steering the toy through turns and over small bumps to check stability. Does the tire maintain grip and balance? If not, reassess the tire fit or the toy’s suspension.
Ask yourself: Would I feel confident letting my child ride on this? If the answer is no, revisit the previous steps. Safety comes first, and a few extra minutes now can prevent bigger problems.

Credit: www.homedepot.com
Frequently Asked Questions
How Do I Remove The Old Tire From A Ride-on Toy?
To remove the old tire, first loosen the wheel nuts with a wrench. Pull the tire off the axle carefully. Use lubricant if the tire is stuck. Avoid damaging the wheel or axle during removal.
What Tools Are Needed To Put A Bike Tire On A Ride-on Toy?
You need a wrench, tire levers, and possibly lubricant. A pump helps to inflate the tire after installation. These tools ensure a smooth and secure tire fit on the ride-on toy.
Can I Use Any Bike Tire For A Ride-on Toy?
No, choose a bike tire that matches the ride-on toy’s wheel size. Check the tire diameter and width for compatibility. Using the correct size ensures safety and proper function.
How To Properly Inflate A Bike Tire On A Ride-on Toy?
Use a bike pump and inflate to the tire’s recommended pressure. Check the sidewall for the PSI range. Proper inflation improves ride comfort and tire durability.
Conclusion
Putting a bike tire on a ride-on toy is simple with the right steps. Take your time and follow the guide carefully. Use the correct tools and check the tire fits well. Tighten everything securely to avoid problems while riding.
A well-installed tire makes the toy safer and more fun. Keep practicing, and soon you will do it quickly. Enjoy the ride and the happy moments it brings.