



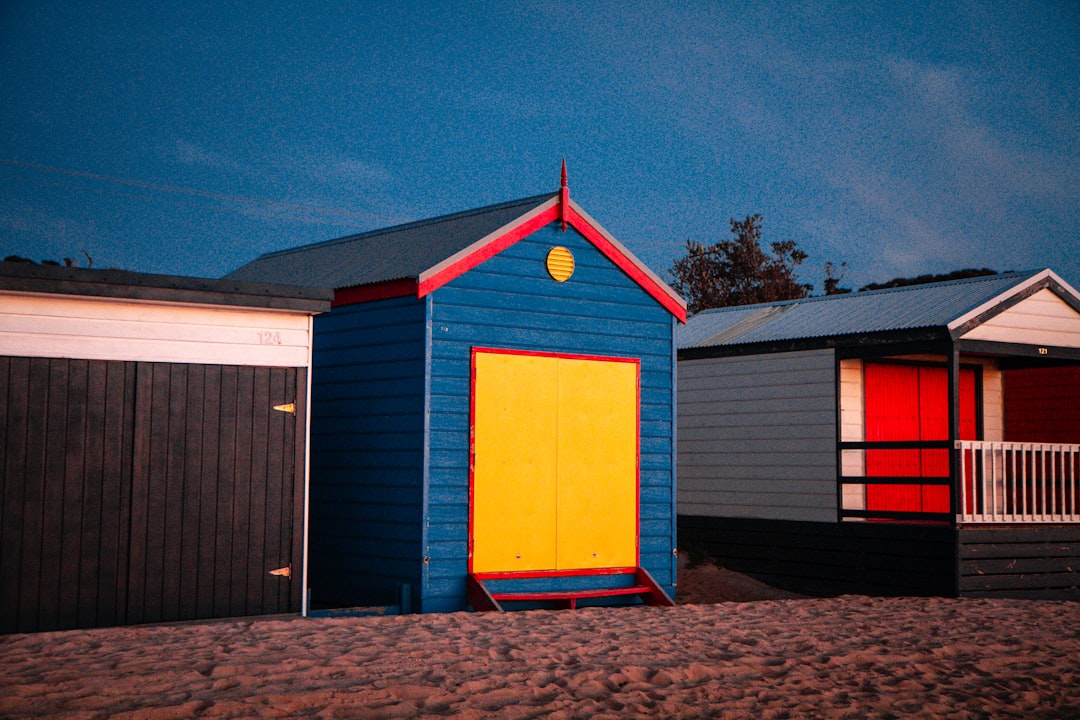
Imagine creating a tiny beach house that feels like a real getaway—right in your own home. You can build a toy beach house that sparks fun, creativity, and endless playtime.
Whether you want a special project to enjoy or a unique gift, this guide will show you simple steps to bring your idea to life. Ready to turn your imagination into a charming little beach retreat? Keep reading, and you’ll discover how easy and rewarding it can be.
Materials Needed
Gathering the right materials sets the foundation for making a toy beach house that’s both fun to build and enjoyable to play with. Having everything ready before you start saves time and keeps your creative flow uninterrupted. Think about what you already have at home and what you might want to add to make your beach house truly unique.
Basic Craft Supplies
- Cardboard or foam board:These are perfect for building the main structure. Choose sturdy pieces that can hold their shape well.
- Glue:A strong craft glue or hot glue gun will keep everything together. Make sure it’s safe and easy to handle, especially if kids are involved.
- Scissors or craft knife:Sharp cutting tools help you create precise edges and details. Always handle with care.
- Paints and brushes:Acrylic paints work great on cardboard or foam board. Pick bright colors that remind you of the beach.
- Ruler and pencil:Measure twice, cut once. Marking your materials accurately makes assembling easier.
Optional Decorative Items
- Colored paper or fabric scraps:Use these to add texture or decorate walls and furniture inside the house.
- Miniature shells or pebbles:Adding real beach elements gives your toy house an authentic seaside vibe.
- Stick-on gems or glitter:Want a bit of sparkle? These small details can make your beach house stand out.
- Craft foam sheets:These can be cut into doors, windows, or even beach towels to add depth and variety.
- Markers or colored pencils:Great for drawing fine details like window panes or beach signs.
Do you have some unexpected materials lying around that could add a personal touch to your beach house? Sometimes, the best creations come from using what’s already at hand. Experimenting with different textures and colors can turn a simple project into a memorable keepsake.
Choosing A Design
Choosing a design is the first fun step in making a toy beach house. The design decides the house’s look and how easy it will be to build. Think about who will play with it and the space you have. Simple designs suit quick projects and younger kids. Detailed styles fit experienced builders and those who want a special look.
Simple Vs. Detailed Styles
Simple styles use basic shapes like squares and rectangles. They require fewer materials and less time. These are good for beginners and young children. Simple houses often have one or two rooms and basic windows and doors.
Detailed styles include extra features like balconies, furniture, and textured walls. They take more time and skill but look very real. Detailed designs can have multiple floors and small decorations. Choose this style if you enjoy crafts and want a unique toy.
Sketching Your Idea
Sketching your design helps plan the house clearly. Use pencil and paper to draw the front, sides, and top views. Keep the lines simple at first. Add details like windows, doors, and roof shape.
Sketching lets you spot problems early. You can change the size or shape before building. Use a ruler for straight lines and measure parts to fit well. A clear sketch makes the building process smooth and fun.
Building The Structure
Building the structure is the key part of making a toy beach house. It gives shape and form to your project. A strong and neat structure makes the house sturdy and fun to play with. Focus on precise cutting and careful assembly. Take your time to create smooth edges and firm joints. This will make your toy beach house look great and last longer.
Cutting And Shaping
Start by choosing the right materials, like balsa wood or sturdy cardboard. Use a ruler and pencil to mark the pieces clearly. Cut the walls and roof parts carefully with a craft knife or small saw. Smooth any rough edges with sandpaper for a clean finish. Shape the roof pieces to fit well on top of the walls. Make sure each piece matches your design plan exactly.
Assembling Walls And Roof
Begin by joining the walls together. Use wood glue or strong craft glue for secure bonding. Hold the pieces in place until the glue sets. Check that the corners are square and straight. Next, attach the roof to the top of the walls. Align it carefully to avoid gaps or overhangs. Allow the structure to dry completely before moving to decoration. This ensures your toy beach house stays strong and steady.
Adding Beach Elements
Adding beach elements brings your toy beach house to life. These details create a fun and realistic setting. Small touches make the scene more inviting and playful. Use simple materials to mimic the beach environment. This helps spark imagination during playtime.
Creating Sand And Water Effects
Use fine sand or craft sand for a realistic beach base. Glue the sand onto a sturdy surface around the house. Spread it evenly for a smooth look. For water, try clear resin or blue-tinted glue. Pour it gently near the sand area to form a small pond or ocean. Let it dry completely to avoid mess. Cotton or clear plastic sheets can also imitate waves or sea foam. These textures add depth and realism to your beach scene.
Incorporating Miniature Accessories
Place tiny beach chairs, umbrellas, and towels near the house. Use small shells and pebbles to decorate the sand area. Add miniature beach balls or surfboards for extra fun. You can craft these items with clay or buy them online. Position them naturally to make the scene lively. Accessories help children imagine beach activities while playing. Keep the scale consistent to maintain realism.
Painting And Decorating
Create a charming toy beach house with paint and decorations. Choose bright colors for a cheerful look. Add small details like windows and doors to enhance realism.
Painting and decorating your toy beach house is where the magic truly happens. It’s your chance to infuse personality and create a unique miniature paradise. Whether you’re aiming for a vibrant tropical vibe or a serene coastal retreat, the right colors and details make all the difference.Color Choices
Choosing the right colors sets the tone for your beach house. Bright blues and sunny yellows can evoke a cheerful, beachy atmosphere. Neutral tones, like soft whites and sandy beiges, offer a calm and classic look. Consider the overall theme you want. Are you inspired by the vibrant hues of a Caribbean island or the muted shades of a New England shoreline? Use your vision to guide your palette. Remember, lighter colors can make small spaces appear larger. If your beach house is compact, opt for pastel shades to maximize the airy feel.Adding Texture And Details
Adding texture brings your toy beach house to life. Think about incorporating materials like tiny wooden planks or faux stone to mimic real beachside architecture. Small details make a big impact. Use mini seashells, beads, or even pieces of scrap fabric to add character and charm. These tiny touches can transform a plain surface into a lively scene. Have you considered the textures found in nature? Sandpaper can replicate sandy surfaces, and cotton balls can mimic fluffy clouds. These simple additions can make your beach house truly unique. What’s your favorite detail to add? Personal touches make your creation stand out and feel more connected to your vision. Engage with your creativity and let your imagination run wild!Safety Tips
Safety is key when making a toy beach house for children. Choosing the right materials and ensuring proper care can prevent accidents. This section covers simple safety tips to keep playtime fun and safe.
Non-toxic Materials
Select materials that are safe and free from harmful chemicals. Look for paints, glues, and finishes labeled non-toxic. Avoid small parts that could cause choking hazards. Natural wood or BPA-free plastics are good choices. Test any materials on a small piece before full use. This ensures no allergic reactions or irritations occur.
Supervision And Handling
Always supervise children during play. Teach them how to handle the toy gently. Store the toy beach house in a safe place after use. Check regularly for loose parts or sharp edges. Repair or replace damaged pieces immediately. Proper care extends the toy’s life and keeps kids safe.
Playing And Displaying
Playing with and displaying your toy beach house can bring endless joy and creativity to your space. This is where your creation truly comes alive, offering both a fun activity and a charming decoration. How you interact with it can inspire new stories and even spark fresh ideas for your next project.
Creative Play Ideas
Turn your toy beach house into the centerpiece of a vibrant summer scene. Add small figurines, like tiny beachgoers or animals, to create lively stories. You can even use colored sand or craft paper to mimic water and sand around the house.
Try setting up a day and night scenario. Use small LED lights inside the house to show evening scenes, and swap them out for natural light during the day. This contrast helps develop imaginative play and keeps the experience exciting every time.
Think about adding simple props like mini surfboards, beach towels, or palm trees made from craft supplies. These details make playtime more immersive and give your toy beach house a unique personality.
Showcasing Your Toy Beach House
Find a special spot to display your toy beach house where it catches attention but stays safe from damage. Shelves near windows or a dedicated corner in your room work perfectly. Lighting can highlight its features—consider a small spotlight or natural sunlight.
Use a clear display case or a decorative tray to keep dust away and add a polished look. Group the house with other beach-themed items like shells, miniature boats, or small framed photos of the beach to create a themed display.
Think about changing the display seasonally. You could add holiday decorations or swap out beach elements for autumn leaves, making your toy beach house a year-round focal point. How would your display evolve with the seasons?
Frequently Asked Questions
What Materials Are Needed To Make A Toy Beach House?
You need wood, paint, glue, sandpaper, and small decorative items. These materials help create a sturdy and realistic toy beach house. Choose non-toxic paint for safety and use lightweight wood for easy handling and durability.
How Long Does It Take To Build A Toy Beach House?
Building a toy beach house typically takes 3 to 5 hours. Time depends on design complexity and drying time for glue and paint. Simple designs take less time, while detailed houses need more patience and precision.
Can Children Safely Make A Toy Beach House?
Yes, children can safely make a toy beach house with adult supervision. Use child-friendly materials and tools. Supervise the use of glue and paint to ensure safety. This activity enhances creativity and fine motor skills.
How To Decorate A Toy Beach House Creatively?
Use shells, miniature furniture, paint, and sand for decoration. Add beach-themed stickers or small plants for extra charm. Creativity in decoration makes the toy beach house more personalized and visually appealing.
Conclusion
Making a toy beach house can be fun and simple. Use basic materials and follow easy steps. Let your creativity guide you through the process. This project helps develop skills and offers joy. Kids and adults enjoy building and playing together.
Try different designs to make it unique. Share your creation with friends and family. Enjoy the satisfaction of crafting something special by hand. Keep practicing to improve your toy-making skills. Small projects like this bring big smiles.