



Have you ever wanted to create a fun toy that your child can ride and enjoy for hours? Making a toy horse to ride on is easier than you might think, and it brings endless joy and imagination to your little one.
In this guide, you’ll discover simple steps and tips to build a safe, sturdy, and charming ride-on toy horse. Whether you’re a beginner or just looking for a creative project, this article will help you turn basic materials into a special toy that feels like magic.
Ready to bring smiles and excitement into your home? Let’s get started!
Materials Needed
Making a toy horse to ride on is a fun project. You need the right materials to build it safely and well.
This guide will help you gather all the supplies before you start making your toy horse.
Basic Supplies
Basic supplies are the main things you need to build the toy horse. These include wood, paint, and tools.
- Wooden boards or plywood for the horse body
- Wooden dowels or rods for handles and legs
- Sandpaper to smooth rough edges
- Wood glue and nails to hold pieces together
- Paint and brushes for decoration
- Foam or soft fabric for the saddle
- Strong rope or straps for reins
- Basic tools like saw, hammer, and screwdriver
Safety Gear
Safety gear protects you while making the toy horse. Always use the right gear to avoid injuries.
- Safety goggles to protect your eyes from dust and wood chips
- Work gloves to protect your hands from splinters and tools
- A dust mask to avoid breathing sawdust
- Ear protection if you use loud power tools
- Closed-toe shoes to protect your feet
Choosing The Right Design
Picking the right design is important when making a toy horse to ride on. It affects how fun and safe the toy will be.
Think about who will use the toy and where it will be played with. This helps you choose a good design.
Simple Vs. Detailed
Simple designs are easier to make and usually safer for kids. They have fewer parts and less chance to break.
Detailed designs look more like real horses. They may have extra decorations but can be harder to build and clean.
- Simple: easy to build and clean
- Simple: fewer small parts, safer
- Detailed: looks more realistic
- Detailed: may need more care
Size And Proportions
Choose a size that fits the child who will ride the toy horse. It should be easy to get on and off.
Keep the proportions right. The seat should be wide and strong enough to hold the child safely.
- Height matches child’s leg length
- Seat width fits child’s hips
- Stable base to prevent tipping
- Handle height easy to reach
Building The Frame
Building the frame is the first step to make a toy horse you can ride on. The frame gives the toy its shape and strength. You need to work carefully to make it safe and sturdy.
This guide will help you cut the wood pieces and assemble the base of the frame. Follow each part to create a strong foundation for your toy horse.
Cutting Wood Pieces
Start by measuring and cutting the wood pieces for the frame. Use smooth, straight boards that are free of cracks. Cut all pieces to the correct size before you begin assembly.
Make sure to wear safety goggles and work on a stable surface. Use a saw that you are comfortable with, such as a handsaw or power saw, to cut the wood accurately.
- Cut two long side pieces for the horse’s body
- Cut shorter pieces for the front and back supports
- Cut pieces for the seat and footrests
- Sand all edges to avoid splinters
Assembling The Base
Lay out the cut wood pieces on a flat surface. Start by connecting the two long side pieces with the front and back supports. Use wood glue and screws to hold them tightly.
After the frame base is secure, attach the seat piece across the top. Add footrests on the sides to make riding easier. Check that all parts fit well and the base is stable before moving on.
- Join side pieces with front and back supports
- Use wood glue for extra strength
- Secure with screws or nails
- Attach seat piece on top of the frame
- Add footrests on each side
- Check for stability and adjust if needed
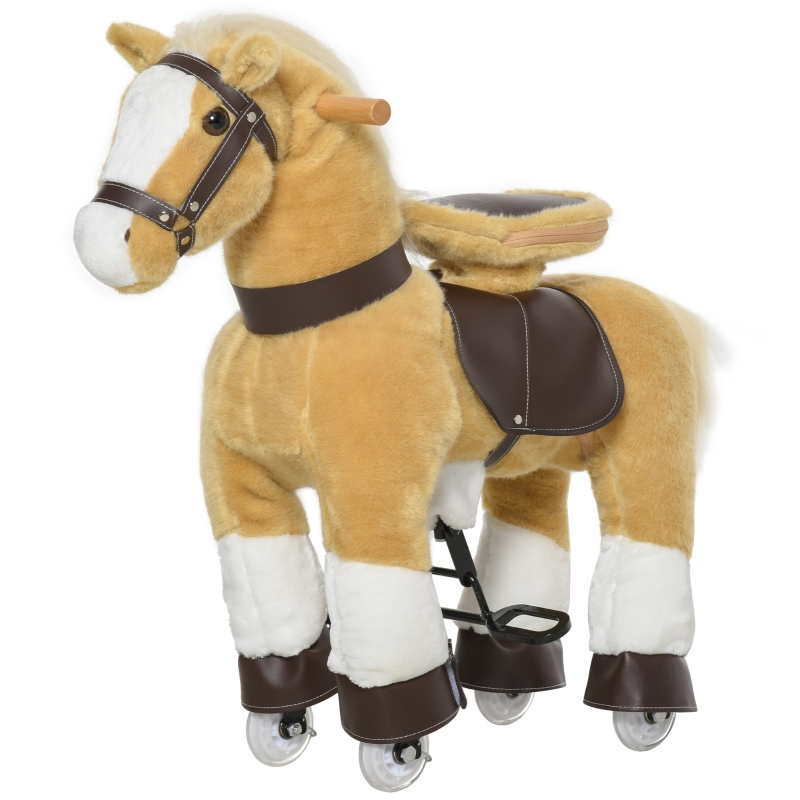
Credit: www.aosom.com
Adding Wheels
Adding wheels to your toy horse makes it fun to ride and easy to move. Wheels help the horse roll smoothly on the floor.
Choosing the right wheels and attaching them well is important for safety and durability. This guide will help you add wheels step by step.
Selecting Wheels
Pick wheels that fit the size and weight of your toy horse. Bigger wheels work better on rough floors, while smaller wheels are good for smooth surfaces.
Make sure the wheels turn easily and are strong enough to support a child’s weight. Plastic or rubber wheels are good choices.
- Choose wheels about 4 to 6 inches wide
- Use rubber wheels for quiet and smooth rolling
- Check wheel bearings for easy turning
- Make sure wheels fit the axles you plan to use
Attaching Wheels Securely
Attach wheels firmly to the toy horse to avoid accidents. Use strong axles and fasteners to keep the wheels in place.
Test the wheels after attaching to make sure they spin freely and do not wobble. Tighten all bolts and nuts securely.
- Use metal axles that fit the wheel holes exactly
- Secure axles with washers and nuts on both sides
- Tighten nuts with a wrench but do not over-tighten
- Check wheels for smooth rotation after assembly
Creating The Horse Body
Making a toy horse to ride on starts with building a strong body. The body should be sturdy and safe for a child.
Use wood or strong cardboard to create the main shape. This will support the head, neck, and legs.
Shaping The Head And Neck
Cut the head shape from a flat board. Make sure it looks like a horse’s head with ears.
Attach a curved piece to form the neck. This will connect the head to the body smoothly.
- Draw the head shape on wood or cardboard
- Cut carefully along the lines
- Shape the neck with a curved piece
- Attach the head and neck to the body securely
Crafting The Tail And Mane
Use yarn or strips of fabric to make the tail and mane. These add a fun, realistic look.
Glue or staple the mane along the neck. Attach the tail at the back of the body.
- Cut yarn or fabric into strips
- Attach mane along the neck’s top edge
- Fix the tail to the back bottom
- Use glue or staples to secure them well
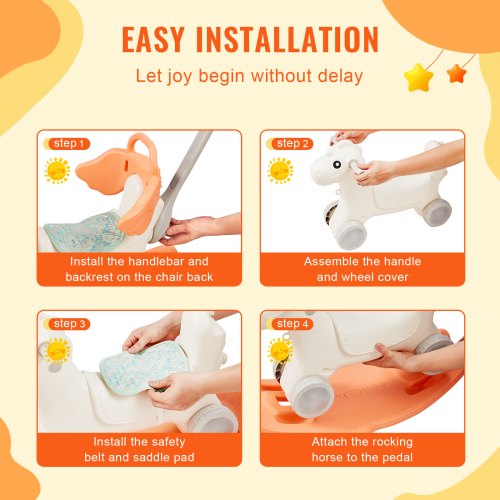
Credit: www.vevor.ca
Painting And Decorating
Painting and decorating your toy horse makes it look special and fun. You can use colors and patterns to give it character.
Take your time to choose paint and add details carefully. This will make your toy horse a beautiful ride-on toy.
Choosing Paint Colors
Pick colors that you like and that look good on wood. Bright colors make the toy horse lively. Soft colors give a calm feel.
Use non-toxic paint to keep it safe for children. You can choose one main color or mix two or three colors for fun.
- Red, blue, or yellow for bold looks
- Pastel colors like pink, light blue, or mint for soft looks
- White or black for simple and classic styles
- Use paint that dries quickly and lasts long
Adding Details And Patterns
Details make your toy horse unique. You can add eyes, mane, saddle, or spots with a small brush.
Patterns like stripes or dots add fun to the design. Use different colors to make details stand out.
- Draw eyes and nostrils to give your horse a face
- Paint a mane with stripes or wavy lines
- Add a saddle using a different color
- Use dots or stars for decoration
- Seal the paint with a clear coat for protection
Ensuring Safety
Making a toy horse to ride on is fun and creative. Safety is very important to keep kids from getting hurt.
This guide explains how to check stability and smoothen edges for a safe toy horse.
Checking Stability
Make sure the toy horse stands firmly on the ground. It should not wobble or tip over easily.
Test the toy by pressing and shaking it gently. Check that all parts fit tightly together.
- Use strong materials for the base and legs
- Tighten all screws and nails securely
- Place wide legs to balance the weight
- Try sitting on the toy before finishing
Smoothening Edges
Sharp edges can hurt children when they play. Smooth all corners and surfaces carefully.
Sandpaper is the best tool to remove splinters and sharp points. Check every part of the toy horse.
- Sand edges until they feel round and soft
- Use fine-grit sandpaper for a smooth finish
- Check edges after sanding for any rough spots
- Consider adding a soft paint or sealant

Credit: www.amazon.in
Fun Riding Tips
Making a toy horse to ride on is a fun project. Riding your creation can bring hours of joy.
Use simple tips to enjoy riding safely and keep your toy horse in good shape.
Safe Riding Practices
Always wear a helmet to protect your head while riding. Make sure your clothes fit well and do not get caught.
Check the toy horse before each ride. Look for loose parts or sharp edges. Ride slowly on flat surfaces to avoid falls.
- Wear a helmet and closed shoes
- Inspect the toy horse for damage
- Ride on smooth, flat ground
- Avoid rough or slippery areas
- Keep a parent or friend nearby
Maintenance And Care
Keep your toy horse clean by wiping it with a soft cloth. This helps keep it looking nice and safe to use.
Tighten screws and fix any loose parts regularly. Store the toy horse in a dry place to avoid damage from moisture.
- Clean with a damp cloth after use
- Check and tighten screws weekly
- Replace worn parts if needed
- Store inside or in a dry area
- Avoid exposing it to rain or sun
Frequently Asked Questions
What Materials Are Needed To Make A Toy Horse To Ride?
You need wood, screws, paint, a saw, sandpaper, and fabric. These materials ensure durability and a smooth finish for safe riding.
How Long Does It Take To Build A Ride-on Toy Horse?
Building a ride-on toy horse typically takes 4 to 6 hours. This depends on your skill level and the complexity of the design.
Is It Safe For Kids To Ride Homemade Toy Horses?
Yes, if built properly with smooth edges and sturdy parts. Always supervise children and use protective gear for extra safety.
Can Beginners Easily Make A Toy Horse To Ride On?
Yes, beginners can make one by following step-by-step instructions. Simple designs with basic tools are ideal for first-timers.
Conclusion
Creating a toy horse to ride on is fun and rewarding. You get to enjoy the crafting process and see your child’s joy. Gather your materials carefully. Follow each step with patience. Safety is crucial, so ensure all pieces are secure.
Personalize it with colors or accessories. This project is perfect for bonding with kids. A handmade toy horse offers endless play possibilities. It sparks creativity and imagination. Start your crafting journey today. Delight in your child’s happy ride!