



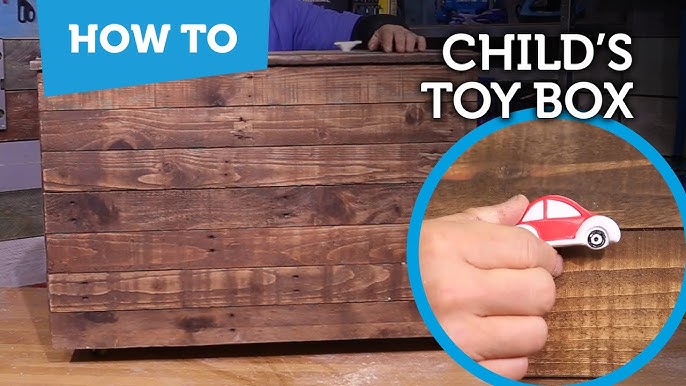
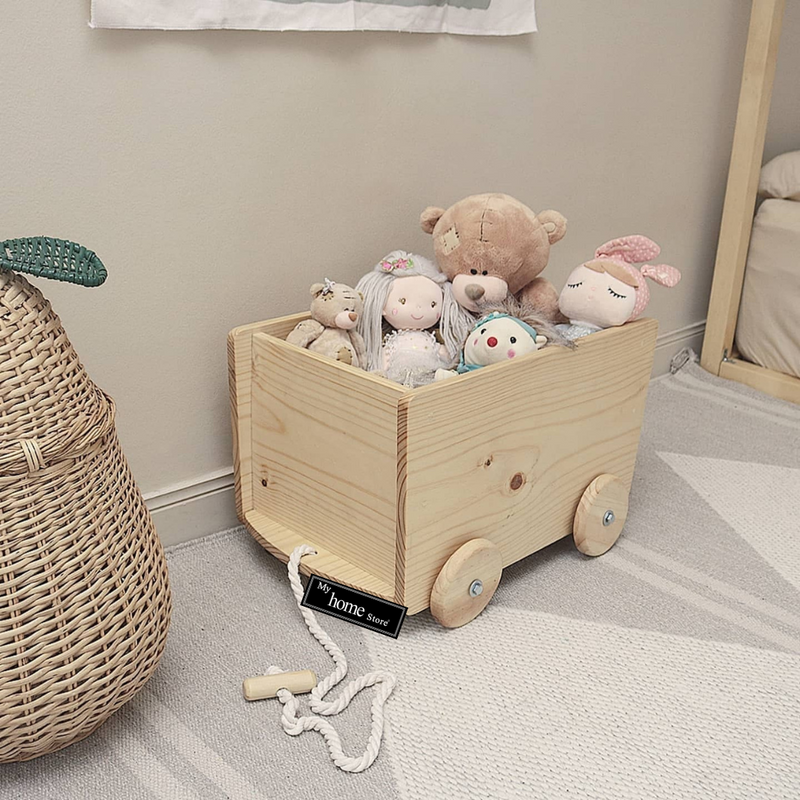
Are you tired of toys scattered all over your living room? Imagine having a stylish bench that not only gives your kids a cozy seat but also hides away all those toys neatly.
Making a toy storage bench yourself is easier than you think. In this guide, you’ll discover simple steps to create a practical and attractive piece that fits perfectly in your home. Keep reading, and you’ll soon have a clutter-free space that everyone will love.
Credit: humboldt.ca
Choosing Materials
Choosing the right materials is key to making a durable and safe toy storage bench. The materials affect the bench’s strength, appearance, and safety for children. Careful selection ensures the bench lasts long and looks great in any room.
Focus on wood types that are sturdy yet easy to work with. Paints and finishes must be safe for kids and easy to clean. The tools and hardware should match your design and provide reliable support.
Selecting Wood Types
Choose wood that is strong and smooth. Pine is affordable and easy to cut. Hardwood like oak or maple lasts longer and looks better. Avoid soft woods that can dent easily. Make sure the wood has no cracks or knots that can weaken it.
Picking Safe Paints And Finishes
Select paints labeled non-toxic and child-safe. Water-based paints dry quickly and have less odor. Avoid paints with strong chemicals or fumes. Use finishes that protect the wood but do not peel. A clear, water-based sealant works well to keep the surface smooth.
Gathering Tools And Hardware
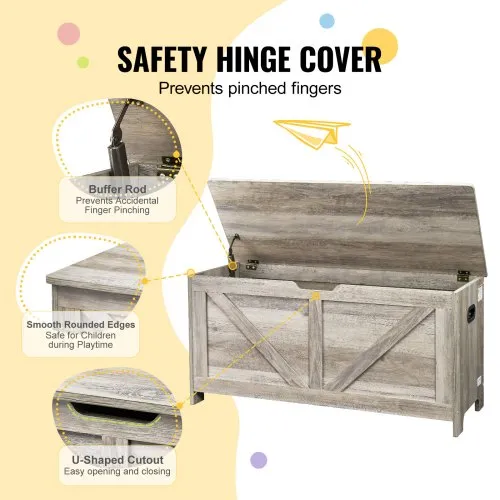
Prepare basic tools like a saw, drill, screwdriver, and measuring tape. Choose screws and hinges that support weight safely. Soft-close hinges prevent fingers from pinching. Sandpaper helps smooth rough edges. Include handles or knobs for easy opening and closing.

Credit: feelingnifty.com
Planning Your Bench
Planning your toy storage bench carefully will save you time and frustration later. It’s more than just picking a design; it’s about making sure the bench fits your space and meets your storage needs perfectly. Let’s break down the key parts of planning so your project starts off on the right foot.
Measuring Space And Dimensions
Start by measuring the area where you want to place the bench. Use a tape measure to get the length, width, and height available. Don’t forget to account for any baseboards, heating vents, or doors that might interfere with your bench’s placement.
Think about how much space you want the bench to occupy. Would a longer bench work better, or do you need something compact? Write down these numbers clearly—they’ll guide every decision moving forward.
Designing Storage Compartments
Next, decide what types of toys you want to store. Are there lots of small pieces that need divided sections or bigger items that require open space? This will shape how you design the compartments inside the bench.
Consider using a mix of open bins, shelves, or even drawers to keep everything organized. You can even plan some removable sections for flexibility. What’s your current biggest toy storage headache? Design compartments that solve it.
Sketching A Simple Blueprint
Put your ideas on paper with a simple sketch. It doesn’t need to be fancy—just clear enough to show the bench’s shape, size, and storage layout. This visual plan helps you spot any design flaws before you start cutting wood.
Label important measurements and storage types on the sketch. If you’re like me, drawing it out helped avoid mistakes and saved money on materials. Can you picture the bench in your space while sketching? That’s a good sign you’re on track.
Cutting And Preparing Wood
Cutting and preparing wood is a crucial part of building your toy storage bench. Getting these steps right ensures your bench will be sturdy, safe, and look professional. Taking your time here makes the assembly much easier and the final product more enjoyable to use.
Marking Cut Lines
Start by measuring your wood pieces carefully. Use a pencil and a ruler or a straight edge to draw clear, precise lines where you’ll make your cuts. Double-check your measurements—accuracy now saves you from wasted wood and frustration later.
Try marking all the pieces before cutting. This gives you a visual overview and helps prevent mistakes like cutting the wrong piece. Have you ever realized mid-cut that your lines were off? Avoid that by taking a moment to review your markings.
Safe Cutting Techniques
Always prioritize safety when cutting your wood. Wear safety goggles and keep your fingers clear of the blade. Using clamps to hold your wood steady can prevent slipping and make your cuts cleaner.
Choose the right saw for the job—whether it’s a handsaw, circular saw, or miter saw—and follow the tool’s instructions closely. Cutting slowly and steadily gives you more control and reduces the risk of accidents. Are you confident in your cutting skills? If not, practicing on scrap wood can build your confidence.
Sanding For Smooth Edges
Once your pieces are cut, sanding is key to smooth, safe edges. Use medium-grit sandpaper first to remove rough spots, then switch to fine-grit for a soft finish. This helps avoid splinters and prepares the wood for painting or staining.
Pay extra attention to corners and edges where kids will touch the bench the most. Sanding by hand allows you to feel for any rough patches you might miss visually. Have you noticed how a smooth edge makes your project feel more polished and comfortable?
Credit: www.vevor.ca
Assembling The Bench
Begin by arranging all parts neatly and checking the instructions. Connect the bench frame securely using screws and a drill. Attach the seat last, ensuring it fits tightly for safe storage and seating.
Assembling the bench is where your toy storage bench takes shape. This process requires precision and patience. Follow these steps to ensure a sturdy and functional bench.Joining Panels And Frames
Start by gathering all the pre-cut panels and frames. Align them carefully on a flat surface. Use wood glue to attach the panels to the frame edges. Ensure each piece is flush with its adjoining piece. Once glued, reinforce the connections with screws. This adds strength and durability. Check for any gaps or misalignments. Adjust as needed before the glue sets. Allow the glue to dry completely before proceeding.Installing Hinges And Supports
Choose quality hinges for smooth operation. Position the hinges evenly on the back edge of the storage box. Mark the screw holes with a pencil. Drill pilot holes to prevent wood splitting. Secure the hinges with screws. Consider adding support brackets inside. This helps to keep the lid stable. Supports ensure the lid stays open when needed. Test the hinge movement to ensure smooth operation.Securing The Storage Lid
Align the storage lid with the bench top. Check that it fits snugly and evenly. Attach the lid to the hinges with screws. Ensure the screws are tight but not over-tightened. This prevents damage to the wood. Test the lid by opening and closing it several times. Make sure it operates smoothly without catching. Adjust the hinges if necessary for proper alignment.Painting And Finishing Touches
Painting and finishing touches transform your toy storage bench from a simple wooden structure into a vibrant, functional piece that fits perfectly in your space. This stage not only enhances the bench’s appearance but also protects it from everyday wear and tear. Paying attention to detail here ensures your bench looks great and lasts long.
Applying Primer And Paint
Start with a good primer to create a smooth base and help the paint stick better. Choose a primer suitable for wood, especially if your bench has knots or raw edges.
Once dry, apply your paint in thin, even coats. Using a brush or roller, paint in the direction of the wood grain to avoid streaks. Let each coat dry completely before adding another to prevent drips and uneven texture.
Think about colors that match your room or add a pop of fun for the kids. Have you considered using chalk paint? It’s easy to work with and gives a lovely matte finish.
Adding Decorative Elements
Decorative touches make your bench unique and inviting. You can add stencils, decals, or hand-painted designs to personalize it.
- Use painter’s tape to create stripes or geometric patterns.
- Attach colorful knobs or handles to the storage lid for extra flair.
- Consider adding a cushion on top for comfort and style.
Decorating isn’t just about looks—what creative details will make your bench a favorite spot for your kids?
Sealing For Durability
Seal your bench with a clear protective coat to guard against scratches, spills, and daily use. Polyurethane is a strong option that adds a subtle shine and tough finish.
Apply at least two coats, allowing proper drying time between each. This step saves you from frequent touch-ups and keeps the bench looking fresh longer.
Would you prefer a matte, satin, or glossy finish? Each offers a different look and feel, so pick one that suits your style and lifestyle.
Tips For Safety And Longevity
Creating a toy storage bench is fun and practical. Safety and durability matter most. These tips help keep the bench safe for children. They also extend its life for years of use.
Childproofing Edges And Corners
Sharp edges can hurt little ones. Use soft corner protectors or sand down rough spots. Rounded edges reduce the risk of bumps and bruises. Check for any nails or screws sticking out. Cover them with caps or countersink them to avoid injuries.
Maintaining The Bench Over Time
Regular checks keep the bench strong. Tighten screws and bolts every few months. Look for cracks or splits in the wood. Clean the surface with mild soap and water. Avoid harsh chemicals that can damage finishes. Reapply paint or sealant to protect wood from moisture.
Encouraging Organized Play
Teach kids to put toys away after use. Use labels or pictures on storage bins to help sorting. Make clean-up part of the daily routine. Praise children for keeping the bench neat. Organized play teaches responsibility and keeps the bench tidy.
Frequently Asked Questions
What Materials Are Needed For A Toy Storage Bench?
You need wood panels, screws, hinges, paint, sandpaper, and a drill. Choose durable wood like plywood or pine for strength. Paint or finish can be customized to match your decor.
How Long Does It Take To Build A Toy Storage Bench?
Building a toy storage bench typically takes 3 to 5 hours. This depends on your skill level and tools available. Planning and preparation can reduce overall build time.
Can I Customize The Size Of The Bench?
Yes, you can customize the bench size to fit your space. Measure the area before starting and adjust wood panel dimensions accordingly. Custom sizing ensures better fit and functionality.
Is It Safe To Make A Toy Storage Bench For Kids?
Yes, using smooth edges, non-toxic paint, and sturdy construction makes it safe. Avoid small parts or sharp corners. Always supervise children around the bench.
Conclusion
Building a toy storage bench helps keep rooms tidy and organized. It also creates extra seating for kids or guests. You can customize it to fit your space and style. Plus, making it yourself saves money compared to buying ready-made options.
Try using simple tools and easy steps to finish your project quickly. Enjoy a neat play area and happy kids with your new bench. Give it a try and see how useful it can be.