



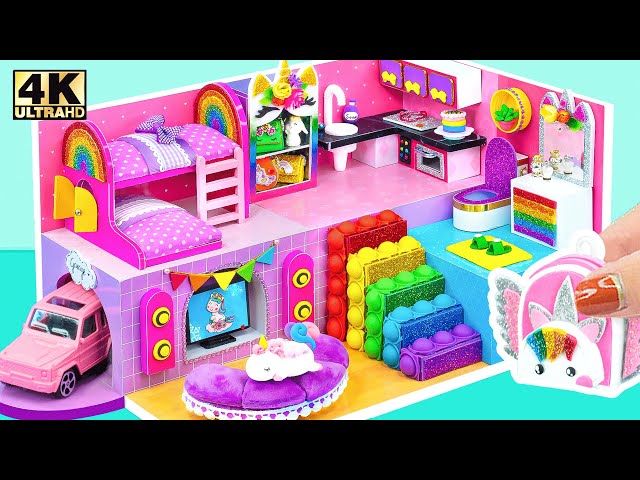
Looking for a fun and creative way to make toys at home? You can easily craft your own building blocks using simple cardboard.
Not only will you save money, but you’ll also enjoy the satisfaction of making something unique with your own hands. Imagine the joy your kids will have stacking, building, and playing with blocks you created yourself. Ready to turn ordinary cardboard into exciting building blocks?
Keep reading, and I’ll show you step-by-step how to do it quickly and safely. Your next favorite toy is just a few cuts away!
Materials Needed
Making toy building blocks with cardboard is a fun and simple project. You only need a few materials to get started.
Choosing the right materials helps create safe and sturdy blocks for playtime.
Choosing The Right Cardboard
Pick strong cardboard that can hold shape well. Avoid thin or soft cardboard.
Look for cardboard that is clean and free from wrinkles or tears.
- Corrugated cardboard is best for durability
- Recycled cardboard works if it is thick and firm
- Avoid glossy or coated cardboard that is hard to cut
Essential Tools And Supplies
You need some basic tools to cut and shape the cardboard blocks.
Having the right supplies makes the project easier and safer.
- Sharp utility knife or scissors for cutting
- Ruler or measuring tape for accurate sizes
- Pencil for marking cut lines
- Glue or tape to hold pieces together
- Cutting mat or safe surface to protect tables
- Sandpaper to smooth rough edges (optional)
Preparing The Cardboard
Making toy building blocks needs good preparation of cardboard. This helps the blocks stay strong and safe for kids.
Start by choosing thick cardboard sheets. Thin sheets may bend or break easily.
Cutting Cardboard Sheets
Cut the cardboard into the shapes and sizes you want for your blocks. Use a ruler and pencil for straight lines.
Use a sharp utility knife or scissors to make clean cuts. Always cut on a safe surface to protect your work area.
- Measure carefully before cutting
- Cut slowly to avoid jagged edges
- Work on a cutting mat for safety
Smoothing Edges
After cutting, the edges may feel rough or sharp. Smooth the edges to make the blocks safe to handle.
Use sandpaper or a sanding block to gently rub the edges. This removes splinters and sharp points.
- Use fine-grit sandpaper for best results
- Sand all edges evenly
- Check for any rough spots by touch
Designing The Blocks
Designing toy building blocks with cardboard is a fun and creative process. Good design helps the blocks fit well and stay strong.
Start by thinking about the size and shape of each block. Then create templates to cut the cardboard easily.
Selecting Block Sizes
Choose block sizes that are safe and easy for children to handle. Small blocks can be a choking hazard.
Pick sizes that work well together. Mixing large and small blocks makes building more fun.
- Make blocks between 2 to 4 inches wide
- Use simple shapes like cubes and rectangles
- Keep all blocks thick enough to be sturdy
- Consider making some flat pieces for building bases
Creating Templates
Templates help you cut each block the same way every time. Draw the shapes on paper first.
Use a ruler and pencil to make straight lines. Cut out the paper templates and trace them on cardboard.
- Draw each block face separately on cardboard
- Mark fold lines lightly with a pencil
- Cut carefully along outer edges
- Use the templates to make many blocks quickly

Credit: m.youtube.com
Cutting And Shaping Blocks
Making toy building blocks from cardboard is fun and easy. Cutting and shaping the blocks carefully is important.
Good cutting helps the blocks fit well and look neat. Use the right tools and techniques to shape your blocks.
Marking The Cardboard
Mark the cardboard clearly before cutting. Use a pencil and ruler for straight lines and accurate shapes.
Draw all sides of the blocks on the cardboard. This helps you see the size and shape before you cut.
- Use a ruler for straight edges
- Mark each block side clearly
- Label pieces to avoid confusion
Cutting Techniques
Use a sharp craft knife or scissors to cut the cardboard. Cut slowly and follow the marked lines closely.
Cut on a safe surface like a cutting mat. Make small cuts to avoid tearing the cardboard.
- Use a ruler as a guide for straight cuts
- Apply gentle pressure to avoid bends
- Cut one side at a time for clean edges
- Sand edges lightly if needed for smoothness
Assembling The Blocks
Assembling cardboard toy blocks requires care to make them strong. You need to layer and glue the pieces correctly. This helps the blocks last longer and hold their shape.
Follow simple steps to put your blocks together. This will create fun and safe building blocks for play.
Layering For Strength
Stack several layers of cardboard to make each block strong. Use the same size pieces for each layer. This adds thickness and prevents the block from bending.
Make sure layers line up perfectly. This keeps the block even and sturdy. You can cut layers from old boxes or scrap cardboard.
- Cut 3-5 pieces of cardboard per block
- Stack pieces neatly on top of each other
- Check edges for smooth alignment
Gluing And Securing
Use strong glue to stick the layers together. Apply glue evenly on each layer. Press firmly to avoid gaps or bubbles.
Clamp or weigh the blocks while drying. This keeps layers tight and helps the glue bond well. Avoid moving blocks until dry.
- Spread glue thinly but completely
- Press layers with weight or clips
- Let dry for at least one hour

Credit: www.youtube.com
Adding Connectors
Adding connectors helps toy blocks stick together. It makes building easier and more fun.
Connectors keep blocks stable and allow kids to create bigger shapes.
Using Velcro Or Magnets
Velcro strips are easy to attach on cardboard blocks. They let pieces stick and come apart quickly.
Magnets work well if you use small, flat ones. They connect blocks without damaging the cardboard.
- Cut Velcro into small strips and glue them to block edges
- Use magnets on inside faces of blocks for a clean look
- Test magnet strength to avoid blocks falling apart
- Place Velcro or magnets evenly for better balance
Creating Interlocking Features
Cut tabs and slots in the cardboard blocks. These help blocks fit and lock together.
Make sure tabs are not too big or too small. They should fit snugly without tearing the cardboard.
- Design tabs on one block edge and matching slots on another
- Use a craft knife to cut precise slots
- Fold tabs slightly to make insertion easier
- Test fit before cutting many blocks
Decorating Blocks
Decorating cardboard building blocks makes them more fun and exciting. You can use many simple ways to add colors and designs. Decorating helps bring your blocks to life.
Choose decoration styles that fit your child’s interests. Bright colors and fun patterns make the blocks more playful. Let’s explore some easy decoration ideas.
Painting And Coloring
Painting is a great way to add color to cardboard blocks. Use safe, non-toxic paints for kids. Acrylic paints work well and dry quickly.
Color the blocks fully or create patterns with brushes or sponges. Let each side dry before turning to avoid smudges. Painting makes blocks bright and unique.
- Use water-based, non-toxic paint
- Apply thin coats for quick drying
- Let each side dry before painting the next
- Try simple patterns like stripes or dots
- Use stencils for neat shapes
Applying Stickers Or Patterns
Stickers add fun shapes and pictures to cardboard blocks. Choose colorful stickers that stick well to cardboard. You can also print patterns and glue them on.
Cut paper patterns like stars, animals, or letters to decorate blocks. Use glue sticks or double-sided tape for easy application. Stickers and patterns make blocks more playful.
- Pick stickers with bright colors and fun designs
- Print or draw patterns on paper before cutting
- Use glue sticks to avoid mess
- Press stickers firmly to prevent peeling
- Combine stickers with paint for variety
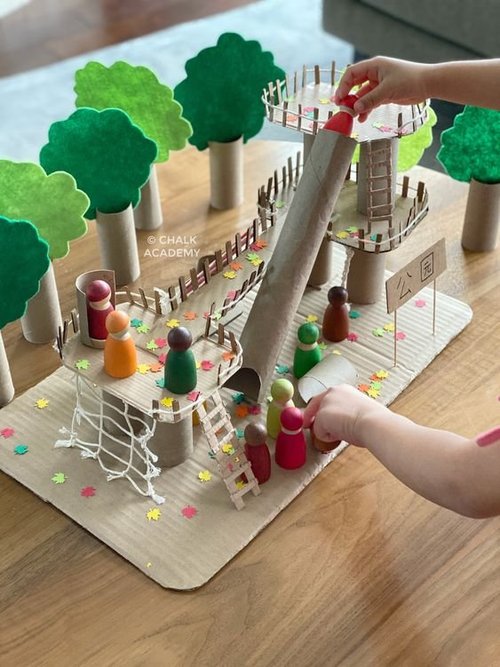
Credit: petitarchitect.com
Safety Tips
Making toy building blocks with cardboard is fun and creative. It is important to keep safety in mind for children.
Using safe materials and watching children during play helps prevent accidents and health risks.
Ensuring Non-toxic Materials
Always use cardboard that is clean and free from harmful chemicals. Avoid cardboard with printed inks that may be toxic.
Choose glue, paint, and markers labeled as non-toxic. These materials are safer for children to handle and chew on.
- Check labels for “non-toxic” certification
- Use water-based glue and paint
- Do not use recycled cardboard with unknown chemicals
- Test materials on a small area before use
Supervising Children
Always watch children when they play with cardboard blocks. Cardboard edges can sometimes be sharp or cause paper cuts.
Help younger children build and play safely. Keep small parts away from kids under three years to avoid choking hazards.
- Stay close while children play
- Check blocks regularly for damage or sharp edges
- Teach children to handle blocks gently
- Remove small pieces that can break off
Storage And Maintenance
Keeping your cardboard toy building blocks in good shape helps them last longer. Proper storage and care prevent damage and mess.
Organizing and cleaning your blocks makes playtime easier and safer. Small repairs can fix broken pieces quickly.
Organizing Blocks
Sort blocks by size, shape, or color to find them easily. Use containers or boxes that keep blocks in one place.
Label storage boxes to save time. Store blocks in a dry area to avoid moisture damage.
- Use clear containers to see blocks inside
- Separate blocks by type or color
- Stack boxes to save space
- Keep the storage area clean and dry
Cleaning And Repairs
Clean blocks regularly with a soft, damp cloth. Avoid soaking cardboard to prevent warping.
Fix small tears with glue or tape. Replace blocks that are too damaged to keep play safe.
- Wipe dirt off gently
- Use white glue for small repairs
- Apply clear tape to reinforce weak spots
- Check blocks for damage before use
Frequently Asked Questions
How Do I Start Making Cardboard Building Blocks?
Begin by choosing sturdy cardboard. Cut uniform shapes, like squares or rectangles. Use a ruler and pencil for accuracy. Ensure edges are smooth. This creates safe, stackable blocks perfect for play and learning.
What Materials Are Needed To Make Toy Blocks?
You need cardboard sheets, a ruler, pencil, scissors, and glue. Optional materials include paint or markers for decoration. These basic supplies help create durable, colorful blocks that engage children in creative play.
How Can I Ensure Cardboard Blocks Are Safe?
Use non-toxic glue and smooth all edges. Avoid sharp corners by sanding or trimming. Test blocks for sturdiness to prevent breakage. Safety ensures children can play without risk of injury.
Can I Customize Cardboard Blocks With Colors?
Yes, decorate blocks using paint, markers, or colored paper. Custom colors enhance visual appeal and learning. Always use child-safe, non-toxic materials to keep blocks safe and vibrant.
Conclusion
Making toy building blocks from cardboard is fun and simple. You only need basic materials and a little time. These blocks encourage creativity and help develop fine motor skills. Kids enjoy building different shapes and structures. Cardboard blocks are safe and eco-friendly too.
Try this craft project to reuse old boxes and reduce waste. It is a great way to spend quality time with children. Everyone can join in and share ideas. Give it a try and watch imagination grow.