



Are you looking for a fun and creative way to help your child learn and grow? Making wooden educational toys can be the perfect solution.
These toys are not only safe and durable but also stimulate your child’s imagination and skills. Imagine crafting something with your own hands that sparks curiosity and learning every day. You’ll discover simple steps and tips to create wooden toys that your kids will love.
Ready to turn ordinary wood into extraordinary learning tools? Let’s dive in!
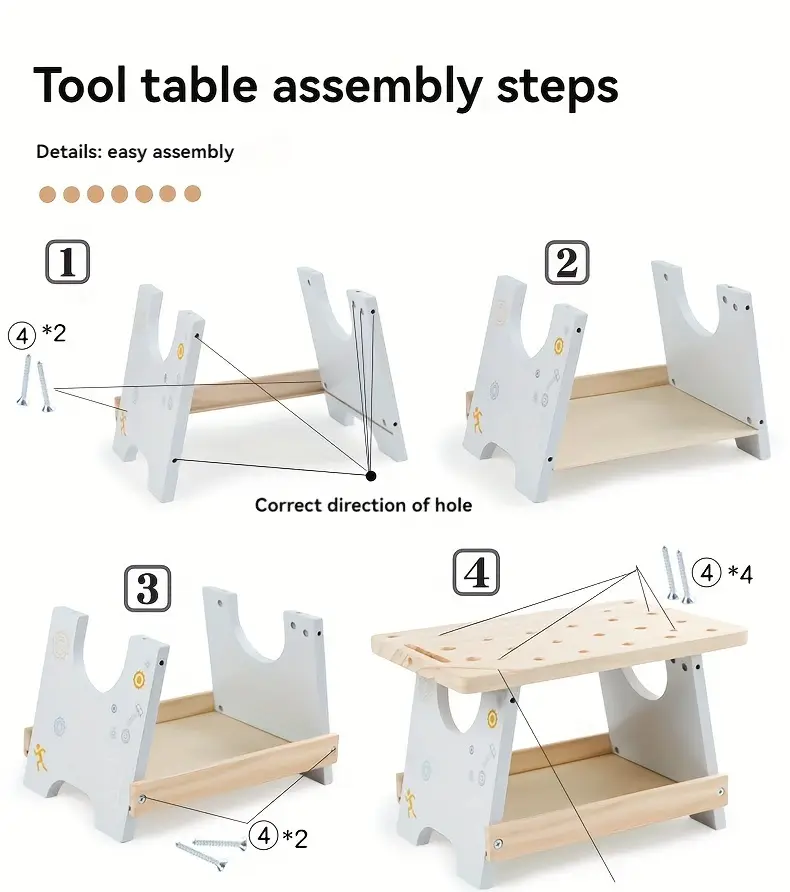
Credit: www.temu.com
Choosing The Right Wood
Making wooden educational toys is fun and safe when you pick the right wood. The wood must be safe for children and strong enough to last long.
Choosing good wood helps create toys that kids enjoy and parents trust. It also makes the toy look and feel nice.
Safe And Non-toxic Woods
Safety is very important for educational toys. Use wood that does not cause allergies or harm children.
Some woods have natural chemicals that can irritate skin or cause problems. Choose woods that are known to be safe and non-toxic.
- Maple
- Beech
- Birch
- Alder
- Poplar
Durability And Texture
Wood for toys needs to be strong. It should not break or chip easily. Kids play hard with their toys.
The texture should be smooth. Rough wood can hurt little hands. Sand the wood well to make it safe and nice to touch.
- Hardwoods like maple and beech are very durable
- Softwoods may wear out faster
- Smooth grain feels better for kids
- Check for knots and cracks before use
Sourcing Materials
Buy wood from trusted sellers who offer good quality. Check if the wood is free of chemicals and treatments.
Look for sustainable wood sources. Using wood from well-managed forests helps protect the environment.
- Local lumberyards often have fresh wood
- Certified sustainable wood is eco-friendly
- Avoid reclaimed wood that may have nails or paint
- Ask sellers about wood origin and treatment
Essential Tools And Materials
Making wooden educational toys is a fun and rewarding project. You need the right tools and materials to create safe, sturdy toys.
This guide covers the basic tools, finishing supplies, and safety gear needed for woodworking.
Basic Woodworking Tools
Basic woodworking tools help you cut, shape, and assemble wooden toys. You do not need expensive tools to start.
- Handsaw or jigsaw for cutting wood
- Hammer and nails for joining pieces
- Sandpaper or sanding block for smoothing edges
- Clamps to hold pieces while working
- Measuring tape and pencil for marking cuts
- Wood glue for strong joints
Finishing Supplies
Finishing supplies make wooden toys smooth and safe. They protect the wood and add a nice look.
- Non-toxic wood paint or stain to add color
- Clear wood sealer or varnish for protection
- Fine-grit sandpaper for a smooth finish
- Clean cloth for applying finishes
Safety Gear
Safety gear protects you while making wooden toys. It helps avoid accidents and injuries.
- Safety goggles to protect your eyes
- Dust mask to avoid breathing wood dust
- Work gloves to protect your hands
- Hearing protection if using loud tools
Designing Educational Toys
Designing wooden educational toys requires care and thought. These toys help children learn while they play.
Good designs focus on safety, learning goals, and fun. The toys should be easy to use and interesting.
Age-appropriate Concepts
Toys must match the child’s age and skill level. Young children need simple shapes and big pieces.
Older kids can handle puzzles and toys with many parts. Age-appropriate toys keep children safe and engaged.
- Infants: Large, smooth blocks for grabbing
- Toddlers: Simple puzzles and stacking toys
- Preschoolers: Counting and matching games
- School-age: More detailed and challenging sets
Incorporating Learning Elements
Educational toys teach skills like numbers, shapes, and colors. Include features that encourage problem-solving.
Use letters, numbers, or patterns in the design. Toys should invite children to explore and discover new ideas.
- Shape sorters to teach geometry
- Number blocks for counting practice
- Color matching sets for recognition
- Puzzles to build critical thinking
Simple Vs. Complex Designs
Simple toys are easier for young children to use. They help focus on one skill at a time.
Complex toys challenge older kids with multiple skills. They can combine learning and creativity.
- Simple designs: Basic shapes, few parts
- Complex designs: Multiple pieces, varied functions
- Balance complexity with child’s ability
- Keep safety in mind for all designs
Cutting And Shaping Wood
Cutting and shaping wood are key steps in making wooden educational toys. These steps help create the right size and shape for safe play.
Careful work in this stage ensures the toy parts fit well and feel smooth to touch.
Measuring And Marking
Start by measuring the wood pieces carefully. Use a ruler or tape measure to get exact lengths.
Mark the cut lines clearly with a pencil. This helps guide your cuts and keeps pieces even.
- Use a straight edge for drawing lines
- Double-check measurements before marking
- Mark all sides for easy visibility
Safe Cutting Techniques
Always use the right tools for cutting wood, like a handsaw or jigsaw. Keep your hands away from the blade.
Cut slowly and follow the marked lines. Wear safety goggles and work in a clean space to avoid accidents.
- Secure wood with clamps before cutting
- Use steady, even pressure when cutting
- Keep tools sharp for cleaner cuts
- Wear protective gear like gloves and goggles
Sanding For Smooth Edges
After cutting, sand the edges to make them smooth. Use sandpaper or a sanding block for best results.
Sanding removes splinters and rough spots. This makes the toy safe for children to handle.
- Start with coarse sandpaper (80-100 grit)
- Finish with fine sandpaper (180-220 grit)
- Sand along the grain of the wood
- Check edges by running your fingers over them
Assembling Toy Components
Building wooden educational toys requires careful assembly. Each piece must fit well to create a safe toy.
Good assembly helps the toy last long and function properly during play.
Joining Methods
You can join wooden parts using glue, nails, or screws. Glue gives a clean look but needs drying time.
Nails and screws hold pieces strongly and allow quick assembly. Use small nails to avoid splitting wood.
- Wood glue for smooth, invisible joints
- Small nails for quick and strong holds
- Screws for parts that may need tightening
- Dowels for hidden, sturdy connections
Checking Stability
After joining parts, check if the toy stands firm. Wobbly pieces can be unsafe for children.
Test each joint by gently pressing and shaking the toy. Tighten or re-glue loose parts immediately.
- Press all joints to check for movement
- Look for gaps between pieces
- Fix loose parts with more glue or screws
- Ensure the toy sits evenly on flat surfaces
Adding Movable Parts
Movable parts make toys interactive and fun. Use hinges, pegs, or sliders to add movement.
Make sure moving pieces are smooth but not loose. Secure parts so they do not detach during play.
- Attach wheels with axles for rolling parts
- Use wooden pegs for spinning sections
- Add small hinges for doors or flaps
- Check movement is easy but steady
Painting And Finishing
Painting and finishing are important steps in making wooden educational toys. They protect the wood and make the toys look nice.
Using safe paints and coatings keeps the toys safe for children. Decoration adds fun and learning value.
Non-toxic Paint Choices
Choose paints that are free from harmful chemicals. Non-toxic paints keep children safe if they put toys in their mouths.
Water-based paints are a good choice. They dry fast and clean up easily with water.
- Look for paints labeled non-toxic and child-safe
- Avoid paints with lead, solvents, or strong fumes
- Use natural paints made from plant dyes or minerals
- Test paint on a small wood piece before full use
Applying Protective Coatings
Protective coatings keep the paint and wood safe from damage. They also make the toy last longer.
Use clear finishes that do not harm children. Apply thin layers and let each dry well before adding more.
- Choose water-based sealers or varnishes labeled non-toxic
- Sand the wood smoothly before coating
- Apply coatings with a clean brush or cloth
- Let the toy dry completely before use
Creative Decoration Ideas
Decorate toys with simple shapes and bright colors. Use patterns that help children learn letters, numbers, or animals.
Add texture by using different paint finishes or small wooden pieces. This makes toys more interesting to touch and look at.
- Paint numbers and letters clearly on blocks
- Create animal shapes using colored paint
- Use dots or stripes for fun patterns
- Glue small wooden shapes for 3D effects
Testing And Safety Checks
Making wooden educational toys is fun but safety is very important. Testing and safety checks help keep children safe while playing.
Each toy must be checked for strength and hazards. This ensures children can use toys without harm.
Ensuring Durability
Durable toys last longer and do not break easily. Check the wood for cracks or weak spots before making toys.
Test toys by applying pressure and dropping them from a low height. This shows if the toy can handle rough use.
- Use hard, good-quality wood
- Sand all surfaces smooth
- Glue and nails must hold parts firmly
- Check joints for tightness
- Repeat tests after finishing the toy
Avoiding Small Parts Hazards
Small parts can be a choking hazard for young children. Make sure parts are large enough to avoid this risk.
Check if any pieces can break off or come loose. Secure all parts firmly to keep the toy safe.
- Do not use small nails or screws
- Glue small parts strongly
- Avoid tiny decorations or beads
- Test by shaking the toy to see if parts fall off
Child-friendly Features
Child-friendly toys are easy to hold and use. Make sure all edges are smooth and corners are rounded.
Use non-toxic paints and finishes. These keep the toy safe if a child puts it in their mouth.
- Round all sharp edges
- Use bright but safe colors
- Keep the toy light enough for children to carry
- Use water-based, non-toxic paint or finish

Credit: www.amazon.com
Maintaining And Caring For Toys
Wooden educational toys need care to last long. Proper maintenance keeps them safe and fun.
Simple cleaning, fixing, and storing help keep the toys in good shape.
Cleaning Tips
Clean wooden toys regularly to remove dirt and germs. Use gentle methods to avoid damage.
Avoid soaking toys in water. Use a damp cloth with mild soap to wipe them clean.
- Use a soft cloth or sponge
- Wipe with a damp cloth, not wet
- Dry toys completely before use
- Avoid harsh chemicals or bleach
Repairing Damages
Fix cracks or chips quickly to keep toys safe for children. Small repairs prevent bigger problems.
Use wood glue for loose parts. Sand rough edges gently to avoid splinters.
- Apply wood glue to broken areas
- Clamp parts until glue dries
- Sand sharp edges smooth
- Replace missing pieces if needed
Storage Suggestions
Store wooden toys in a dry place to avoid warping. Keep them away from direct sunlight.
Use bins or shelves to organize toys. Proper storage prevents damage and keeps toys ready to use.
- Choose cool, dry storage areas
- Avoid damp or humid spots
- Use bins or boxes with lids
- Keep toys off the floor
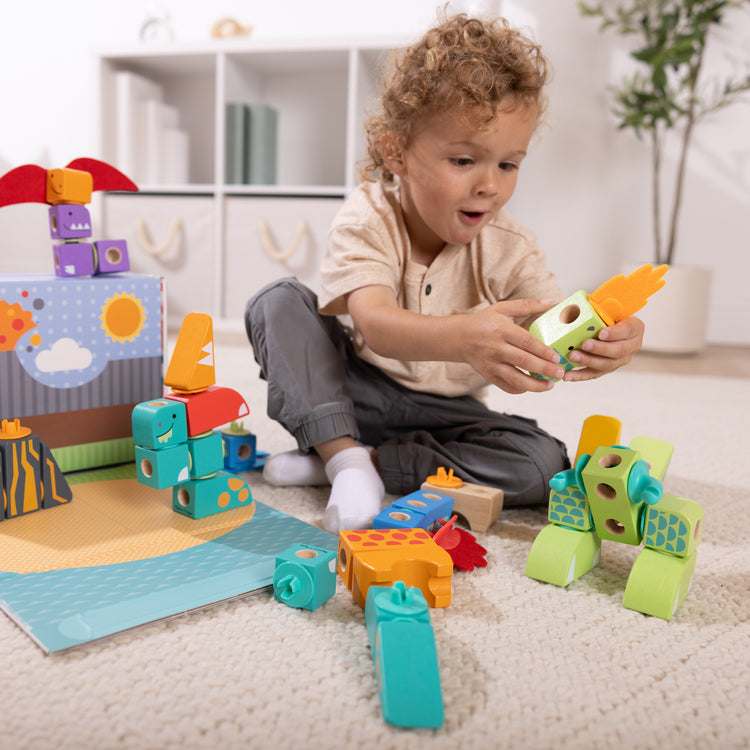
Credit: www.melissaanddoug.com
Frequently Asked Questions
What Materials Are Best For Wooden Educational Toys?
The best materials include non-toxic wood like maple or birch. These woods are safe, durable, and easy to shape for toys. Always use child-safe finishes to ensure the toy is safe for kids.
How Do I Design Safe Wooden Educational Toys?
Design toys with smooth edges and no small parts. Avoid sharp corners to prevent injuries. Ensure the toy is sturdy and suitable for the child’s age group.
What Tools Are Needed To Make Wooden Toys?
Basic tools include saws, sandpaper, drills, and clamps. These help in cutting, shaping, and smoothing the wood. Using the right tools ensures precision and safety during crafting.
How Can Wooden Toys Aid Child Development?
Wooden toys enhance creativity, motor skills, and problem-solving. They encourage hands-on learning and sensory exploration. These toys support cognitive growth through interactive play.
Conclusion
Making wooden educational toys can be fun and rewarding. You choose safe materials and simple designs. Each toy helps children learn shapes, colors, and numbers. Crafting toys by hand adds a personal touch. It also saves money and reduces waste.
Kids enjoy playing with toys made just for them. Start small, and enjoy the process step by step. Your effort creates joy and learning combined. Keep exploring new ideas and improve your skills. Wooden toys bring lasting value to any child’s playtime.