



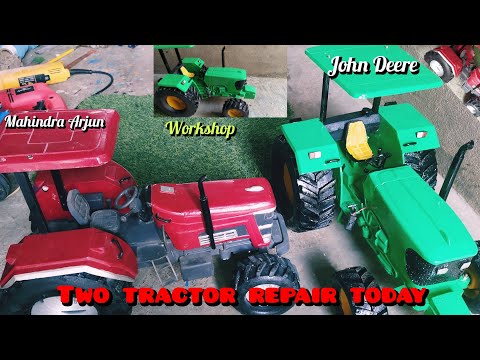
Are you tired of looking at your worn-out 1:16 scale toy tractor and wishing it looked new again? You don’t have to let cracks, faded paint, or broken parts ruin your favorite miniature model.
With the right steps, you can bring your toy tractor back to life, making it a proud piece in your collection or a perfect gift. In this guide, you’ll discover simple and effective ways to repair and restore your 1:16 scale toy tractor, even if you’ve never done it before.
Keep reading—you’re just moments away from turning that old tractor into a stunning showpiece.
Choosing The Right Tools
Choosing the right tools plays a key role in repairing and restoring 1:16 scale toy tractors. Using proper tools makes the work easier and improves the final result. It helps avoid damage to delicate parts and ensures precision in repairs. Knowing what tools to use also saves time and frustration.
Essential Repair Tools
- Small screwdrivers: for removing tiny screws
- Tweezers: to handle small parts carefully
- Needle files: to smooth rough edges
- Mini pliers: for bending or holding parts
- Magnifying glass: to see details clearly
- Glue applicator: for precise adhesive application
Selecting Paints And Finishes
Choose paints designed for plastic or metal models. Acrylic paints dry fast and have low odor. Use fine brushes for small areas and details. Matte or gloss finishes protect the paint and improve look. Test paint on a hidden spot before full application.
Safety Gear
- Wear gloves to protect hands from glue and paint
- Use safety glasses to shield eyes from debris
- Work in a well-ventilated area to avoid fumes
- Keep a clean workspace to prevent accidents

Credit: www.ebay.com
Assessing Damage
Assessing damage is the first and most important step in repairing 1:16 scale toy tractors. Careful inspection helps decide what repairs are needed. It saves time and prevents further damage during restoration. This section guides you through identifying problems, checking the tractor’s structure, and recording all damage clearly.
Identifying Common Issues
Look closely for these typical problems on toy tractors:
- Broken or missing parts like wheels or axles
- Cracks or chips in plastic or metal components
- Faded or scratched paint
- Loose or missing screws and bolts
- Rust spots on metal surfaces
- Stiff or stuck moving parts
Spotting these early helps plan repairs more effectively.
Evaluating Structural Integrity
Check if the tractor’s frame and body hold together well.
- Gently press different parts to test firmness
- Look for bent or warped sections
- Check if wheels spin freely and stay aligned
- Test moving parts for smooth operation
Structural soundness ensures your repairs last longer.
Documenting Damage
Write down all damage details before starting repairs.
- Note the location and type of each issue
- Take clear photos from multiple angles
- Use a checklist to track progress
Good records help avoid missing any repairs and keep you organized.
Cleaning Techniques
Cleaning your 1:16 scale toy tractors is the foundation of any effective repair and restoration project. Dirt, grime, and rust can hide damage and prevent parts from functioning properly. Taking the time to clean these models carefully will not only improve their look but also extend their lifespan.
Removing Dirt And Grime
Start by gently brushing off loose dust with a soft paintbrush or microfiber cloth. Avoid harsh scrubbing that can scratch delicate paint or decals. For stubborn dirt, dip a cotton swab in warm, soapy water and lightly clean the surface in small sections.
Be mindful not to soak the tractor, especially if it has metal parts prone to rust. Have you noticed how dirt often settles into tiny crevices? Use a toothpick or a soft-bristled toothbrush to reach those tricky spots.
Handling Rust And Corrosion
Rust can quickly damage metal parts of your toy tractor, so address it early. Use a rust remover designed for small metal items or a mixture of white vinegar and baking soda applied with a soft brush. Let it sit briefly, then wipe clean with a damp cloth.
If the corrosion is severe, consider gently sanding the affected area with fine-grit sandpaper. Always test your method on a hidden spot first to avoid damaging the finish. What’s the best way you’ve found to remove rust without harming delicate parts?
Delicate Parts Cleaning
Small components like mirrors, decals, and tires need special attention. Use a soft, damp cloth or a barely wet cotton swab to clean these areas without applying pressure. Avoid any cleaners with harsh chemicals that could dissolve paint or plastic.
For rubber tires, a mild soap solution usually works well to remove dirt without drying them out. Remember, the goal is to clean without risking any damage—patience here will save you headaches later.
Credit: www.toytractortimes.com
Fixing Broken Parts
Repairing and restoring 1:16 scale toy tractors involves careful cleaning, fixing, and painting. Identify broken parts and gather necessary tools. Replace or mend parts with precision to ensure the tractor looks new again.
Fixing broken parts of 1:16 scale toy tractors can seem daunting. With the right tools and techniques, it becomes a fulfilling task. Each component may require a different approach. This guide will help you restore your toy tractors to their former glory.
Repairing Plastic Components
Plastic parts are common in toy tractors. Cracks or breaks often occur over time. Use plastic glue for strong bonds. Clean the surface before applying the glue. Align the broken pieces carefully. Hold them together until the glue dries. For larger repairs, use a plastic welding kit. These kits melt and fuse the plastic. Always work in a well-ventilated area.
Metal Part Restoration
Metal parts might rust or bend. Start by cleaning the metal surface. Use fine sandpaper to remove rust. For bent parts, gently reshape them with pliers. Apply metal polish for a shiny finish. If a part is too damaged, consider replacing it. Keep your tools handy for quick fixes.
Replacing Missing Pieces
Missing parts can affect the tractor’s look. Check online stores for replacement parts. Some manufacturers offer spare parts directly. If unavailable, consider 3D printing parts. Many communities share 3D models for toy tractors. Ensure the new part matches the original in size and color. Attach the piece securely to avoid future loss.
Painting And Finishing
Painting and finishing your 1:16 scale toy tractors is where the transformation truly comes to life. This stage not only enhances the look but also protects your model from wear and tear. The key is to approach each step carefully to get a smooth, durable finish that highlights every detail.
Surface Preparation
Start by cleaning the tractor thoroughly. Use a mild soap and water solution to remove dirt and grease, then let it dry completely.
Next, gently sand the surface with fine-grit sandpaper. This helps the paint stick better and smooths out any rough spots or old paint chips.
Don’t rush this part—imagine how frustrating it is to see paint peel off after all your hard work. Taking your time here prevents that.
Applying Primer And Paint
Choose a primer that matches the material of your tractor—plastic, metal, or resin. Priming creates a uniform base, so the paint goes on evenly and lasts longer.
Apply the primer in thin, even coats. Let each layer dry fully before adding the next. Patience here pays off with a flawless finish.
When painting, use light layers too. Thick paint can hide details or cause drips. Spray paints or airbrushes often give the best results for these tiny models.
Sealing And Protecting
Once the paint is dry, seal your work with a clear coat. This locks in the color and adds shine or matte texture based on your preference.
Consider using polyurethane or acrylic sealants designed for models. Apply them sparingly to avoid clouding the fine details.
Have you noticed how a good sealant can make your tractor look brand new, even after handling? It’s a small step that makes a huge difference in durability.
Reassembling The Tractor
Reassembling the tractor brings all repaired parts back to life. It requires focus and patience. Each piece must fit just right for smooth operation. Careful handling prevents damage to delicate components. Follow these steps to put your 1:16 scale toy tractor back together perfectly.
Aligning Components
Start by positioning the main parts in their correct places. Check the manual or photos taken before disassembly. Make sure gears and wheels line up properly. Misaligned parts cause poor function or damage. Use gentle pressure to fit parts without forcing them. Keep all components clean and free from debris.
Securing Fasteners
Use the correct screws or clips to hold parts firmly. Tighten fasteners evenly to avoid warping. Avoid overtightening, which can strip threads or crack plastic. Keep small fasteners organized to prevent loss. Replace any damaged screws with matching sizes. A magnetic screwdriver helps handle tiny screws safely.
Testing Functionality
Check moving parts for smooth motion. Turn wheels and levers to ensure no binding or sticking. Listen for unusual sounds like grinding or clicking. Test any electrical features carefully with batteries or power sources. Make adjustments if parts do not move freely. A fully tested tractor is ready for display or play.
Maintenance Tips
Maintaining your 1:16 scale toy tractors is key to keeping them in top shape and extending their lifespan. Small details like dust or improper handling can cause damage over time. These maintenance tips will help you protect your collection and enjoy it for years to come.
Regular Cleaning Schedule
Dust and dirt build up quickly on tiny parts, so cleaning your toy tractors regularly is essential. Use a soft brush or a microfiber cloth to gently remove dust from crevices and wheels. Avoid harsh chemicals; instead, opt for mild soap and water applied with a damp cloth for tougher grime.
Have you ever noticed how a little dust can dull the paint? Keeping a consistent cleaning routine not only preserves the look but prevents corrosion or wear. Try setting a reminder every couple of weeks to give your tractors a quick clean.
Proper Storage Methods
Storing your toy tractors correctly prevents damage from humidity, sunlight, and accidental drops. Keep them in a cool, dry place away from direct sunlight to avoid fading and warping. Consider using display cases or containers with padding to protect delicate parts.
Think about the last time you found a toy with cracked plastic or faded colors—chances are, poor storage was to blame. Using silica gel packets can help control moisture inside storage boxes, especially if you live in a humid climate.
Handling And Display Advice
How you handle your 1:16 scale tractors matters as much as how you store them. Always pick them up by the base or sturdy parts to avoid stressing fragile components like antennas or mirrors. Limit handling to reduce wear and tear on moving parts.
When displaying, choose stable shelves or cabinets with enough space around each tractor to prevent accidental bumps. Rotating your display pieces occasionally can also reduce prolonged exposure to light and dust on any one model. Do you notice how some models stay pristine longer when handled less?

Credit: www.ebay.com
Frequently Asked Questions
How Do I Clean 1:16 Scale Toy Tractors Safely?
Use a soft brush and mild soap solution to clean. Avoid harsh chemicals that may damage paint or decals. Dry thoroughly with a soft cloth to prevent rust or corrosion.
What Tools Are Needed To Repair Toy Tractor Parts?
Basic tools include small screwdrivers, tweezers, glue, and fine sandpaper. These help fix loose parts, repaint, or smooth rough edges effectively.
How Can I Restore Faded Paint On Toy Tractors?
Use model-specific paint and fine brushes for touch-ups. Apply thin layers to match original colors and preserve details carefully.
Where To Find Replacement Parts For 1:16 Toy Tractors?
Check online hobby stores, manufacturer websites, or collector forums. These sources often have authentic or compatible parts for repairs.
Conclusion
Repairing and restoring 1:16 scale toy tractors takes patience and care. Small steps bring big results. Use the right tools and materials for each part. Clean, fix, and paint carefully to keep the original look. Taking time makes your tractor look like new again.
Enjoy the process and the final result. Your toy tractor can be a proud display or a fun collectible. Keep practicing, and your skills will improve with each project.