



Do you have a beloved tin toy that’s lost its charm because of dents, rust, or broken parts? You don’t have to let it sit forgotten or throw it away.
Imagine bringing your tin toy back to life with simple steps you can follow right now. In this guide, you’ll discover easy and effective ways to repair your tin toys, saving both memories and money. Keep reading, and you’ll be surprised at how satisfying and rewarding fixing your tin toys can be.
Tools And Materials Needed
Repairing tin toys requires specific tools and materials to ensure a clean, lasting fix. Having the right equipment makes the process smoother and more effective. Below is a list of essential items needed for tin toy repair.
Essential Repair Tools
- Small screwdrivers for tiny screws and parts
- Needle-nose pliers to handle small pieces carefully
- Fine sandpaper for smoothing rough edges
- Metal files to shape or remove rust
- Magnifying glass to see fine details clearly
- Soft cloths for cleaning and polishing
- Protective gloves to avoid cuts and stains
Choosing The Right Paints
Pick paints designed for metal surfaces. Enamel paints work best for tin toys. They dry hard and resist chipping. Choose colors matching the original toy for authenticity. Use small brushes to apply thin, even layers. Let each layer dry before adding another.
Adhesives And Fillers
Use strong adhesives made for metal repair. Epoxy glue is ideal for bonding parts tightly. For dents or holes, use metal filler putty. It smooths damaged surfaces before painting. Apply fillers in thin layers and sand after drying for a neat finish.
Assessing The Damage
Before you pick up any tools or materials, take a close look at your tin toy to understand what you’re dealing with. Assessing the damage carefully will help you decide which repairs are essential and which can wait. This process saves you time and prevents unnecessary work.
Identifying Rust And Corrosion
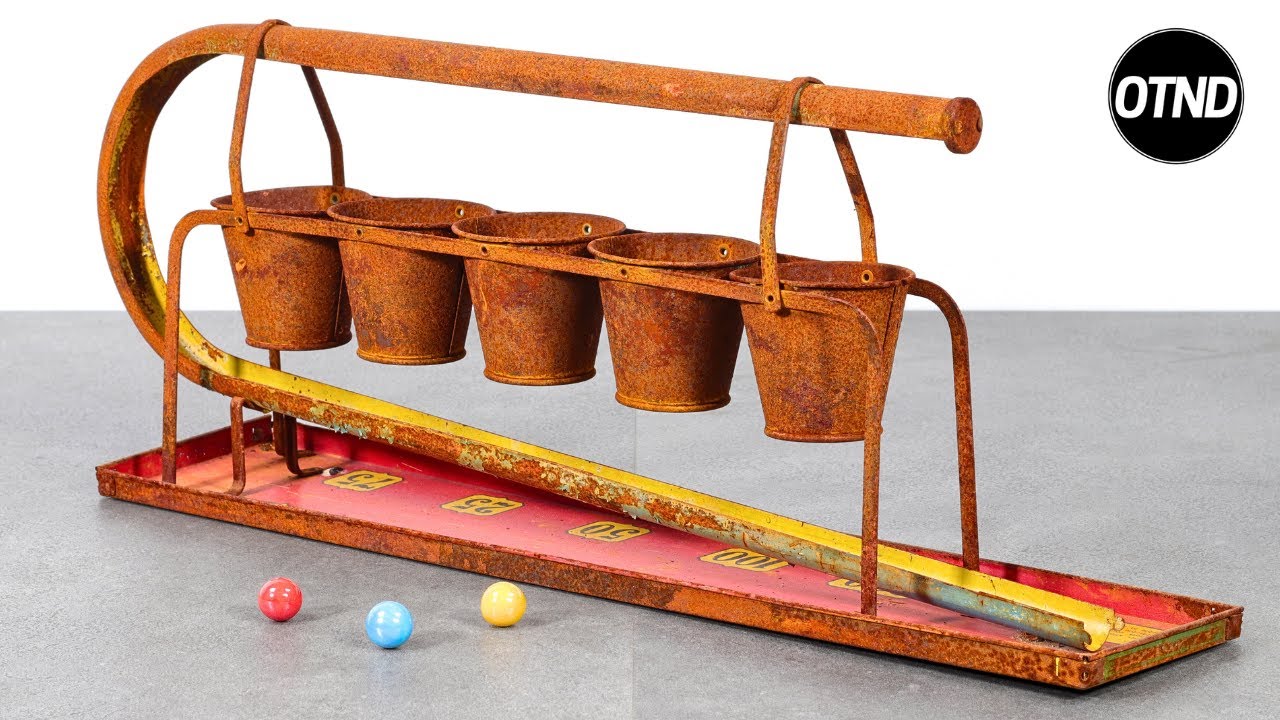
Rust and corrosion are common problems with tin toys, especially if they’ve been stored in damp places. Look for reddish-brown spots or flaking metal, which often indicate rust. Sometimes corrosion hides under layers of paint or grime, so gently clean the surface to reveal any hidden damage.
Ask yourself: Is the rust just on the surface, or has it eaten through the metal? Surface rust can often be removed with light sanding or a rust remover, but deeper corrosion might require patching or replacing parts. Checking early helps prevent the problem from spreading.
Detecting Structural Issues
Check if the toy’s frame is bent, cracked, or missing pieces. Press gently on joints and moving parts to see if they wobble or feel loose. Structural damage affects not only the toy’s look but also its function, especially with wind-up mechanisms or moving wheels.
Have you noticed any parts that don’t line up properly or sound hollow when tapped? These signs can point to hidden damage beneath the surface. Understanding these issues helps you prioritize repairs and maintain the toy’s original charm and playability.
Evaluating Paint Wear
Look closely at the paint for chips, scratches, or fading. Paint wear can tell you a lot about the toy’s history and how it was used. Some collectors prefer original paint even if it’s worn, while others opt to restore the color carefully.
Is the paint peeling in certain areas, or is it evenly worn? Peeling paint may need stabilizing to prevent further damage, while gentle fading might just add character. Deciding how to approach paint wear depends on your goal for the toy’s restoration.
Cleaning Tin Toys
Repairing tin toys involves careful cleaning and gentle handling. Remove dust using a soft brush or cloth. For stubborn stains, use mild soap and water, ensuring the toy is thoroughly dried to prevent rust.
Cleaning tin toys is a delicate yet rewarding process that brings these charming collectibles back to their former glory. Whether it’s an old train, a vintage car, or a whimsical wind-up toy, the cleaning phase is essential to ensure the longevity and appeal of your treasured items. By carefully addressing dirt, grime, rust, and preparing the surface, you can restore these tin wonders to their rightful shine.
Removing Dirt And Grime
Start by gently wiping your tin toy with a soft, dry cloth. This helps remove loose dirt and dust without scratching the surface. For stubborn grime, use a mixture of mild soap and warm water, applying it with a soft cloth or sponge. Be mindful not to soak the toy. Excessive moisture can damage the tin. Rinse with a clean, damp cloth and dry immediately with a soft towel.
Dealing With Rust Spots
Rust is a common issue in tin toys. It can be tackled with patience and care. Use a fine-grade steel wool or a rust eraser to gently rub the rust spots. Apply minimal pressure to avoid removing paint or damaging the surface. Afterward, clean the area with a damp cloth to remove any residue from the rust treatment.
Preparing Surface For Repair
A clean surface is crucial before any repairs. Ensure the toy is completely dry. Any moisture can interfere with adhesive or touch-up paint. Consider using a magnifying glass to inspect for small cracks or chips. This level of detail helps you identify areas that might need further attention.

Credit: classic-tin-toy-co.myshopify.com
Fixing Structural Problems
Fixing structural problems is key to restoring tin toys to their original charm. These toys often suffer from bent parts, cracks, or loose pieces due to age or rough play. Repairing these issues carefully ensures the toy remains sturdy and safe to handle. A gentle touch and the right tools make all the difference.
Straightening Bent Parts
Bent parts can spoil the toy’s look and function. Use soft cloths and small pliers to avoid scratching the tin. Work slowly to bend metal back into shape. Press gently along the bend, moving in small steps. Avoid forcing the metal, as it can break or crack.
Repairing Cracks And Holes
Cracks and holes weaken the toy’s body. Clean the damaged area well before repair. Use thin metal patches or special tin solder to cover holes. Smooth edges around cracks with fine sandpaper. Seal cracks with a strong adhesive made for metal. Let the repair dry completely before touching.
Reattaching Loose Components
Loose parts can fall off or cause the toy to break more. Identify the original attachment points. Use metal glue or small screws to secure pieces back in place. Clamp parts gently while glue dries to keep them steady. Check that all moving parts still work smoothly after repair.
Restoring Paint
Restoring the paint on tin toys is a delicate task that requires patience and attention to detail. The original colors and finish define the toy’s character, so keeping the paint true to its initial appearance is key. Small mistakes can easily stand out, so careful planning before you start painting will save you time and frustration.
Matching Original Colors
Finding the right color match can be tricky. Try using a small sample area or a hidden spot on the toy to test paint colors before applying them broadly. You can compare colors by holding paint swatches next to the toy under natural light.
Consider using artist acrylic paints because they come in many shades and can be mixed to match the original color. If you’re working with very old toys, remember that original paint may have faded, so aim to match the current tone rather than the factory-new shade.
Techniques For Touch-ups
Use fine-tipped brushes for detailed areas. Thin layers of paint work better than thick coats, so build your color gradually. If you accidentally paint outside the lines, you can clean it up with a tiny amount of paint thinner on a cotton swab, but be gentle to avoid damaging the metal.
Patience is essential. Let each layer dry completely before applying the next one to avoid smudges or uneven surfaces. If you have uneven edges, gently sanding with very fine sandpaper can smooth the area before repainting.
Sealing And Protecting Paint
Once your touch-ups are dry, seal the paint to protect it from chipping or fading. Use a clear, matte or glossy varnish depending on the original finish of your tin toy. Spray sealants are easier to apply evenly and reduce the risk of brush marks.
Make sure to apply the sealant in a well-ventilated area and follow the instructions for drying times. A good seal can keep your restored paint looking fresh for years, even with regular handling.
Credit: www.youtube.com
Lubricating Moving Parts
Lubricating moving parts is key to restoring tin toys. It helps reduce friction and wear. Proper lubrication brings toys back to smooth action. Without it, gears and joints might stick or squeak. This step keeps the toy functioning longer and preserves its value.
Choosing The Right Lubricant
Select a lubricant made for delicate metal parts. Use light oils like sewing machine oil or mineral oil. Avoid thick greases or WD-40, which can gum up small parts. Stay clear of oils that attract dust or dirt. A clean, thin lubricant ensures smooth movement without damage.
Applying Without Damage
Apply lubricant sparingly to avoid excess buildup. Use a small brush or a fine needle oiler. Target only moving joints, gears, and axles. Protect painted surfaces by covering them with tape before applying. Wipe off any drips immediately to prevent rust or staining.
Testing Movement Smoothness
After lubrication, gently move the toy’s parts by hand. Check for smooth rotation or sliding without resistance. Listen for any unusual sounds like grinding or squeaking. Repeat lubrication if needed in spots that still feel stiff. Proper testing ensures the toy will work well and last longer.
Maintaining Restored Toys
Maintaining restored tin toys keeps their charm and value intact. Careful upkeep prevents rust, scratches, and fading. Small efforts extend the life of these precious collectibles.
Proper Storage Tips
- Store toys in a dry, cool place away from sunlight.
- Use acid-free tissue paper to wrap delicate parts.
- Keep toys in airtight containers to avoid dust and moisture.
- Separate each toy to prevent scratches and dents.
- Avoid stacking heavy items on top of tin toys.
Regular Cleaning Schedule
Dust toys gently using a soft brush or microfiber cloth. Avoid harsh chemicals that damage paint or metal. Clean toys monthly to keep dirt from building up. Dry toys completely after cleaning to stop rust formation.
Preventing Future Damage
- Handle toys with clean, dry hands or wear cotton gloves.
- Keep toys away from humidity and temperature changes.
- Inspect toys regularly for signs of wear or rust.
- Repair small issues early to avoid bigger problems.
- Use protective coatings recommended for tin surfaces.
Credit: www.etsy.com
Frequently Asked Questions
How Do I Clean Tin Toys Before Repair?
Use a soft cloth with mild soap and water to clean tin toys. Avoid soaking to prevent rust. Dry immediately with a soft towel to keep the toy in good condition before repair.
What Tools Are Needed To Repair Tin Toys?
Basic tools include small screwdrivers, needle-nose pliers, fine sandpaper, and metal glue. These help remove parts, smooth edges, and reattach pieces precisely during tin toy repair.
How Can I Fix Rust On Tin Toys Effectively?
Remove rust gently using fine sandpaper or a rust remover. Clean the area well, then apply touch-up paint to prevent further corrosion and restore the toy’s appearance.
Can I Replace Missing Parts On A Tin Toy?
Yes, you can source replacement parts from collectors or online shops. Custom fabrication is an option for rare pieces, ensuring the toy remains authentic and functional.
Conclusion
Repairing tin toys takes patience and care. Start with gentle cleaning to avoid damage. Use the right tools for fixing small parts. Paint chips can be touched up with matching colors. Keep tiny screws and pieces safe during work. Regular checks help keep toys in good shape.
Fixing toys brings them back to life. Enjoy the process and preserve these classic treasures. Your effort keeps history and fun alive. Simple steps lead to great results.