



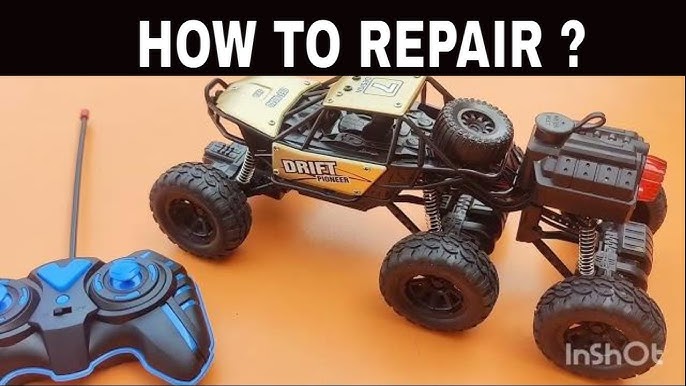
Is your child’s favorite toy car broken and sitting unused? You don’t have to throw it away or rush to buy a new one.
Imagine the joy of fixing it yourself and bringing that little car back to life. In this guide, you’ll discover simple, step-by-step tips to repair your toy car quickly and easily. Whether it’s a loose wheel, a broken axle, or a jammed motor, you’ll learn exactly what to do.
Keep reading, and you’ll be surprised how satisfying and easy it is to fix your toy car with your own hands.

Credit: www.youtube.com
Gather Essential Tools
Gathering the right tools is the first step to repair a toy car. Having all essentials ready makes the process smooth and faster. The right tools help avoid damage and ensure a good fix.
Focus on tools that suit toy car parts. Small, precise tools work best. Organizing tools before starting saves time and effort.
Basic Repair Kit
- Small screwdriver set (flathead and Phillips)
- Tweezers for handling tiny parts
- Needle-nose pliers for gripping
- Super glue or plastic adhesive
- Replacement parts like wheels or screws
- Small file or sandpaper for smoothing rough edges
- Battery tester or new batteries if needed
Safety Equipment
- Protective gloves to avoid cuts
- Safety glasses to shield eyes from debris
- Work on a clean, flat surface with good lighting
- Keep small parts in containers to prevent loss
Identify Common Issues
Identifying common issues in a toy car is the first step to fix it properly. Understanding typical problems helps save time and effort. It allows you to know what tools and parts you may need. Some issues are simple, others need careful attention. Look closely at the car to spot signs of damage or wear.
Loose Wheels
Loose wheels cause the toy car to wobble or fall off. Check if the wheels spin freely or feel shaky. Sometimes the wheel nuts or clips are missing or broken. Tighten or replace these parts to secure the wheels. Dirt or debris can also stop wheels from moving smoothly. Clean the wheels and axles to improve motion.
Broken Axles
Broken axles stop the wheels from turning properly. Axles may bend or snap after rough play. Inspect the axles for cracks or bends by removing the wheels. Replace damaged axles with new ones of the same size. Use pliers to carefully remove and fit axles without damaging other parts. A straight axle ensures smooth rolling and balance.
Faulty Electronics
Faulty electronics cause remote control or motor problems. Check batteries first; weak or dead batteries often cause issues. Inspect wires and connections for breaks or loose contacts. Replace damaged wires or solder loose connections carefully. Test switches and motors by pressing buttons and listening for sounds. Fixing electronics may need basic tools and steady hands.
Clean The Toy Car
Cleaning the toy car is a crucial step before repairing it. Dirt and dust can block moving parts. They may also hide damage or wear. A clean toy car helps you see problems clearly. It also makes repairs easier and more effective. Follow simple cleaning steps to prepare the toy car for fixing.
Remove Dirt And Dust
Start by removing loose dirt and dust. Use a soft brush or a dry cloth. Gently wipe the surface and inside small parts. Pay attention to wheels and joints. Compressed air can blow out dust from tight spaces. Avoid using water at this stage to prevent rust or damage.
Use Suitable Cleaning Agents
Choose cleaning agents safe for plastic and metal parts. Mild soap mixed with water works well. Dip a cloth in the solution and wring it out. Carefully clean the toy car’s surface without soaking it. For stubborn grease, use a small amount of rubbing alcohol. Test cleaning agents on a small area first. Avoid harsh chemicals that can damage paint or plastic.
Fix Mechanical Problems
Fixing mechanical problems can bring a toy car back to life quickly. These issues often stop the toy from moving or functioning properly. Small repairs can make a big difference in playtime and durability.
Reattach Loose Parts
Loose parts cause instability and poor performance. Check areas where pieces may have come off. Use strong glue or small screws to secure them. Hold parts firmly until the glue dries. Avoid using too much glue to prevent mess.
Ensure the parts fit correctly before gluing. Test the toy car by moving the reattached parts gently. If they move well and stay in place, the repair is successful.
Replace Damaged Wheels And Axles
Wheels and axles often wear out or break. Remove the damaged wheel by gently pulling or unscrewing it. Check the axle for bends or cracks. Replace with new parts of the same size and type.
Use pliers to fit the new axle if needed. Test the wheels by rolling the toy on a flat surface. Smooth movement means the replacement works well. Properly aligned wheels improve speed and control.
Repair Electrical Components
Fixing a toy car’s electrical parts can be simple. Identify the faulty component and check for loose wires. Secure connections with a soldering iron or replace damaged parts.
Repairing the electrical components of a toy car can feel like a daunting task, but it’s actually quite manageable with a little patience. Imagine the satisfaction of watching that little vehicle zoom across the floor again, powered by your own handiwork. Let’s dive into the essentials of reviving your toy car’s electrical system, focusing on battery connections and wire repairs.
Check Battery Connections
Start by examining the battery compartment. Is there any corrosion or dirt on the terminals? A quick clean with a mixture of baking soda and water can work wonders here. Ensure the batteries are inserted correctly, paying attention to the plus and minus signs. A loose connection might be the culprit if your toy car isn’t starting. Consider using a multimeter to test if the batteries are still holding a charge. This small step can save you from unnecessary repairs if the problem lies with dead batteries.
Solder Broken Wires
Broken wires can halt your toy car in its tracks. If you spot a detached wire, soldering might be your solution. Gather a soldering iron, some solder, and a helping hand to hold the wires in place. Safety first: ensure the soldering iron is hot enough, but handle it with care to avoid burns. Join the broken wires by melting a small amount of solder onto the connection point. Let the solder cool to secure the connection, and your toy car should be one step closer to running smoothly again. Taking on these repairs yourself can be both rewarding and cost-effective. Have you ever fixed something and felt like a superhero? That’s the power of DIY.
Test The Toy Car
Testing the toy car after repair is essential to ensure everything works smoothly. It helps you catch any remaining issues before the toy is back in action. Taking your time during this phase can save you from future headaches and give you confidence in your fix.
Perform Functional Checks
Start by placing the toy car on a flat surface. Push it gently to see if the wheels roll freely without sticking or wobbling. Listen carefully for unusual sounds like grinding or clicking, which might indicate internal problems.
Next, if the toy car is battery-powered, switch it on to check the motor and any lights or sounds. Does it move as expected? If the car struggles to start or stops suddenly, there might be an issue with the wiring or battery connection.
Test the steering if the toy car has this feature. Turn the wheels to make sure they respond correctly and return to the center smoothly. Problems here could mean a misaligned axle or damaged steering mechanism.
Make Adjustments If Needed
If you spot any problems during your checks, don’t rush to conclude the repair is a failure. Many issues can be fixed with small adjustments. Tighten loose screws or realign parts that seem off-center.
For example, if the wheels don’t spin freely, try cleaning the axles and applying a tiny drop of lubricant. Be careful not to overdo it, as excess oil can attract dirt and cause more problems. Also, check the battery contacts for corrosion and clean them gently with a cotton swab dipped in rubbing alcohol.
Have you noticed the motor doesn’t run smoothly? Try repositioning the wires or replacing the batteries with fresh ones. Sometimes, a simple tweak can bring the toy car back to life without the need for complex repairs.
Maintain For Longevity
Maintaining a toy car properly helps it last longer and work better. Small actions can prevent damage and keep the toy looking new. Regular care saves money and time spent on repairs.
Regular Cleaning
Dust and dirt can harm the toy car’s parts. Clean it often using a soft cloth or small brush. Avoid using water on electronic parts to stop damage. Remove stuck dirt gently from wheels and joints. This keeps the car running smoothly and looking nice.
Proper Storage Tips
Store the toy car in a dry place away from sunlight. Heat and moisture can cause parts to warp or rust. Use a box or case to protect the car from dust and accidents. Keep small parts together to avoid losing them. Proper storage keeps the toy safe and ready to use anytime.

Credit: www.reddit.com

Credit: www.reddit.com
Frequently Asked Questions
How Do I Fix A Toy Car That Won’t Move?
Check the battery first and replace if dead. Clean wheels and axles from dirt. Lubricate moving parts with a small amount of oil.
What Tools Are Needed To Repair A Toy Car?
Common tools include small screwdrivers, tweezers, glue, and replacement parts. A magnifying glass helps with tiny components.
How Can I Replace Broken Wheels On A Toy Car?
Remove the damaged wheel by unscrewing or gently pulling it off. Attach a new wheel securely and test for smooth movement.
Why Is My Toy Car’s Remote Not Working?
Check if the remote’s batteries are fresh. Ensure the toy car’s receiver is powered. Re-sync the remote with the car if needed.
Conclusion
Repairing a toy car can save money and bring joy back. Small fixes often make a big difference. Take your time and follow each step carefully. Use simple tools you have at home. Watch your child’s smile when the toy works again.
Keep the car clean to avoid future problems. Practice makes the process easier next time. Enjoy fixing toys—it’s fun and rewarding!